Photographers are a very diverse category of people. Some shoot to capture memories forever. Some shoot for the joy of composing an interesting photograph. Some shoot to capture things that will impress others. Some shoot to make money from their photos. Most fall somewhere in between, and with the exception of the for-profit group, caring about image quality is just as diverse. Some don’t care as long as you can tell what it is that’s in the picture when you look, while others want as much visual quality as technically possible and will fight to squeeze every last bit of goodness out of a single picture; a third category wants maximum quality until it takes too long to share their work.
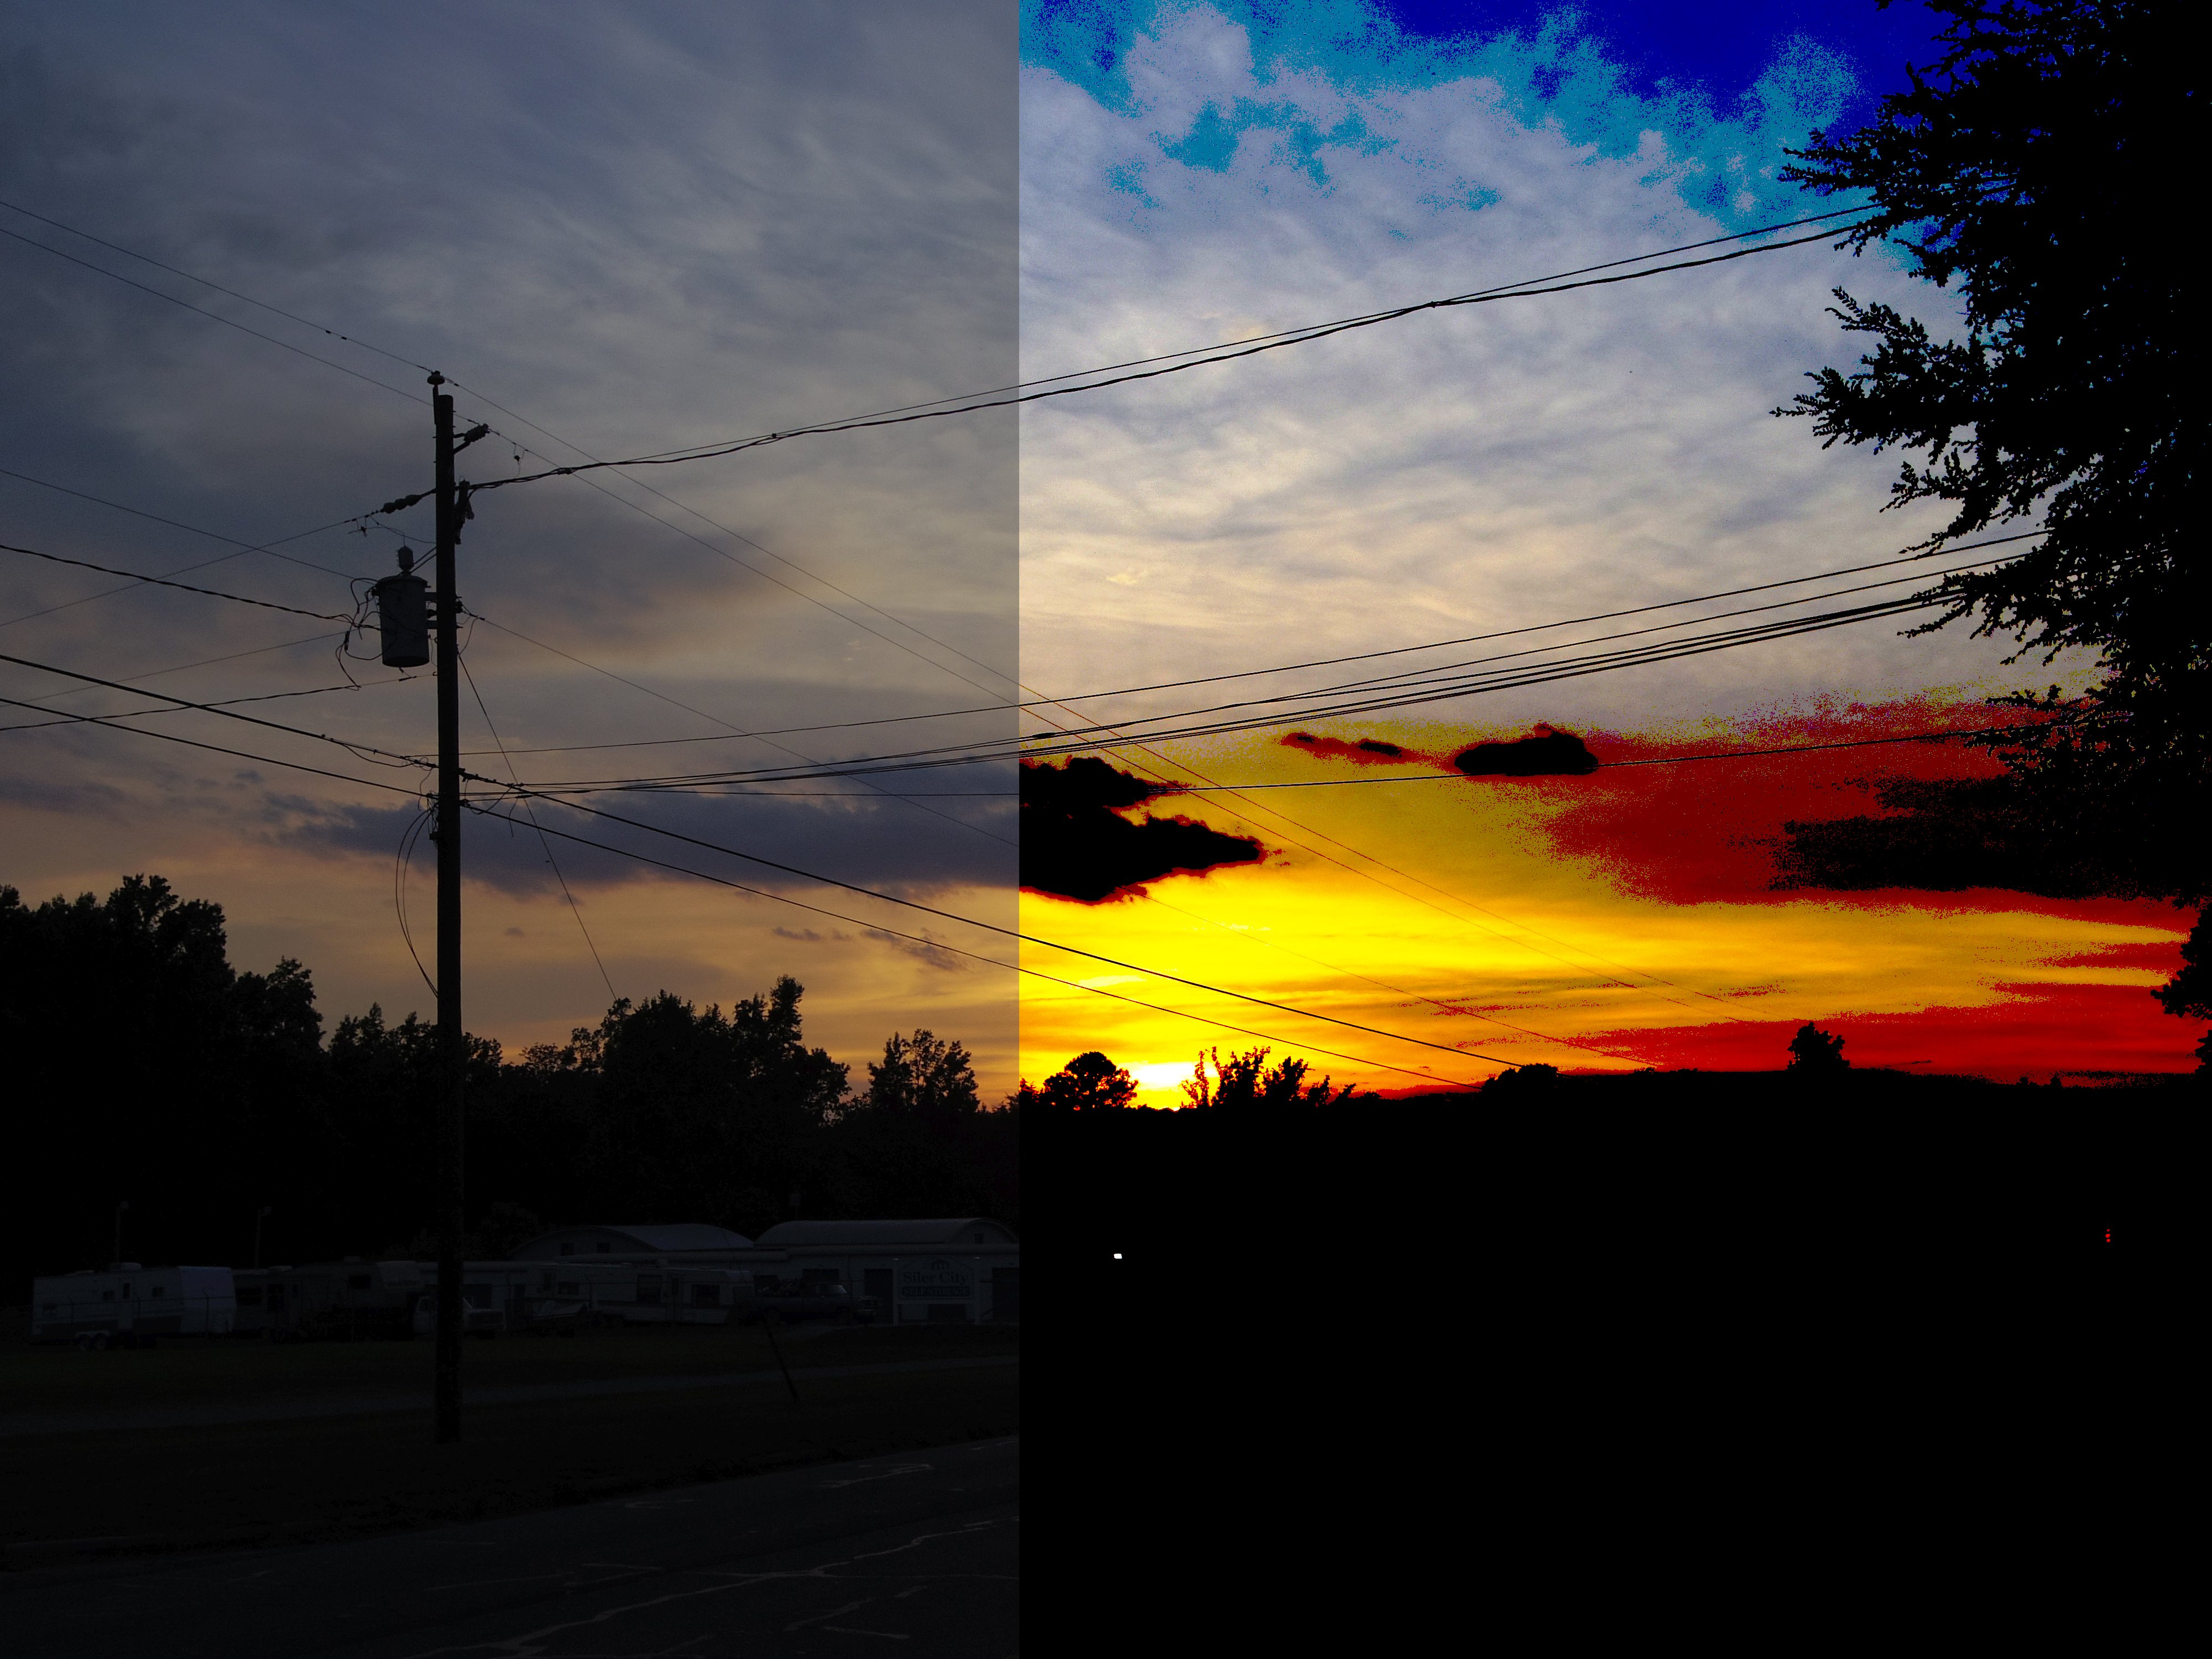
Two versions of the same picture
The RAW/JPEG divide exists because the needs of photographers are so widely varied. But what are RAW and JPEG? The specifics are beyond this article, but here’s a short explanation. RAW is what it says: every single bit of information that the camera sensor produces. JPEG is a lossy image compression format where image information is thrown away to greatly reduce the size of an image file. RAW is meant to be a “digital negative,” the equivalent of film negatives for your digital camera, containing every last drop of data about a picture you took. JPEG is intended to be a compact “delivery format” image, easily moved between computers or published online due to the small size, with some quality loss that most people can’t see without modifying the picture.
I just checked a RAW+JPEG shoot from my Pentax Q7 camera and while the size of a RAW is always about 19-20MB, the “in-camera developed” JPEG varies between 0.97MB and 2.25MB. The RAW file is about 10x to 20x the size of the JPEG file, and when you open at the RAW file in a RAW file developer program, they’re the same exact picture. So why would anyone ever want to capture these enormous RAW files instead of (or in addition to) JPEG files? If you’re just going to use the picture with minimal editing–or none at all–it just makes perfect sense to shoot JPEG and avoid RAW entirely. For a very long time, I never shot RAW because I was perfectly happy with my JPEGs. They looked great and I could edit quite a bit and never notice any loss of quality. Most beginners are in the same boat: JPEG images are more than enough and there’s no reason to shoot RAW with its colossal files and minimal perceived benefit.
The benefits of RAW, told through real photos
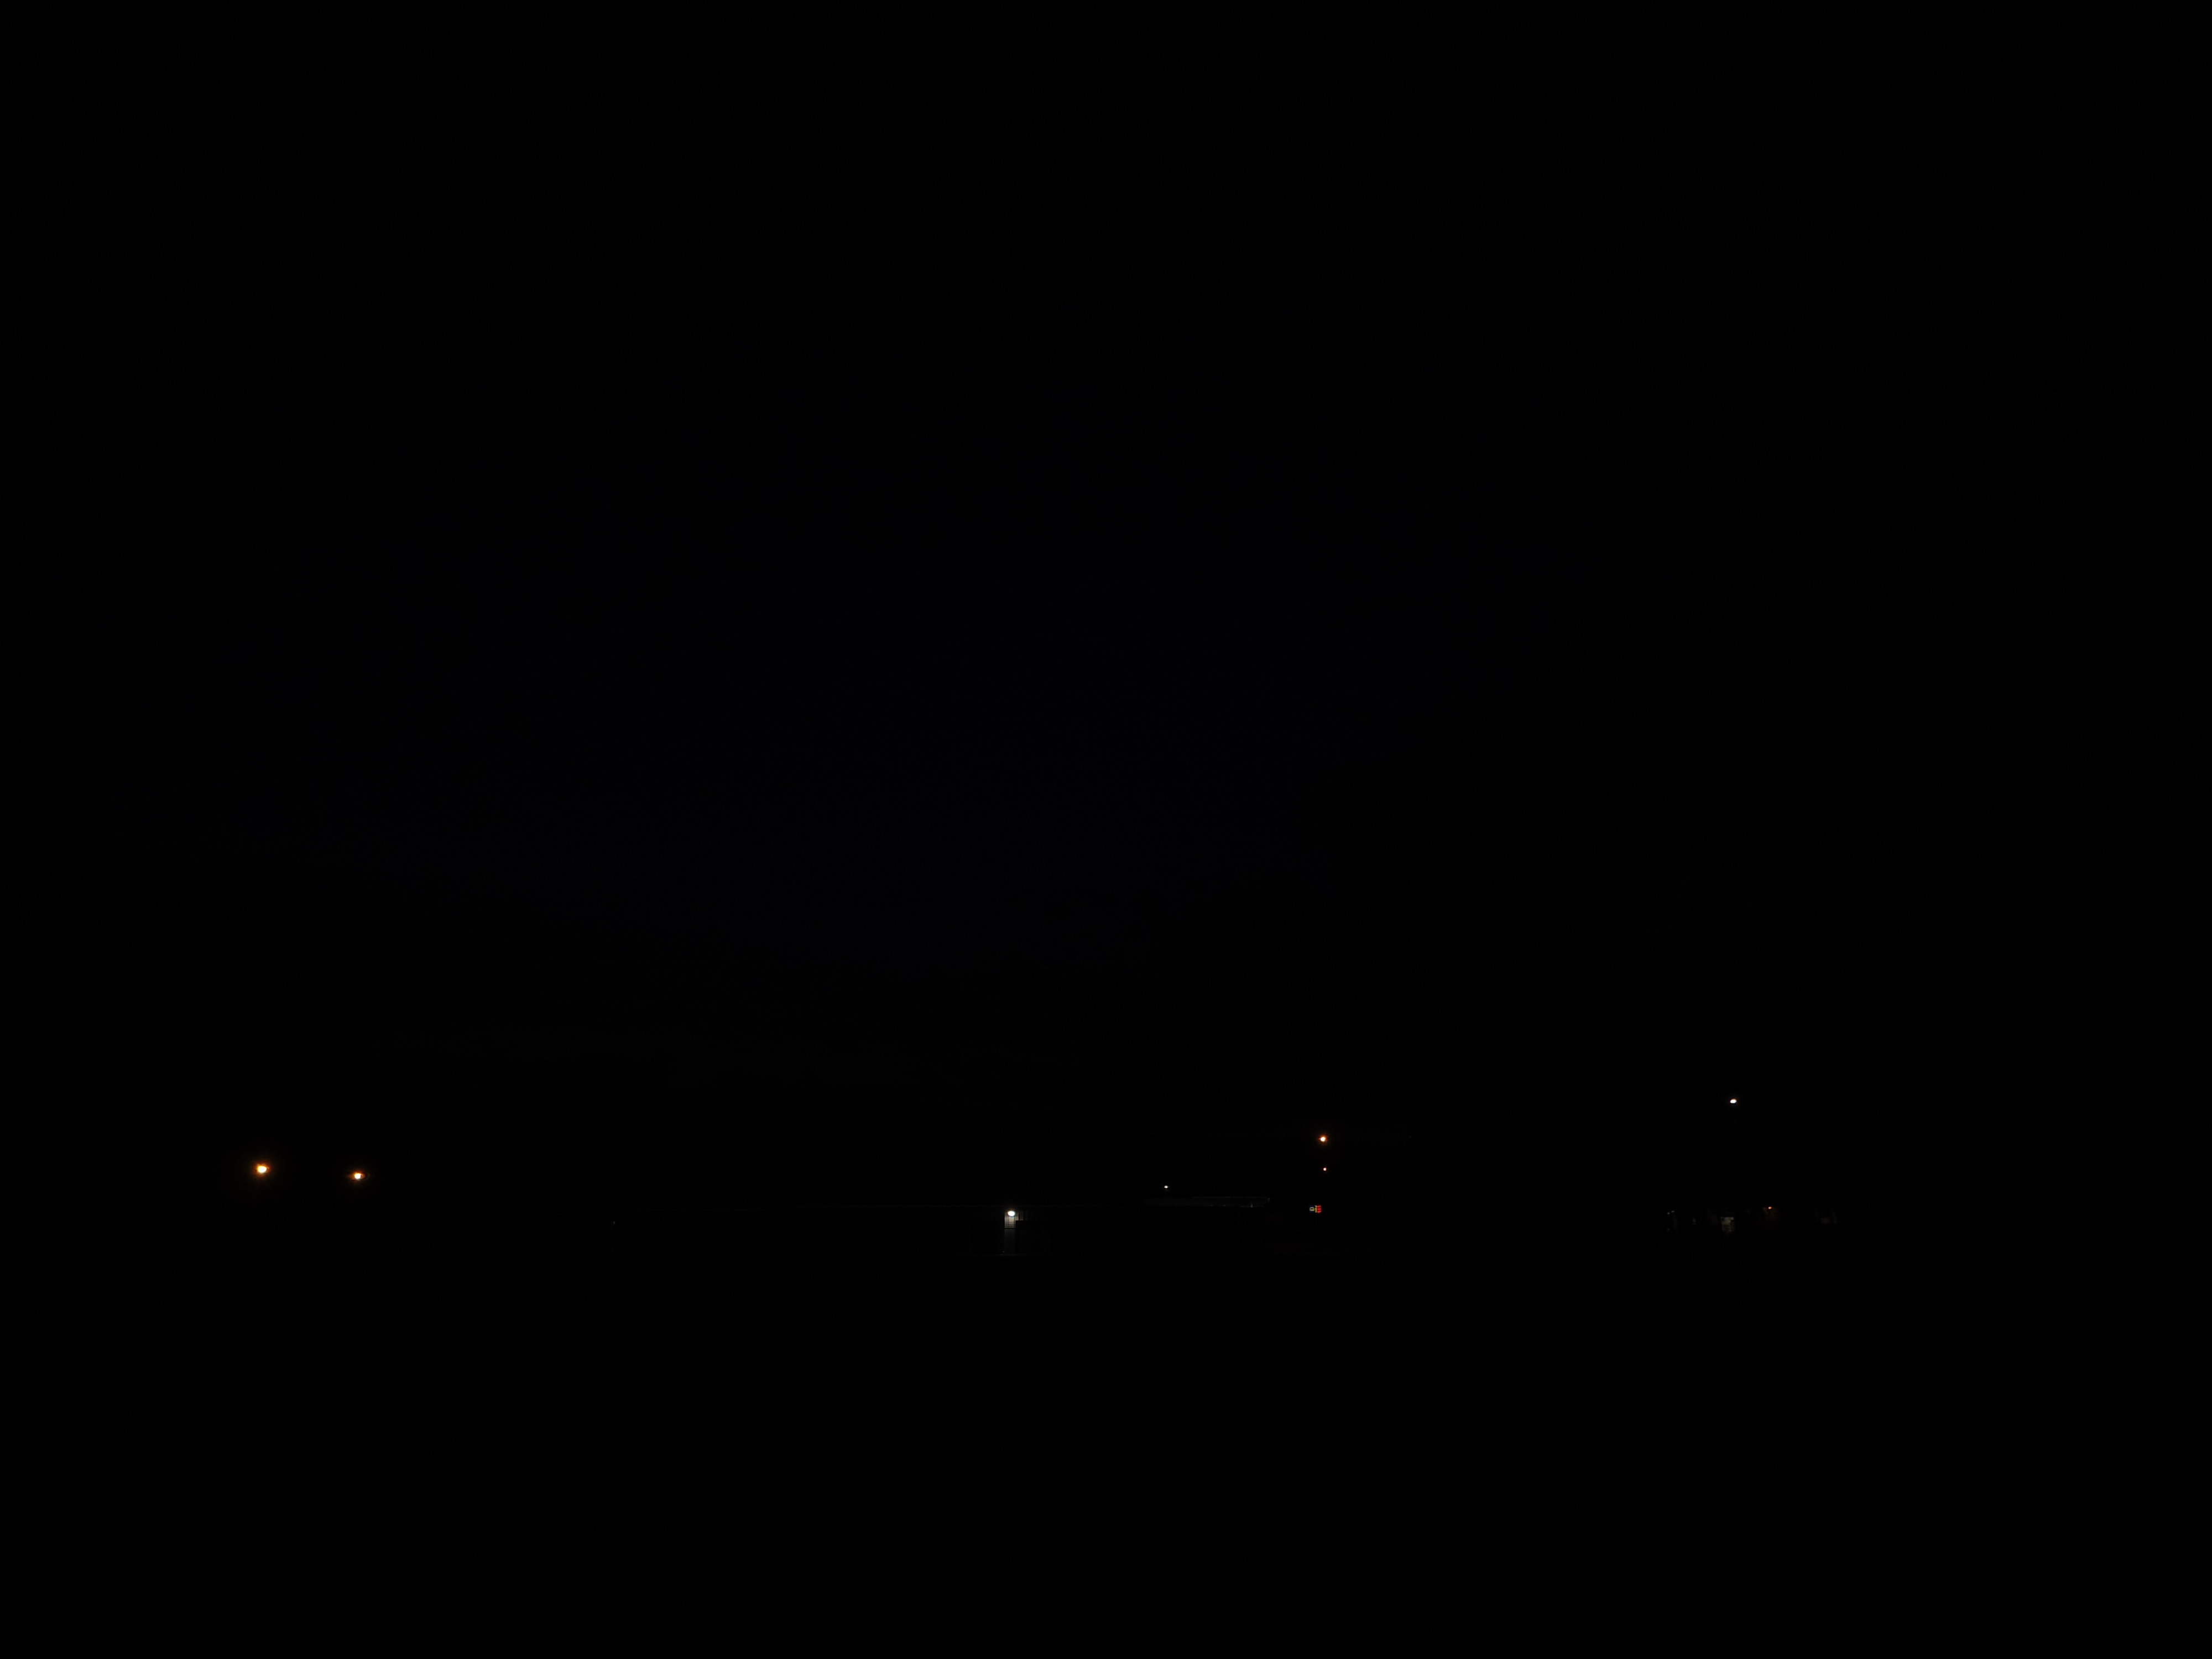
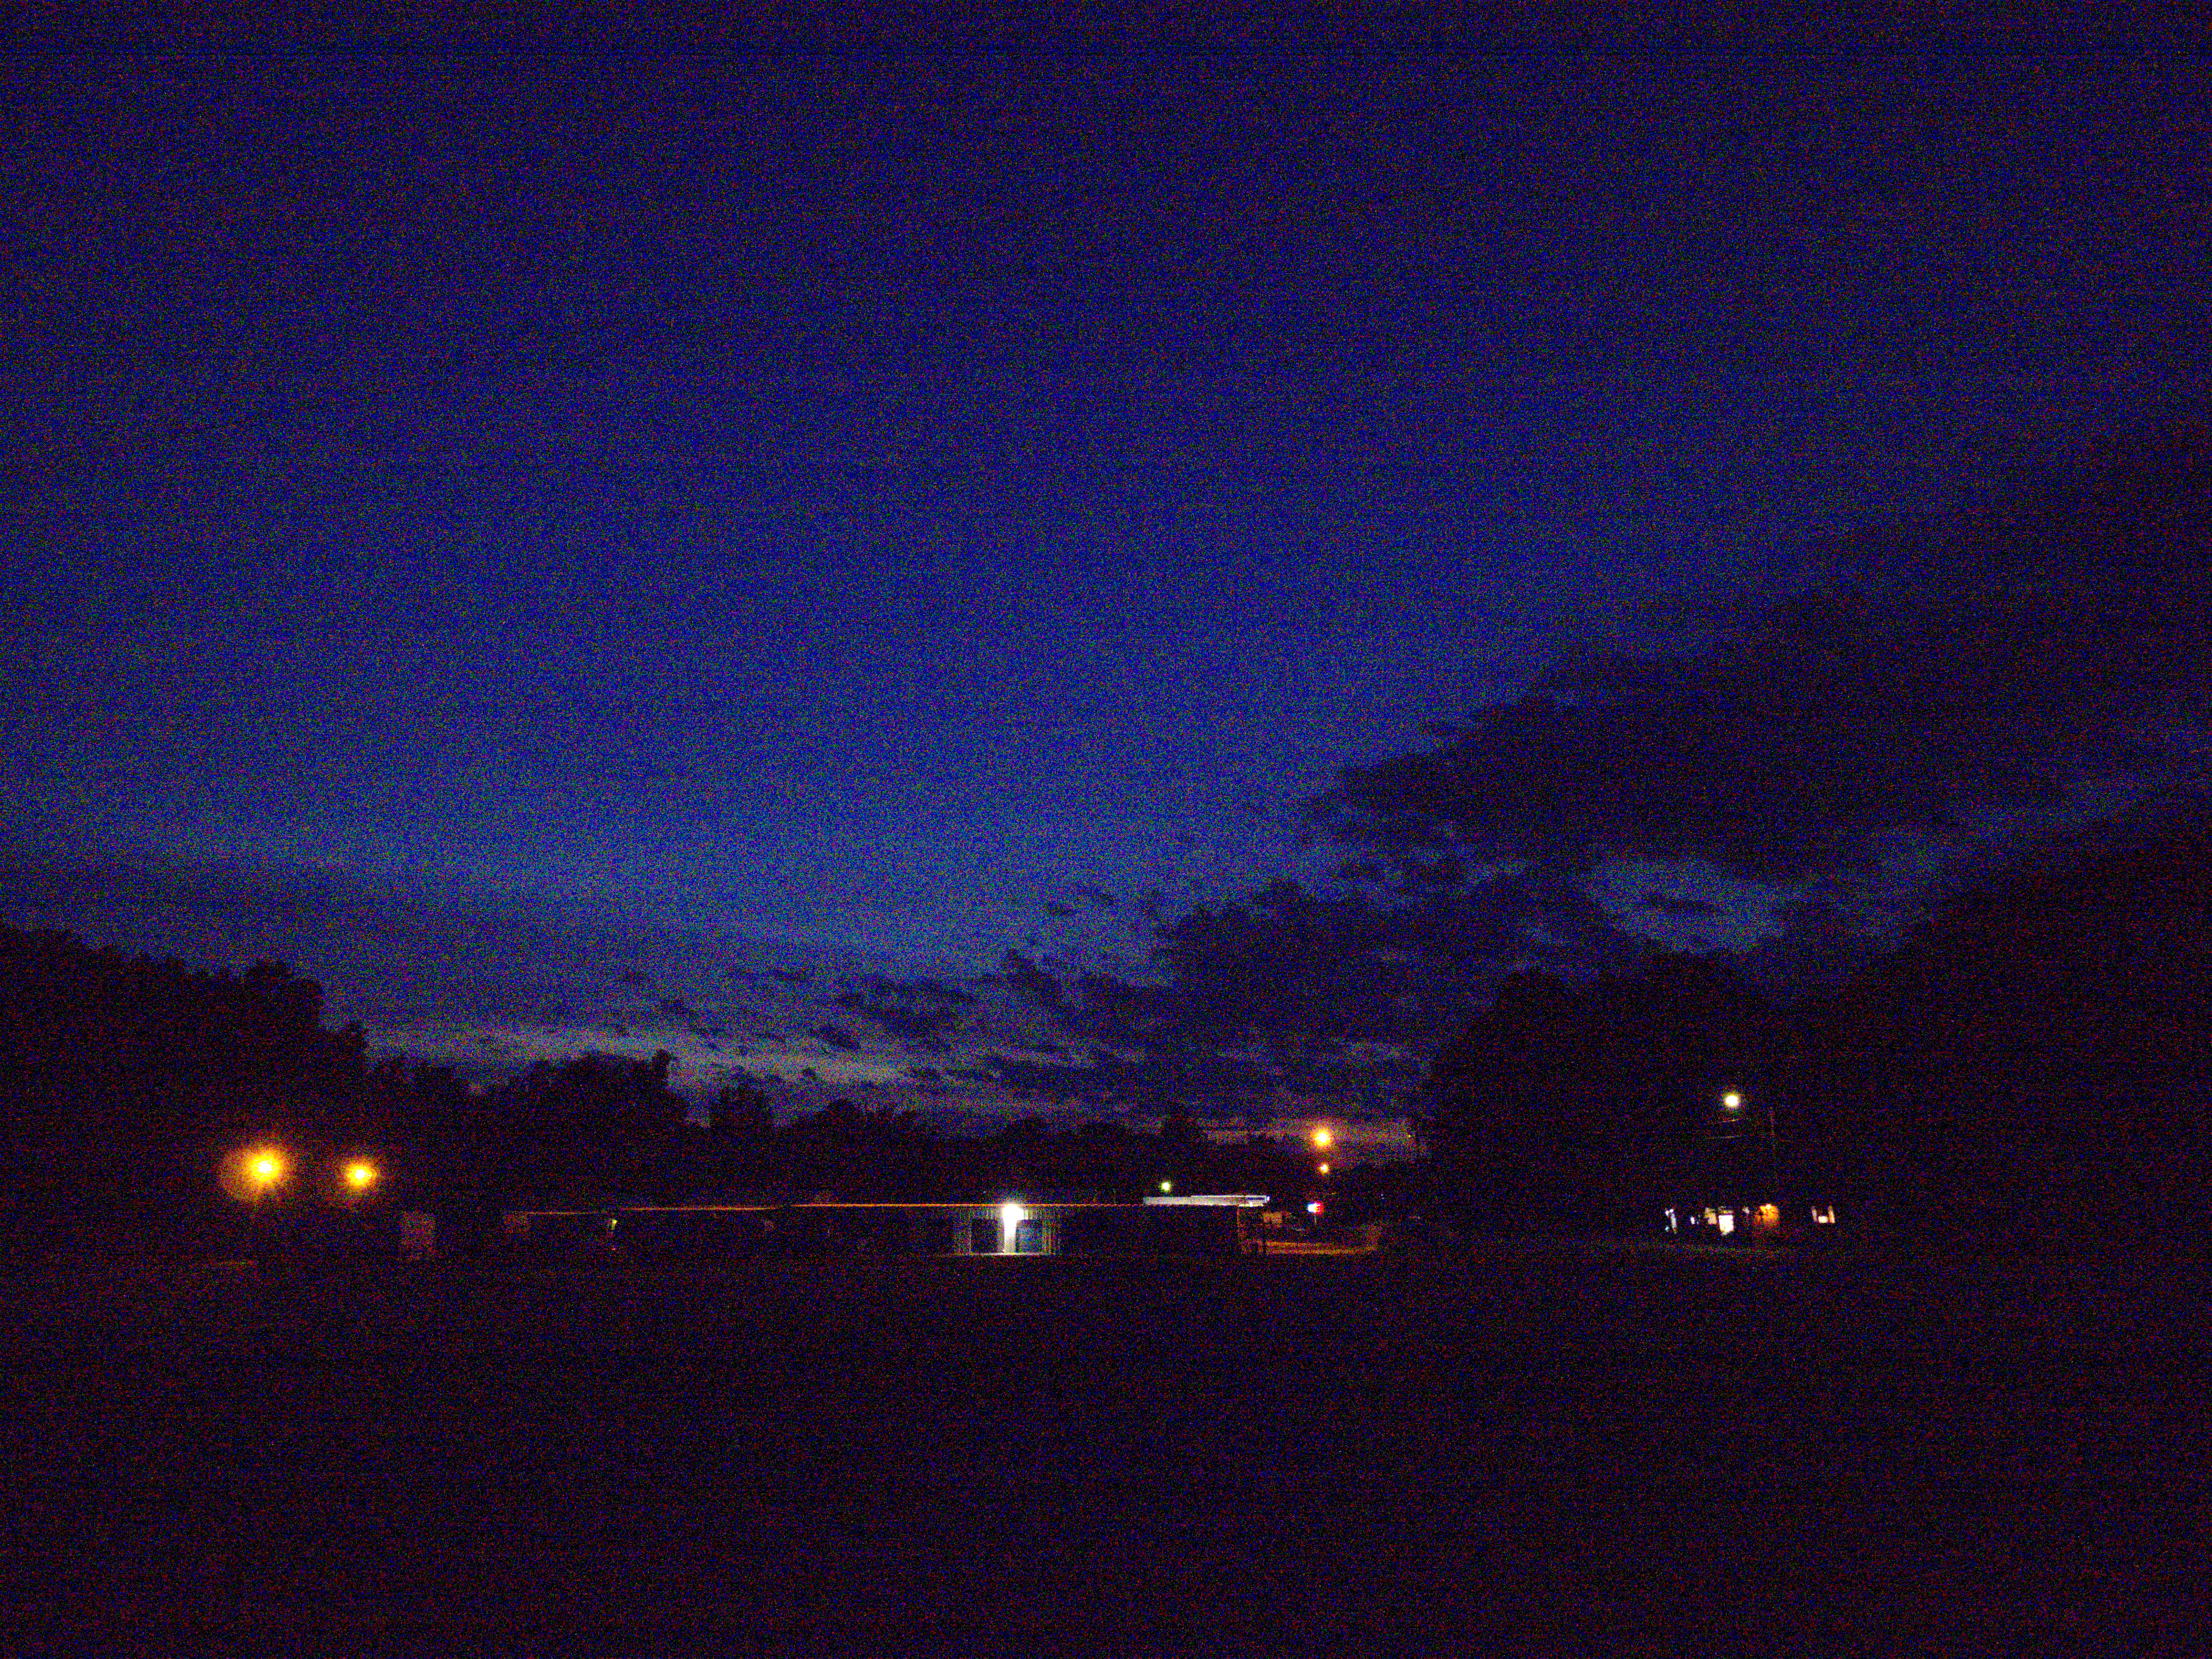
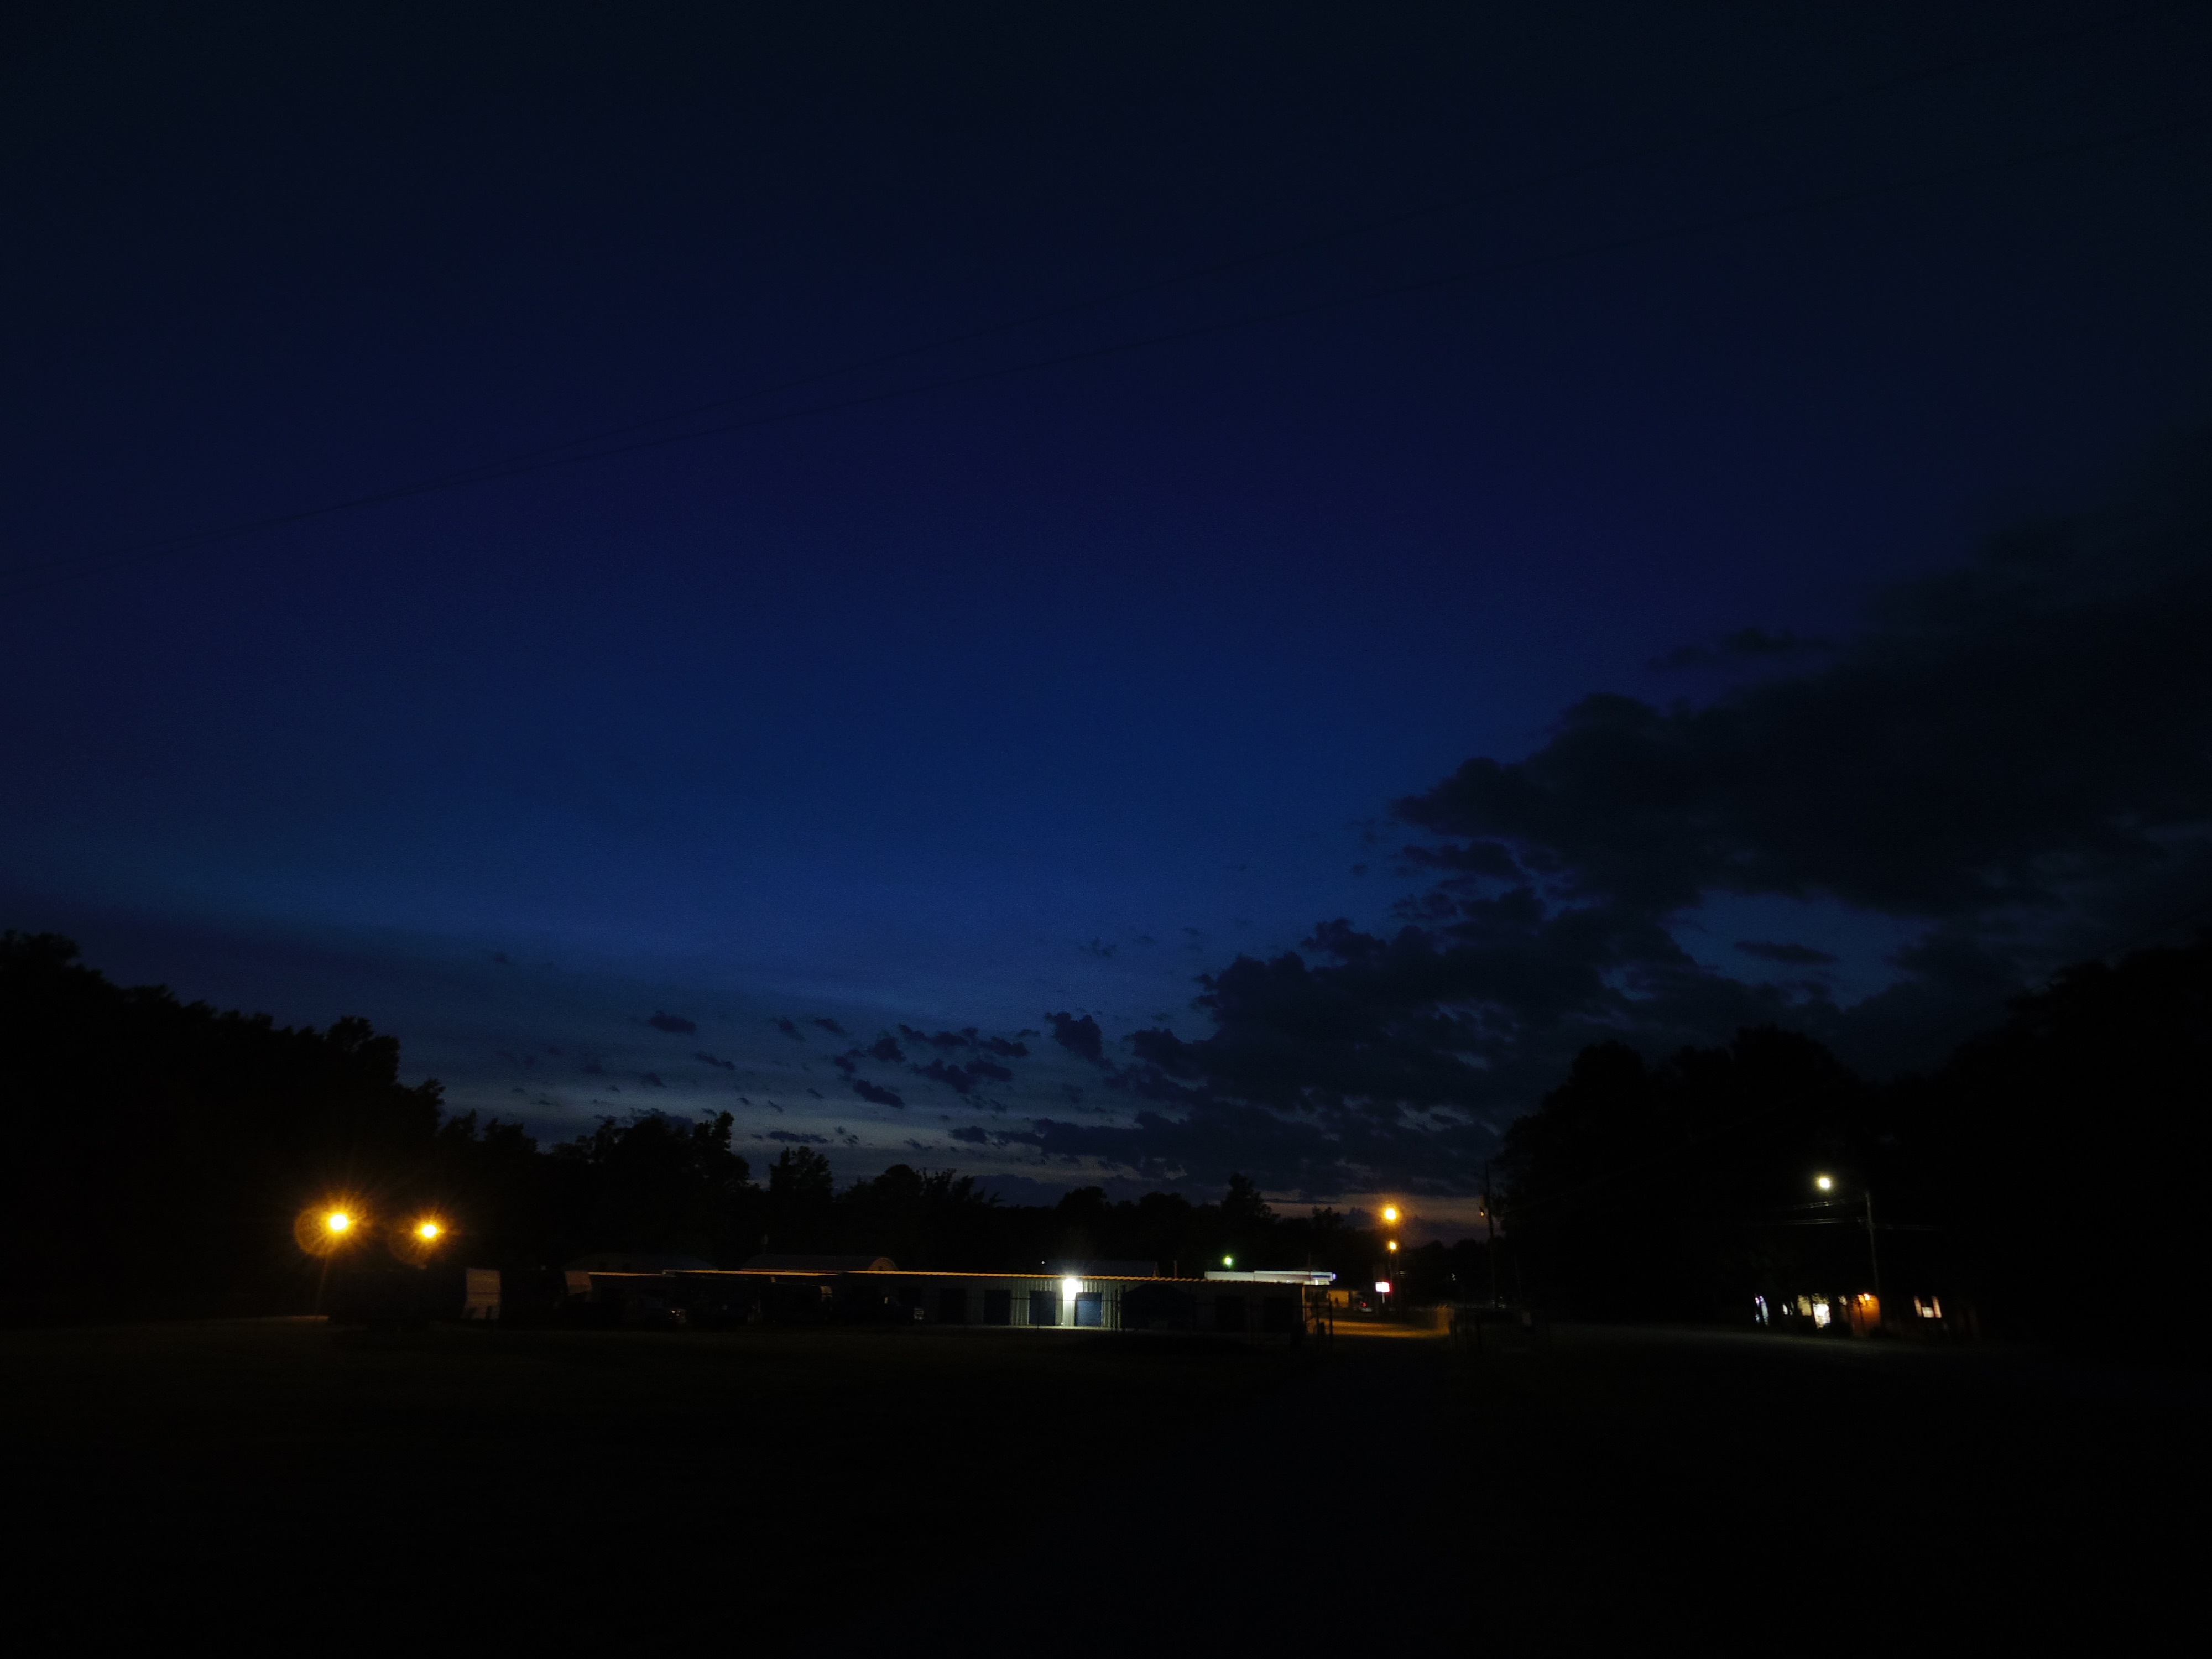
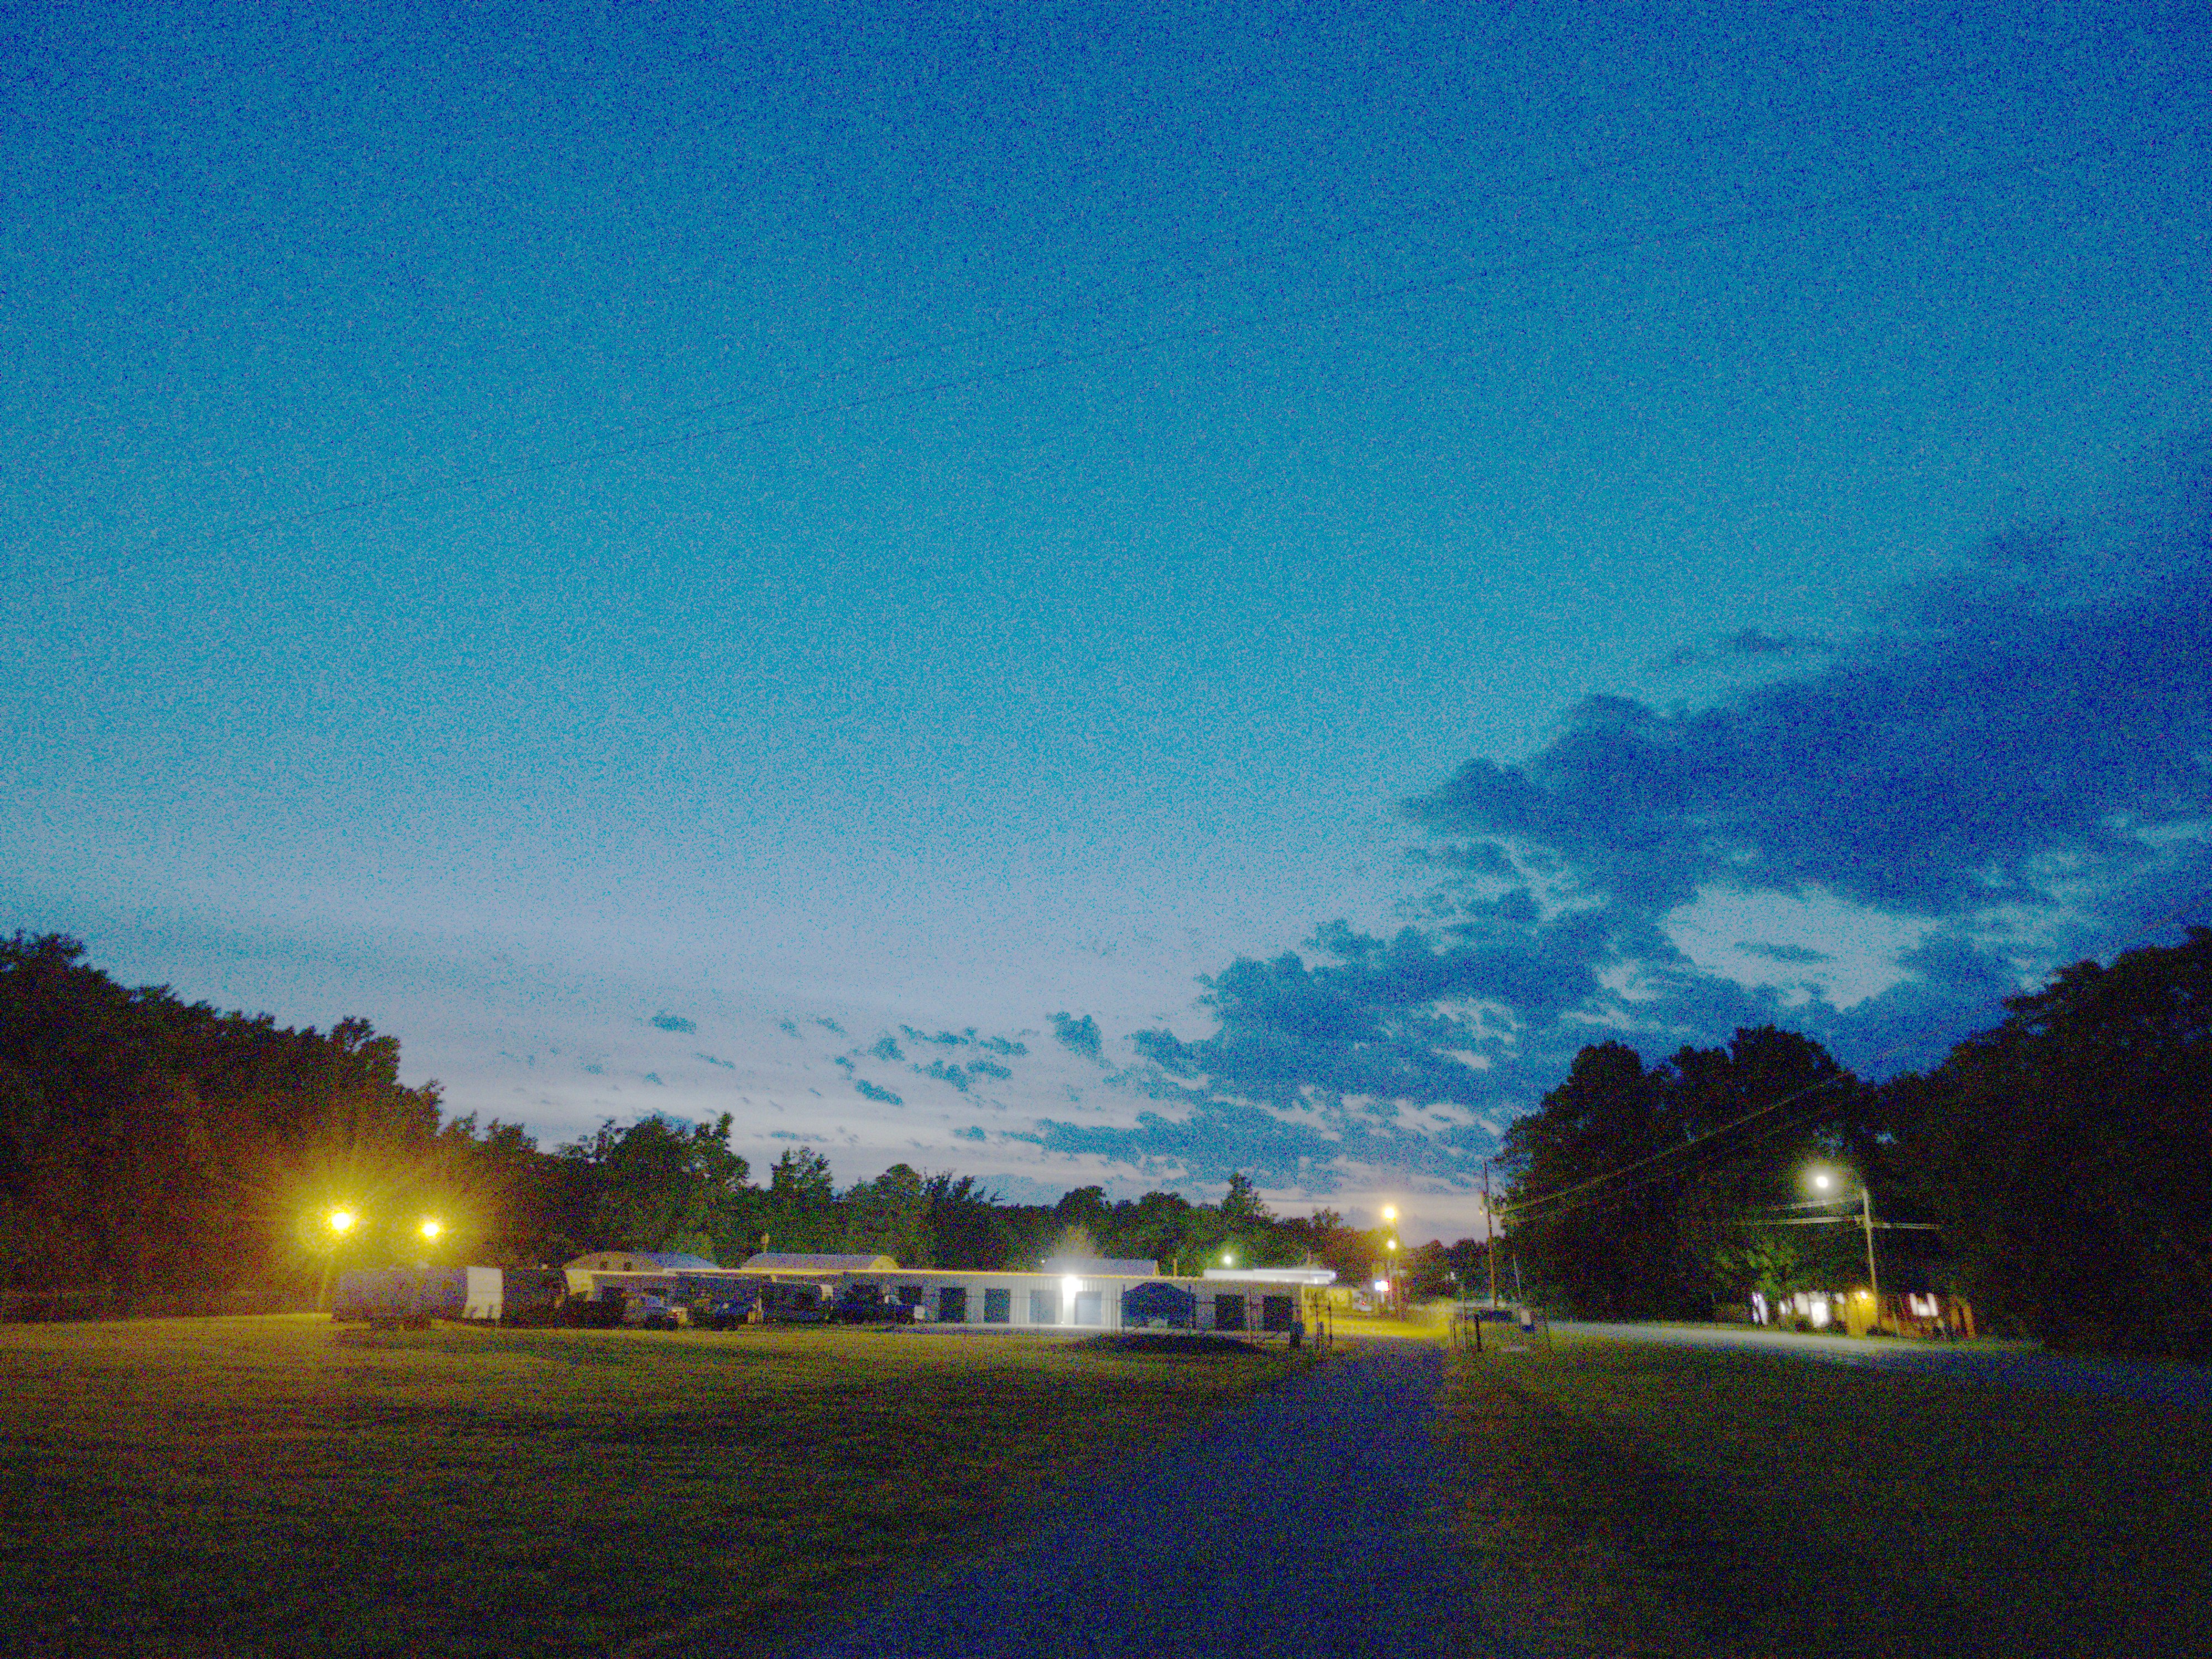
Why do I shoot RAW+JPEG today? As the saying goes, “a picture is worth a thousand words!” Take a look at the following three pictures. One is almost solid black because it’s the original JPEG, severely under-exposed, and all you see is the point light sources. One is the “black” JPEG with the gamma curve boosted to bring up the “black” area. One is the same picture, except this time it’s the RAW version with the gamma boosted to maximum and exposure set to +1.5 EV. The third one is a properly exposed JPEG of the same scene shot right after the “black” frame. What differences do you see?

Now that you’ve seen the immense power of recovering image details from a RAW file, let’s take a look at a properly exposed picture of the same scene taken right after the under-exposed one, and see what can be done with it.
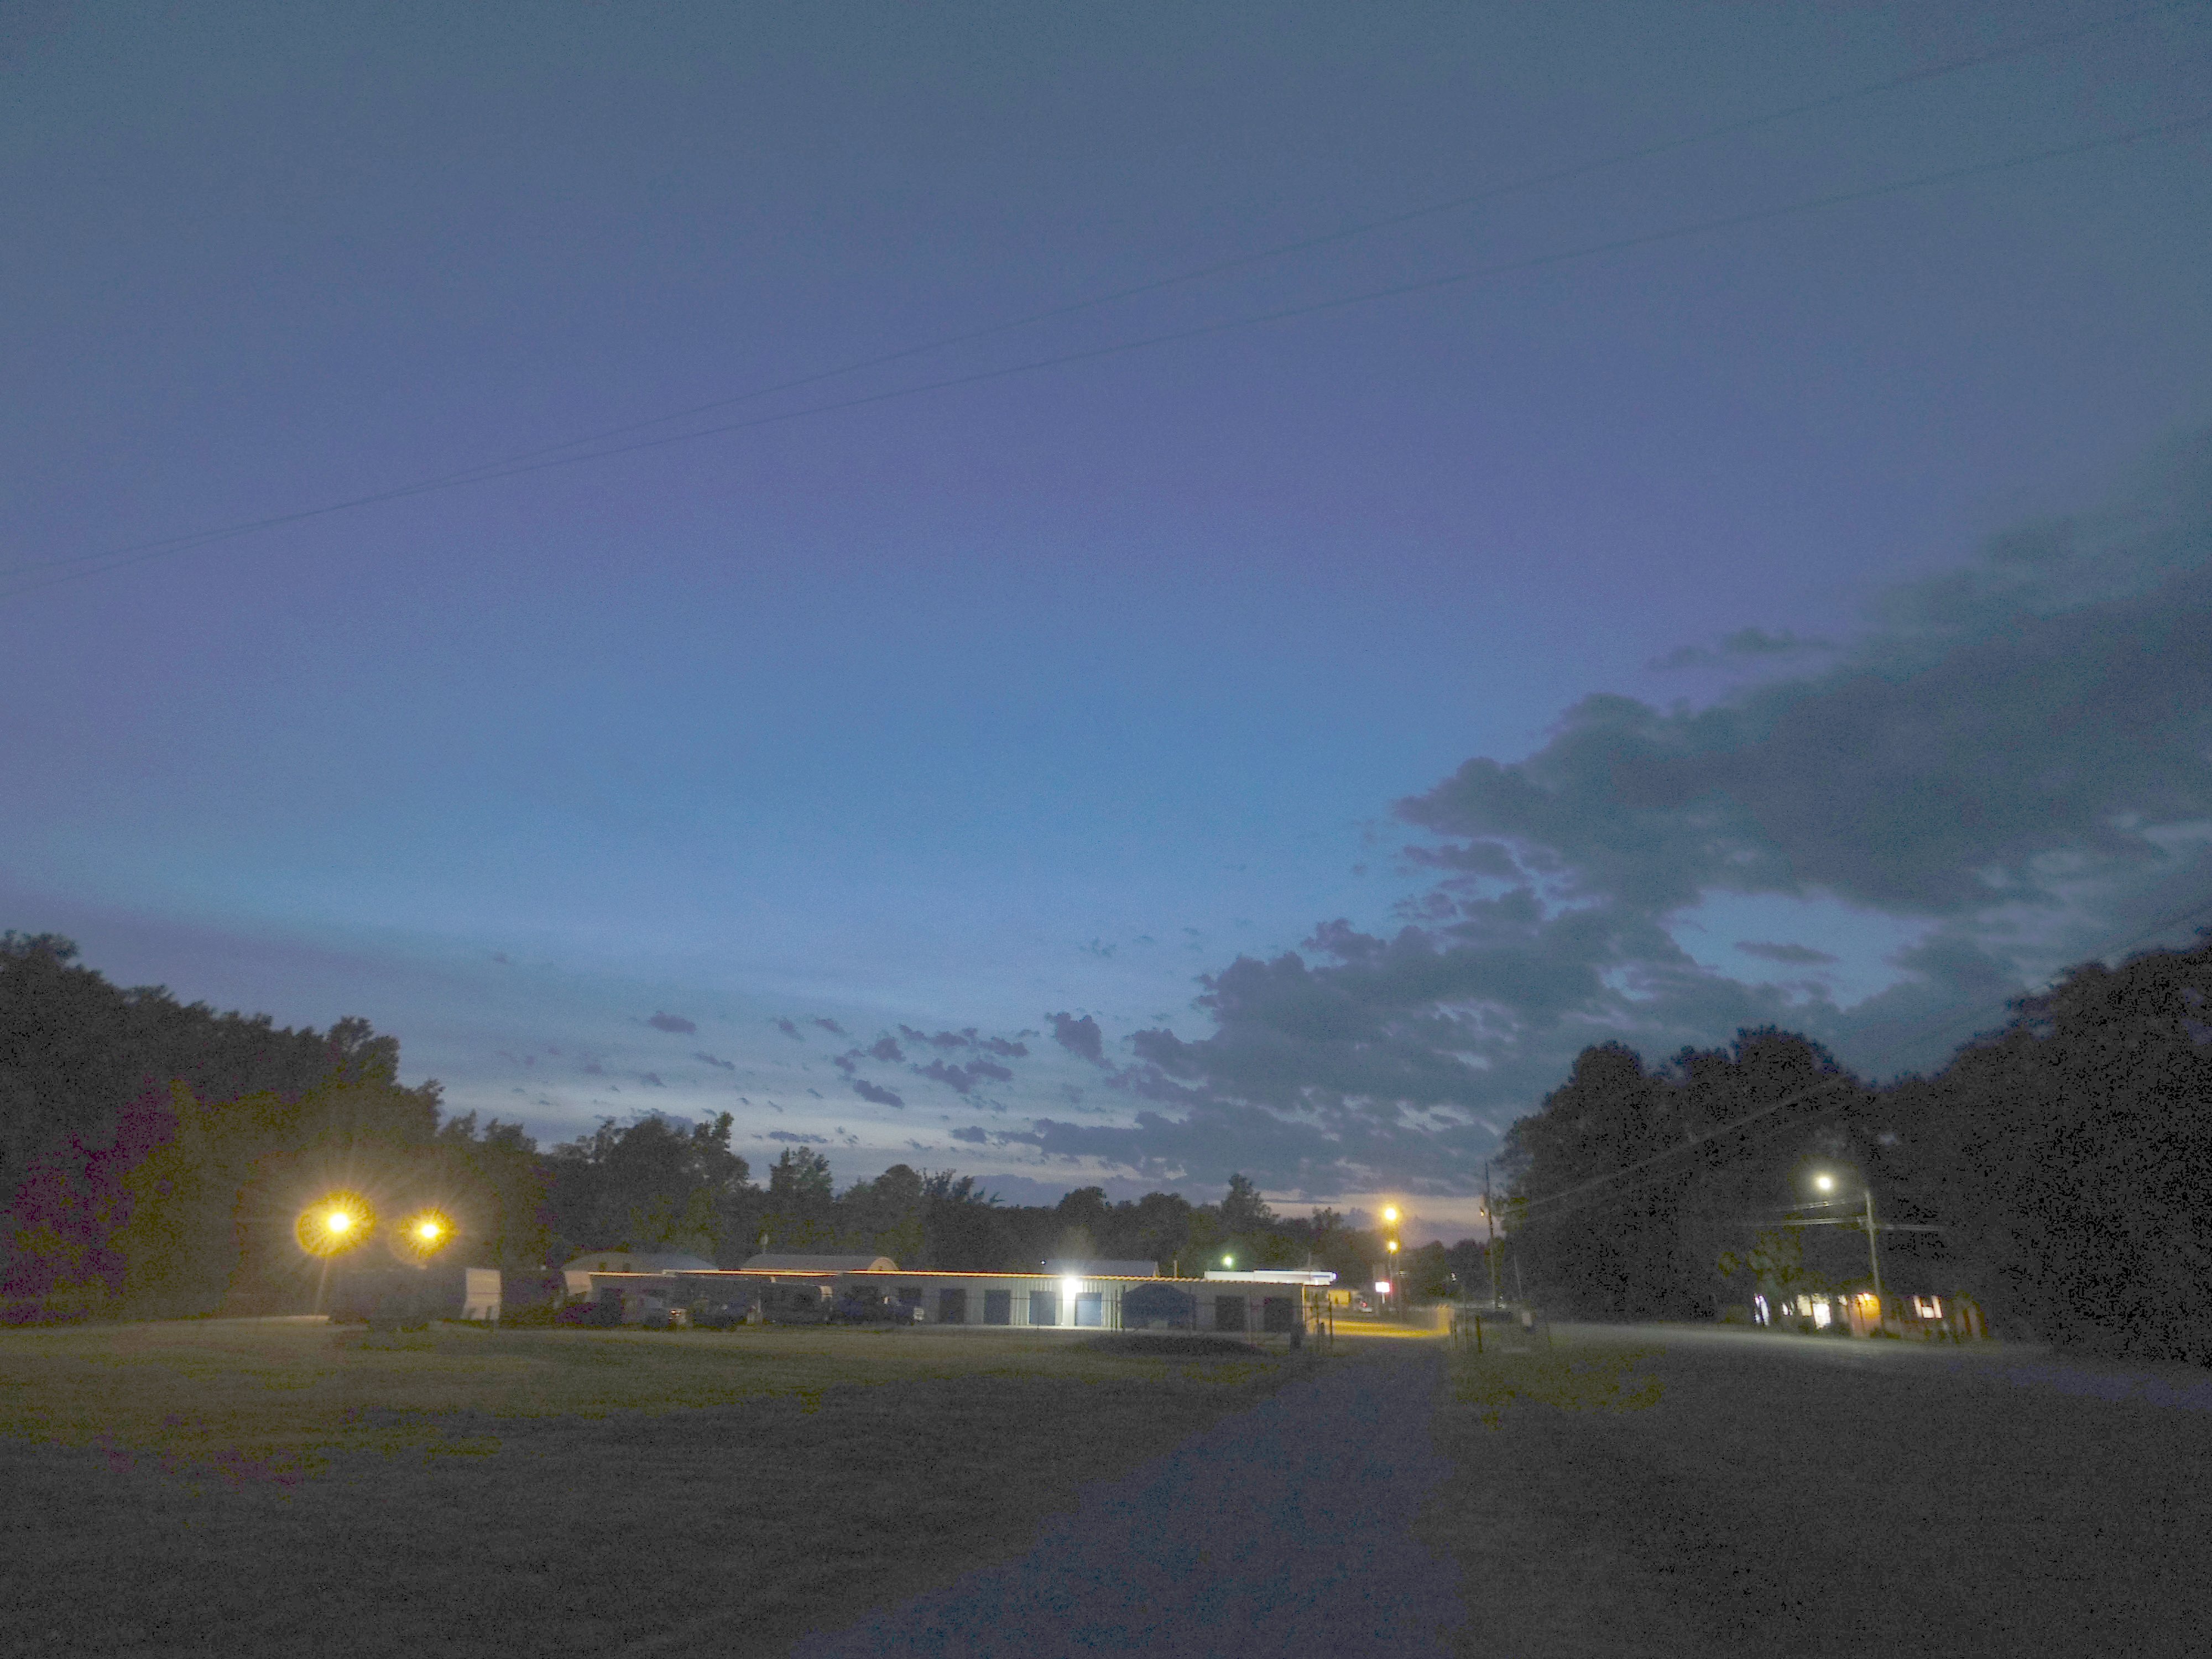
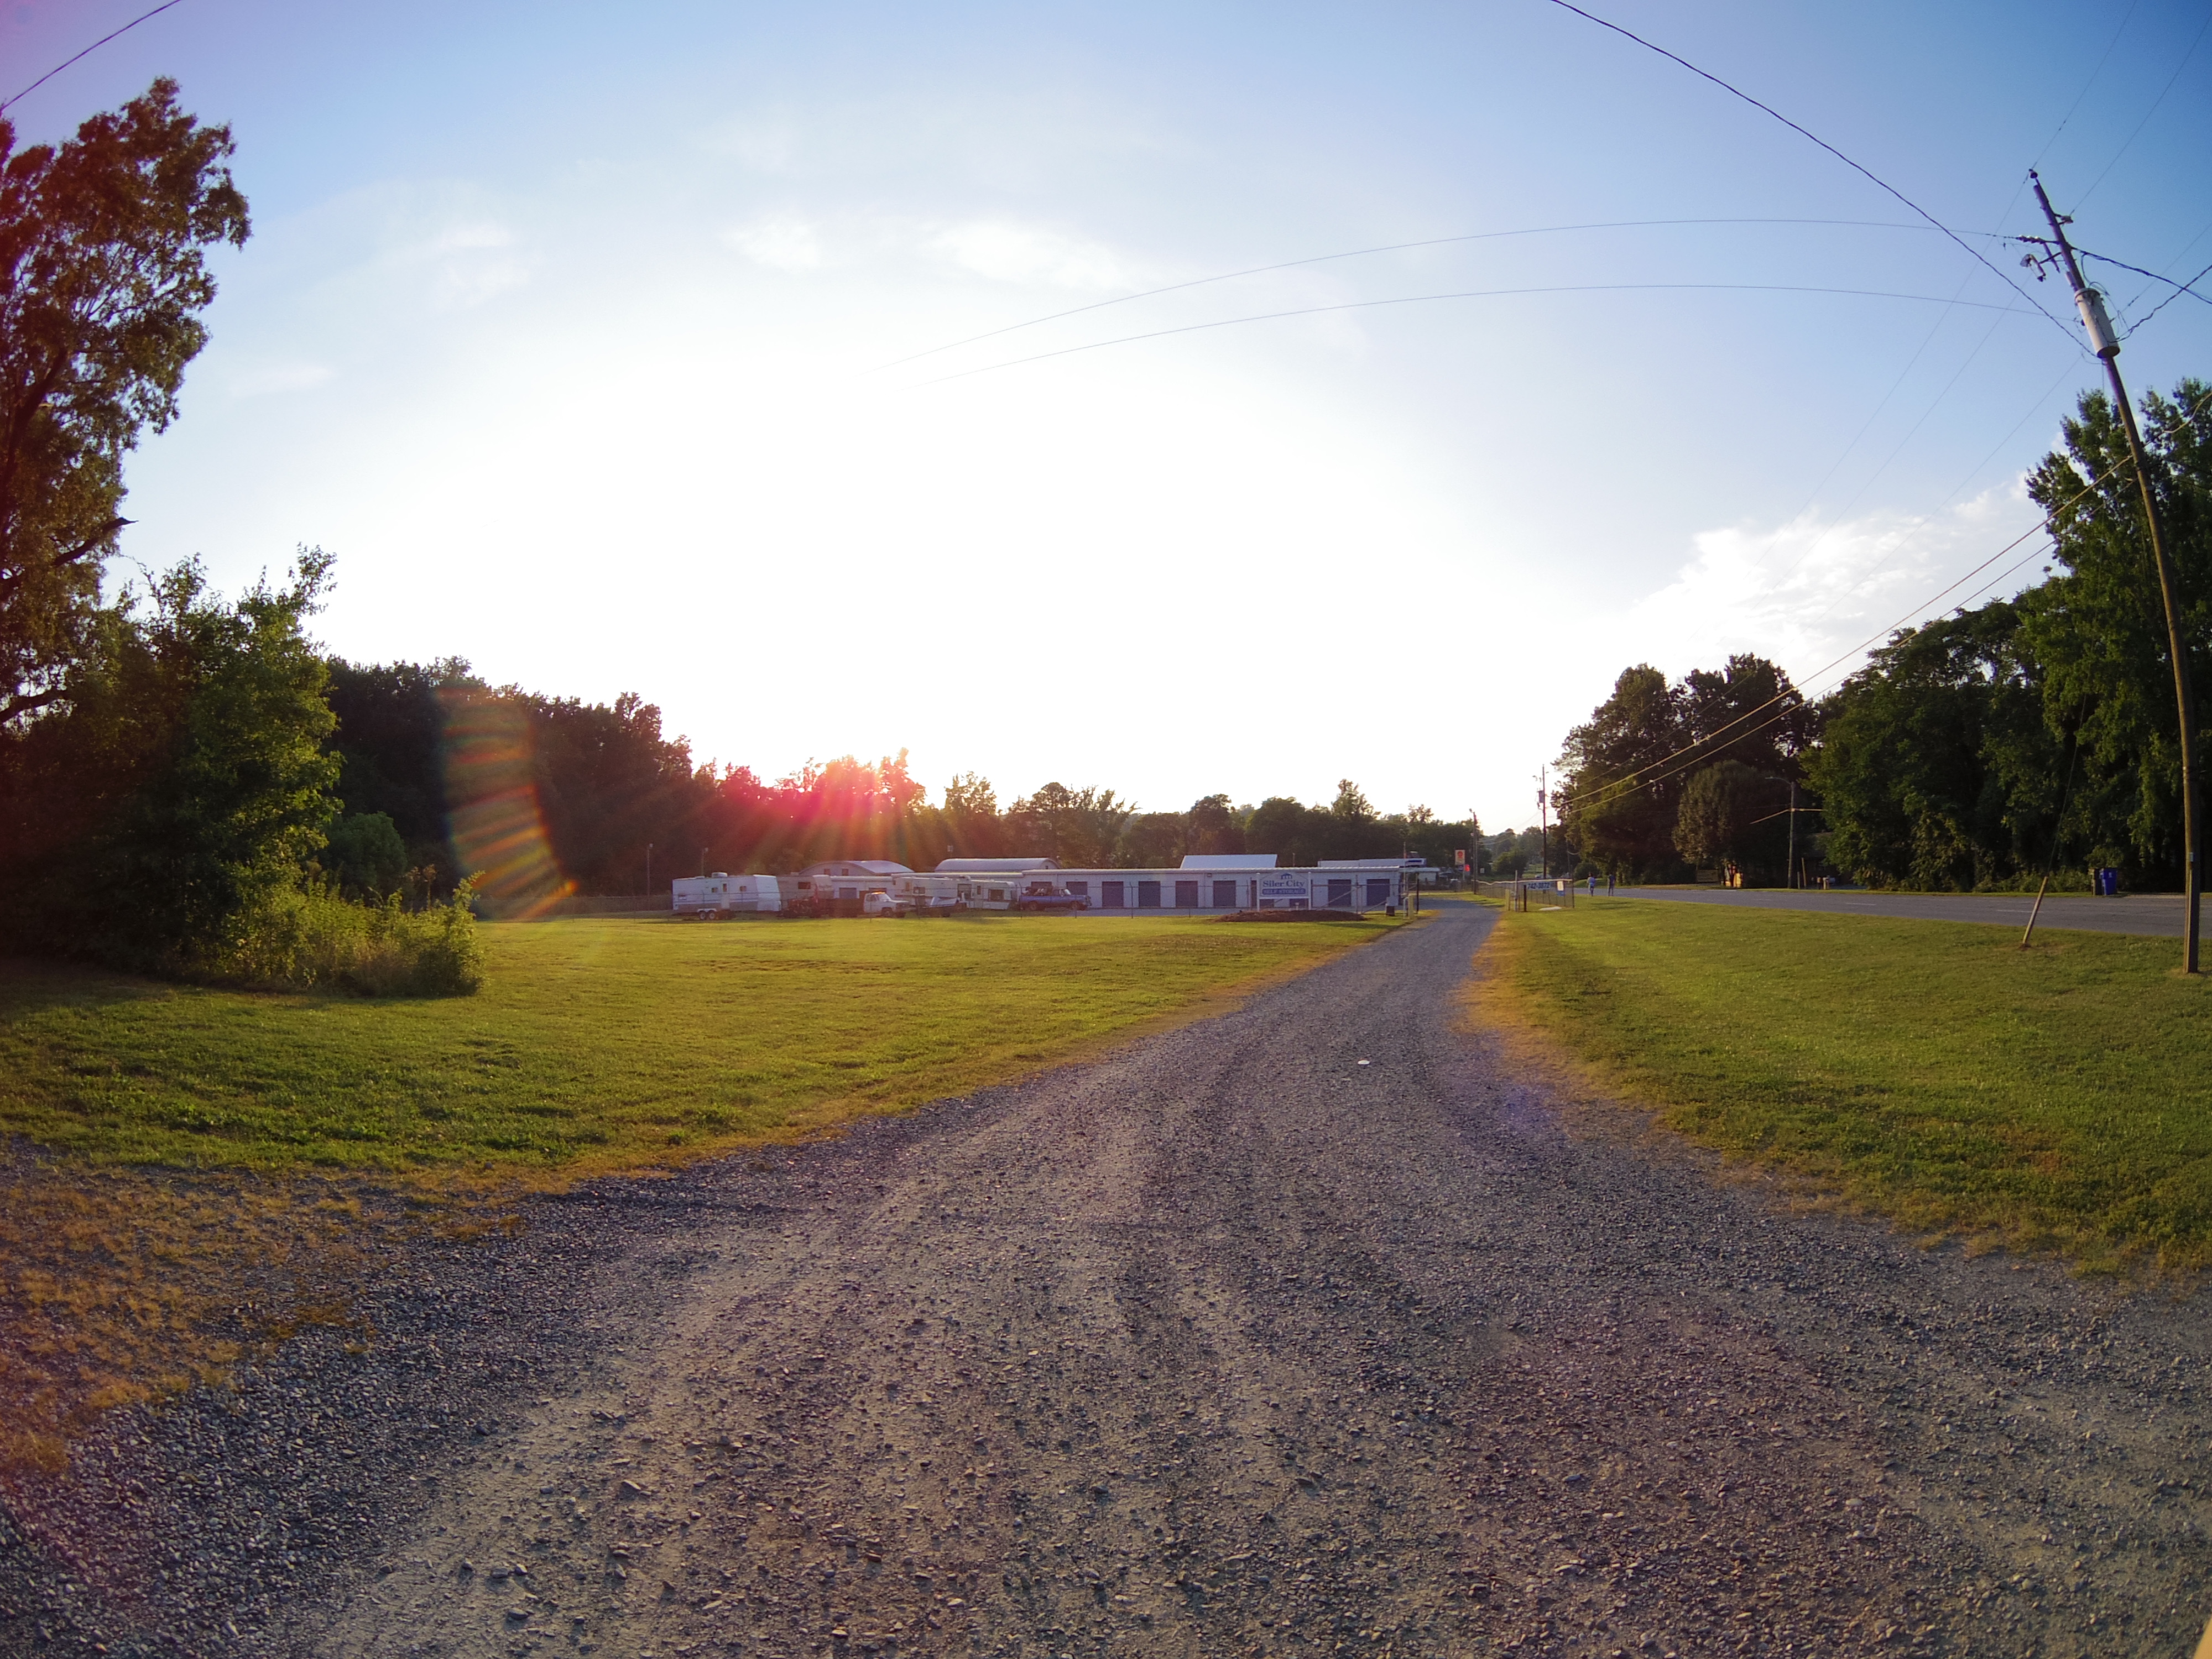
It should be painfully obvious that getting the correct intended exposure the first time around is the best way to take a photo, but what if you only get one chance and you under-exposed? That sort of common mistake is where taking RAWs becomes very useful.
A technical explanation of what’s going on
A JPEG typically stores 8-bit color data with 4:2:2 chroma subsampling (half the color data is thrown away), but a RAW stores 12-bit (or more) data for four color channels (red, blue, 2x green is the most common format) and doesn’t subsample at all. That’s why RAW files are huge: they store 50% more color detail for red and blue, and 3x the samples for green, and they don’t throw away color data for half of the pixels to save space. This is a major disadvantage for sending and storing pictures because there’s so much data that isn’t needed for human visual perception, but the above pictures show off the powerful detail recovery capabilities that you get when you capture RAW files. Because a RAW file contains (roughly) four times the data of a JPEG file, there is a lot more subtle detail available, and this becomes important once you start pushing pictures towards the limits of what they can handle. Where the boosted JPEG above has so little data that only a monochrome ghost of the scene is recoverable from the shadows, the RAW has 16 more subtle levels of brightness for every color channel that makes up every pixel. That means that if you increase the exposure of the picture by 5 stops, you won’t lose subtle gradients to the limits of 8-bit values. Do you really need more proof of RAW’s amazing flexibility when pushed to extremes than the pictures above?
Of course, a RAW doesn’t matter much if you’re just going to pull it into Lightroom or RawTherapee or UFRaw and “develop” it to JPEG without any changes. JPEG images are drastically smaller and you can shoot continuous bursts of them almost infinitely with a modern camera. Most photojournalists today shoot JPEG because news agencies don’t want RAWs and time is almost literally money to them. JPEGs are so much smaller that you can store an order of magnitude more JPEGS in the room taken by RAWs. As with so many things, it’s a trade-off, and many people will shoot JPEG forever and have zero regrets. That was me for a very long time, in fact! JPEG is good enough for most needs.
When to shoot RAW only
- You want to preserve every last bit of detail in a picture
- You plan to edit your pictures and need the added latitude offered by RAW format
- You don’t need continuous burst shooting (most cameras can only buffer a few RAWs before they must stop shooting to write them out)
- You don’t need quick sharing or interchangeable editing ability
- You will batch process the RAW files to JPEGs later
- You want to bypass the in-camera noise reduction and preserve as much fine detail (and noise) as possible
When to shoot JPEG only
- You need to be able to share images quickly without dealing with the RAW development process
- You don’t have (or want to use) the storage space required by RAW files (Depending on the camera and the photo, RAWs are 3x-20x larger than JPEGs)
- You need to be able to do continuous burst shooting without pausing
- You don’t intend to do heavy editing to your pictures
- You are happy with the results provided by the in-camera noise reduction
- You don’t mind a small but usually imperceptible loss of image quality and having no way to recover that lost quality
When to shoot RAW+JPEG
- You need both quick sharing ability and RAWs for custom development or heavy editing
- You don’t need continuous burst shooting (RAW+JPEG uses the most space and stops burst shooting sooner than just RAW)
- You have plenty of storage space and don’t mind managing duplicate versions of every picture you take
- You are asking yourself if you should shoot RAW or JPEG and can’t decide
It’s your choice, so make it a good one
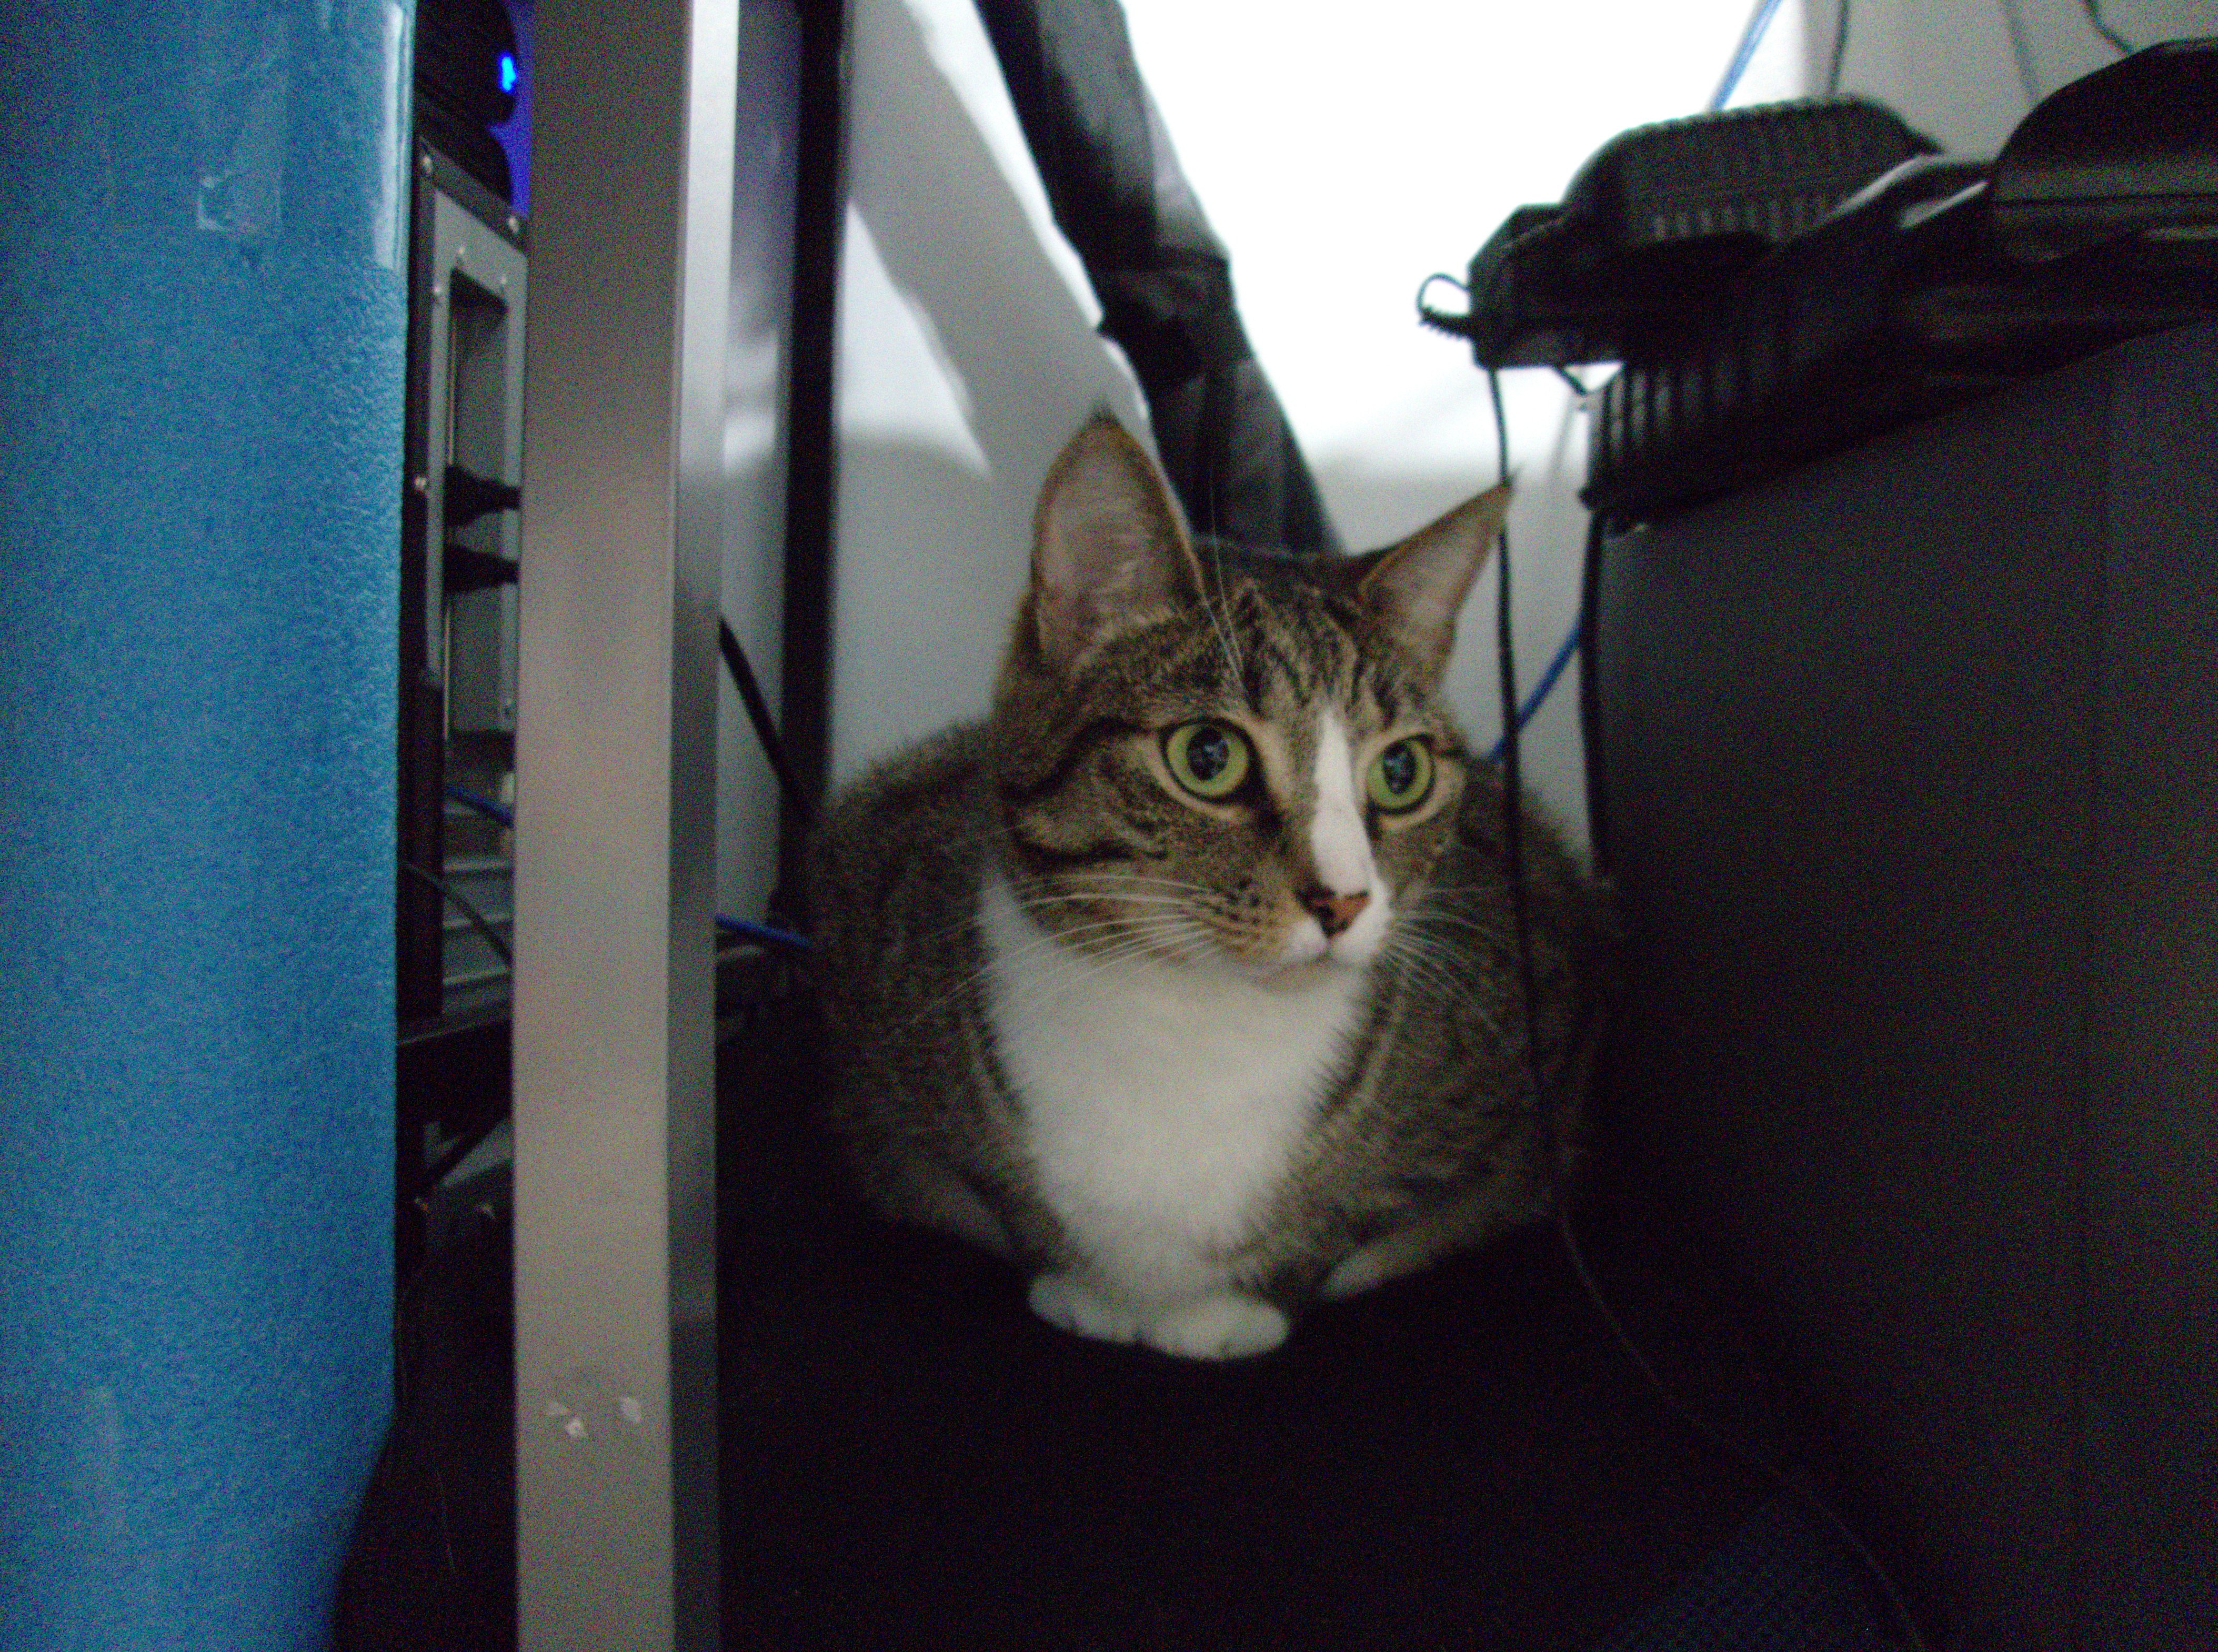
As with all things, RAW versus JPEG is a set of trade-offs. You have to decide what suits you. I spent about eight years only shooting JPEGs and I never had a complaint, but I was also shooting those JPEGs on a Canon DSLR and a good Panasonic mirrorless camera, not a cheap point-and-shoot. When I started buying old cheap point-and-shoot cameras to challenge myself, I discovered that the results were generally poor compared to my better cameras, partly due to the smaller sensors, but more because a cheap point-and-shoot will do heavy in-camera image processing on a weaker CPU than that of a big camera. For Canon point-and-shoot cameras, I discovered the awesome CHDK firmware which adds RAW shooting capabilities and makes a huge difference. CHDK RAWs transformed my point-and-shoot Canon cameras into much more useful tools. Check it out:

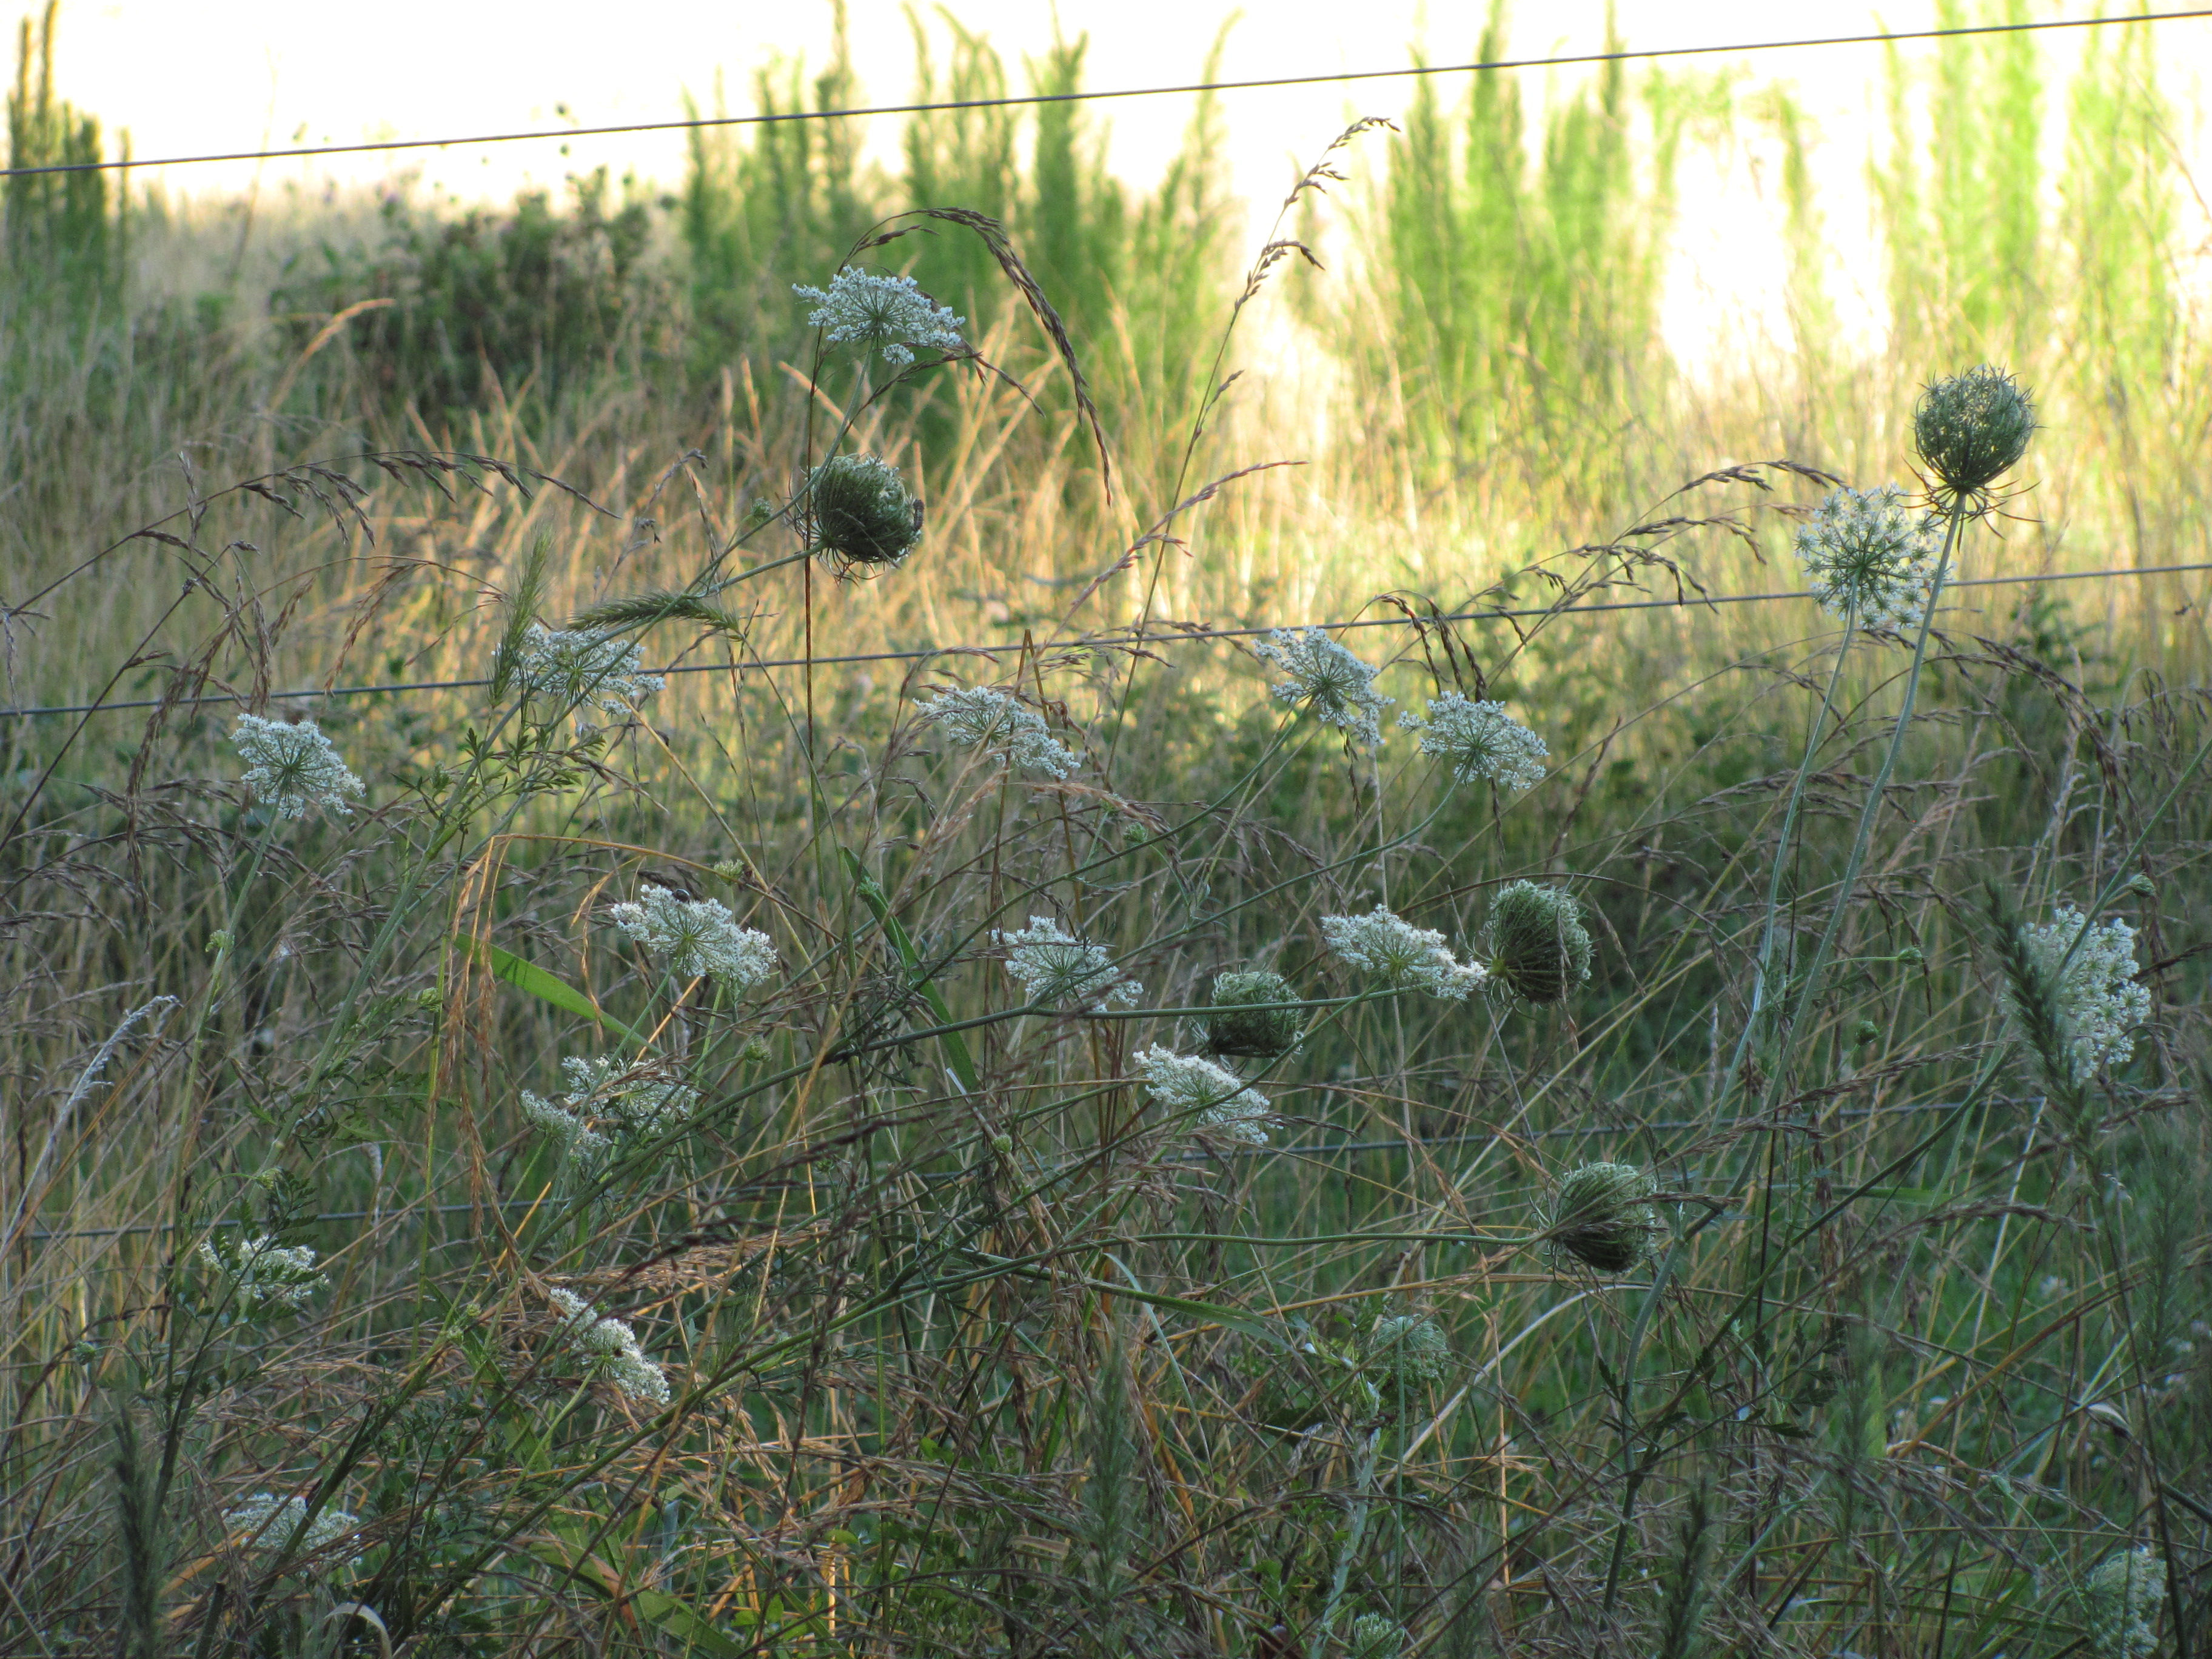
Feeling artsy? You should be shooting RAW
Today, I always shoot RAW+JPEG whenever possible, but on older digital cameras like my beloved Canon PowerShot G3 where RAW is an option by itself without a JPEG option, I shoot JPEG only, primarily because RAW takes a long time to write on those old cameras and they’re supposed to be “fun” cameras for me, and waiting several seconds on a RAW to write on an old CF card is the polar opposite of fun. The main reason I shoot RAW+JPEG is the lack of noise reduction in a RAW file and the resulting boost in detail I can achieve for photos that are worth going to the extra trouble to develop. The ability to boost saturation and play with colors without JPEG compression artifacts appearing is also compelling to me. I find that scenes with landscapes and skies can be very striking if you open a RAW and take some creative liberties with the saturation and color balance.
Which one do you prefer and why? Has this article changed your mind or inspired you to shoot differently? What are your thoughts about the pictures included here? If you’ve made it this far, I’d really appreciate a comment with your thoughts! Comments are moderated, but I try to approve and reply to them quickly.
I just watched your vid on HDR with gimp and wanted to thank you. I’ve been looking for a good tutorial on that very subject and it fit the bill perfectly. I’m retiring soon and will be jumping into Astro-photography which has been an interest of mine for years but work and weather have not cooperated. I need the HDR skill-set to tease out detail from challenging source material.
guess you would recommend sticking with 2.8.
Thanks again for the great work.
I appreciate your feedback! I’m very happy whenever something I’ve made helps someone else. I tried out the latest 2.10 release of GIMP a month or so ago on someone else’s computer that didn’t have an image editor yet and I didn’t have problems with it like I had with the earlier ones. I have still not switched to 2.10 myself, though. There is absolutely nothing wrong with sticking to 2.8 (it’s a very reliable program) but 2.10 seems like it may be mature enough to move to. There’s no penalty for trying 2.10 first, so give it a shot and let me know how it goes.
Then 2.10 it is for now, Thanks. I liked the bit depth improvements I had read about.