Blog

Sage Software logo with "oof!" overlaid

Shell script that converts Sage PRO exported text (.out files) to CSV text format

I have had this tool lying around since 2014. I wrote it once for a business that needed to convert the plain-text .OUT files from Sage PRO into CSV format. It isn’t a super smart script; it only converts the formatting so that the file can be opened in a program like LibreOffice Calc or Microsoft Excel. One .OUT file can have information for lots of accounts, so it doesn’t even bother trying to split up the accounts, though it’s easy to do by hand if desired. I don’t know if this will work with newer versions of PRO or with reports different from the kind I wrote it against. It is offered as-is, no warranty, use at your own risk, don’t blame me if the output gets you a call from the IRS.

If this is useful to you, please leave a comment and let me know! The company I did this for ended up not even using the product of my hard work, so just knowing that anyone at all found this useful will make me very happy.

To use this, you’ll need to give it the name of the .out file you want it to process. Also, this was written when my shell scripting was still a little unrefined…please don’t judge too harshly 🙂

Click here to download the Sage PRO to CSV shell script.

#!/bin/sh

# Convert Sage PRO exported text to CSV text format
# Copyright (C) 2014-2020 by Jody Bruchon <jody@jodybruchon.com>
# Distributed under The MIT License
# Distributed AS-IS with ABSOLUTELY NO WARRANTY. Use at your own risk!

# Program synopsis:
# Converts a Sage PRO ".out" text file to CSV for use as a spreadsheet

# OUT files are generally fixed-width plain text with a variety of
# header and footer information.

# The general process of converting them to CSV text is as follows:

# - Read each line in the file
# - Skip lines that aren't part of the financial data
# - Skip irrelevant page/column headers and any empty lines
# - Read the account number/name information header
# - Consume columns of transaction data in order; convert to CSV data
# - Ignore account/grand totals and beginning balance fields
# - Loop through all the lines until input data is exhausted

# This script has only been tested on a specific version of Sage PRO
# and with one year of financial data output from one company. It may
# not work properly on your exported data, in which case you'll need
# to fix it yourself.

# ALWAYS ***ALWAYS*** CHECK OUTPUT FILES FOR CORRECTNESS. This script
# will throw an error if it encounters unexpected data; however, this
# does not always happen if the data appears to conform to expected
# input data ordering and formatting. For example, financial data is
# assumed to be fixed-width columns and the data is not checked for
# correct type i.e. a valid float, integer, or string.

echo "A tool to convert Sage PRO exported text to CSV text format"
echo "Copyright (C) 2014-2020 by Jody Bruchon <jody@jodybruchon.com>"
echo "Distributed under The MIT License"
echo -e "Distributed AS-IS with ABSOLUTELY NO WARRANTY. Use at your own risk.\n"

if [ ! -e "$1" ]
    then echo "Specify a file to convert."
    echo -e "\nUsage: $0 01-2014.out > 01-2014.csv\n\n"
    exit 1
fi

SKIP=0    # Number of lines to skip
LN=0    # Current processing ine number
TM=0    # Transaction output mode

HEADERS='"Tran Date","Source","Session","Transaction Description","Batch","Tran No","Debit Amt.","Credit Amt.","Ending Bal."'

# Column widths
C1=8    # Tran Date
C2=2    # Source (initials
C3=9    # Session
C4=23    # Transaction Description
C5=9    # Batch
C6=6    # Tran No
C7=26    # Debit Amt.
C8=20    # Credit Amt.
C9=18    # Ending Bal.

CMAX=9    # Number of columns

pad_col () {
    X=$(expr $CMAX - $1)
    while [ $X -gt 0 ]
        do echo -n ","
        X=$((X - 1))
    done
    echo
}

consume_col () {
    # Read next item in line
    CNT=$(eval echo \$C$Z)
    #echo CNT $CNT
    I="$(echo -E "$T" | sed "s/\\(.\{$CNT\}\\).*/\"\1\",/")"
    T="$(echo -E "$T" | sed "s/^.\{$CNT\}    //")"
    # Strip extraneous spaces in fields
    if [ $Z != 4 ]
        then I="$(echo -E $I | sed 's/^  *//;s/  *$//')"
    fi
    echo -n "$I"
}

while read -r LINE
    do
    # Count line numbers in case we need to report an error
    LN=$((LN + 1))

    # Handle line skips as needed
    if [ $SKIP -gt 0 ]
        then SKIP=$((SKIP - 1))
        continue
    fi

    # Strip common page headers (depaginate)
    if echo "$LINE" | grep -q "^Page:"
        then SKIP=7
        continue
    fi

    # Strip standard column headers
    if echo "$LINE" | grep -q "^Tran Date"; then continue; fi
    if echo "$LINE" | grep -q "^Account Number"; then continue; fi

    # Don't process totally empty lines
    if [ -z "$LINE" ]; then continue; fi

    # Pull account number and name
    if echo "$LINE" | grep -q '^[0-9]\{5\}'
        then
        ACCT="$(echo -E "$LINE" | cut -d\  -f1)"
        ACCTNAME="$(echo -E "$LINE" | sed 's/   */ /g;s/^  *//' | cut -d\  -f2-)"
        pad_col 0
        echo -n "$ACCT,\"$ACCTNAME\""; pad_col 2
        continue
    fi

    # Sometimes totals end up on the previous line
    if echo -E "$LINE" | grep -q '^[0-9][0-9][^/]'
        then LL="$LINE"
        continue
    fi
    if echo -E "$LINE" | grep -q '^\$'
        then LL="$LINE"
        continue
    fi
    if [ ! -z "$LL" ]
        then LINE="$LINE $LL"
        unset LL
    fi

    if echo "$LINE" | grep -q "Beginning Balance"
#        then BB="$(echo -E "$LINE" | awk '{print $3}')"
#        echo -n "\"Begin Bal:\",$BB"; pad_col 2
#        pad_col 0
        then
        TM=1; AT=0
        echo "$HEADERS"
        continue
    fi

    if echo "$LINE" | grep -q '^[0-9][0-9]/[0-9][0-9]/[0-9][0-9]'
        then if [ $TM -eq 1 ]
            then
            T="$LINE"
            Z=0
            while [ $Z -lt $CMAX ]
                do
                Z=$((Z + 1))
                consume_col
            done
            echo
            continue
            else echo "error: unexpected transaction" >&2
            exit 1
        fi
    fi

    # Handle account totals line
    if echo "$LINE" | grep -q "^Account Total:"
        then TM=0; AT=1
        continue
    fi

    if echo "$LINE" | grep -q "^Begin. Bal."
        then if [ $AT -eq 1 ]
            then
            echo -n '"Begin Bal",'
            T="$(echo -E "$LINE" | sed 's/Begin[^$]*//;s/\$  */$/g;s/\$/"$/g;s/ Net Change:  */","Net Change/g;s/\$/,"$/g;s/$/"/;s/   *//g;s/^",//')"
            T2="$(echo -E "$T" | cut -d\" -f1-7)"
            T3="$(echo -E "$T" | cut -d\" -f7-)"
            echo $T2,$T3
            continue
            else
            echo "error: unexpected totals line" >&2
        fi
    fi
    
    if echo "$LINE" | grep -q "^Grand Total:"
        then
        pad_col 0; pad_col 0
        echo '"Grand Total"'; pad_col 1
        continue
    fi

    # Output error (unknown line)
    echo "ERROR: Unknown data while processing line $LN" >&2
    echo -E "$LINE" >&2
    exit 1
#    echo -E "$LINE"

done < "$1"
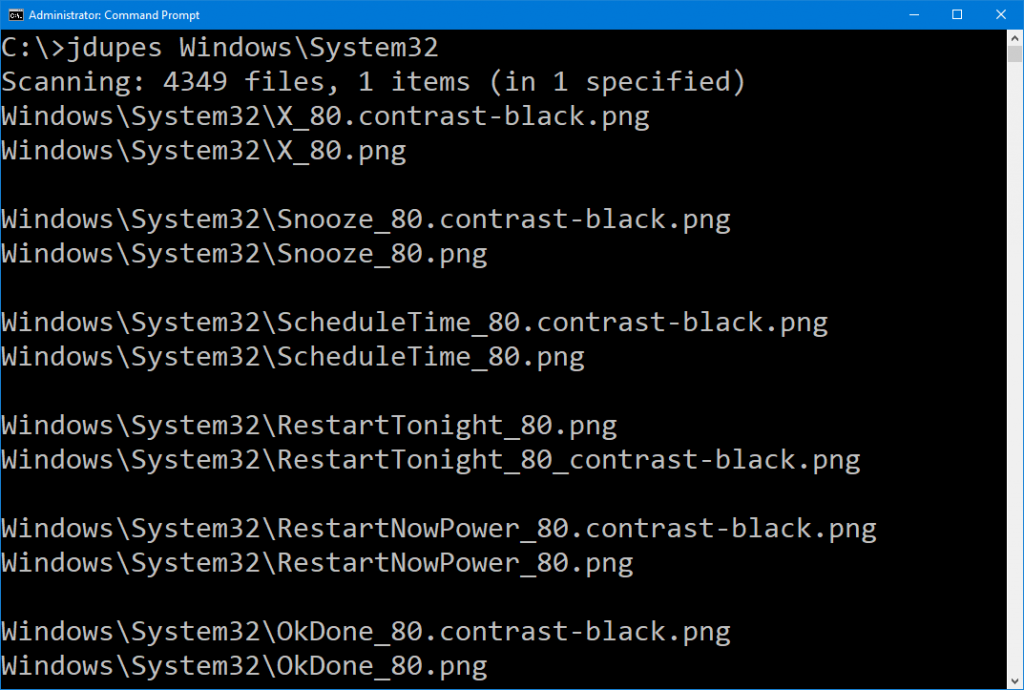
jdupes Screenshot

What WON’T speed up the jdupes duplicate file finder

Some of you are probably aware that I’m the person behind the jdupes duplicate file finder. It’s amazing how far it has spread over the past few years, especially considering it was originally just me working on speeding up fdupes because it was too slow and I didn’t really have any plans to release my changes. Over the years, I’ve pretty much done everything possible that had a chance of significantly speeding up the program, but there are always novel ideas out there about what could be done to make things even better. I have received a lot of suggestions by both email and the jdupes issue tracker on GitHub, and while some of them have merit, there are quite a few that come up time and time again. It’s time to swat some of these down more publicly, so here is a list of things that people suggest to speed up jdupes, but won’t really do that.

Switching hash algorithms

One way I sped up jdupes after forking the original fdupes code was to swap out the MD5 secure hash algorithm for my own custom “jodyhash” fast hash algorithm. This made a huge difference in program performance. MD5 is a CPU-intensive thing to calculate, but jodyhash was explicitly written to use primitive CPU operations that translate directly to simple, fast, and compact machine language instructions. Since discovering that there were some potentially undesirable properties to jodyhash (though those properties had zero effect in practical testing on real-world data), the slightly faster xxHash64 fast hash algorithm has been used. Still, there are those who suggest changing the hash algorithm yet again to improve performance further. Candidates such as t1ha are certainly a little faster than xxHash64, but switching to them has no real value. I chose xxHash64 in part due to its containment within a single .c/.h file pair, making it particularly easy to include with the program, but some replacement hash code bases are not so easily included. Even if they were, the hash algorithm won’t make enough of a difference to change anything in any real-world workloads. The problem is that the vast majority of the slowness in jdupes stems from waiting on I/O operations to complete, not from CPU usage. This isn’t true in fdupes, where MD5 is still stubbornly used as the hash algorithm, but jdupes spends a ridiculous amount of time waiting on the operating system to complete disk reads and a very tiny amount of time waiting on hash calculations to complete.

Tree balancing

At one point, I wrote a spiffy bit of tree rebalancing code that would go down the file tree and change the parent-child relationships to more fairly balance out the tree depth for any given branch. The use of a hash algorithm with minimally decent randomization would mostly balance things out from the start, though, so my concerns about excessive tree depth turned out to be unfounded, and tree rebalance code did nothing to improve overall performance, so it was ultimately scrapped. fdupes tried to use red-black trees at one point, but discarded the implementation for similar reasons of insufficient gains. The file tree built in jdupes tends to balance out reasonably well on its own.

Delete during scanning

This seems like a good idea on paper (and indeed, fdupes has implemented this as an option), but it’s not a good idea in practice for most cases. It doesn’t necessarily speed things up very much and it guarantees that options which work on full file sets (such as the file ordering/sorting options) are not usable. The straightforward “delete any duplicates as fast as possible” case is improved, but anything much more complex is impossible. The performance boost is usually not worth it, because at best, a few extra file comparisons may not happen. It’s a tempting feature, but the risks outweigh the benefits and the added complexity for corner cases, so I’m never planning to do this.

Comparing final file blocks after first blocks

There are two reasons not to do this. The biggest is that I’ve run tests on large data sets and found that the last block of a pair of files tend to match if the first blocks match, so it won’t fast-exclude the vast majority of file pairs seen in the wild. The secondary reason is that moving from the first block to the last block of a file (particularly large files) when using a mechanical disk or disk array will cause a big penalty in the form of three extra (and possibly very long) disk head seeks for every file pair being checked. This is less of an issue on a solid-state drive, but remember that bit about most files having identical end blocks if they have identical start blocks? It’s a good idea that only slows things down in practical application on real-world data. Just for an added sting, jdupes uses an optimization where the first block’s hash is not redone when hashing the full file, but the hash of a final block is not reusable in the same way, so the labor would have to be doubled for the full-file match check.

Comparing median blocks

The rationale is similar to comparing final blocks, but slightly different. The seeks are often shorter and the chances of rejection more likely with median blocks, but all of the problems outlined for final blocks are still present. The other issue is that median blocks require a tiny bit of extra work to calculate what block is the median block for a given file. It’s added complexity with no real reward for the effort, just like final blocks.

Cache hashes across runs

This is actually a planned feature, but there are massive pitfalls with caching file hashes. Every loaded hash would have to be checked against a list of files that actually exist, requiring considerable computational effort. There is a risk that a file’s contents were modified without the cache being updated. File path relativity is an issue that can get ugly. Where do you store the database, and in what format? How do you decide to invalidate cache entries? The xxHash64 fast hash algorithm might also not be suitable for such persistent hashes to be relatively safe to use, implying a return to the slowness of secure hash algorithms and the loss of performance that is implied by such a change. It’s a low-hanging and extremely tempting way to speed things up, but the devil is in the details, and it’s a really mean devil. For now, it’s better to simply not have this around.

Those are just a few ways that things can’t be so easily sped up. Do you have any more “bad” ideas that come to mind?

Google Stadia was guaranteed to fail, according to basic freaking math

If you don’t know what Google Stadia is, it’s basically a networked gaming console. It renders everything on big servers at Google so your tiny Chromecast or other wimpy smart TV or computer or phone or internet-enabled potato or carrier pigeon or whatever doesn’t have to do any of the rendering work, and it takes inputs and sends fully rendered video frames over your network connection in a similar manner to a video streaming service. The idea is that you plug in a control pad, download the Stadia app, and you can play games without buying any special hardware. It’s a revolution in video gaming! It’s the end of home consoles!

…and it was guaranteed to be dead on arrival…and anyone with the most basic knowledge could have figured this out, but Google somehow green-lit it.

Anyone who looks at a typical ping time on a home internet connection, even a good one, can easily figure out why Stadia was doomed to be trash from the outset. A game running at any remotely usable frame rate (I’d say 20fps is a minimum for pretty much anything at this point) needs to receive inputs, process inputs, do all the game logic calculations for the next frame, render the next frame, and blit the frame, and for a 20fps frame rate, a game on your normal system has 50ms total to completely turn that around. If you are playing a faster action game that requires real-time control, you need higher frame rates than that, meaning even lower total latencies than 50ms.

Now let’s look at ping times from my house on my otherwise completely unused connection to google.com:

Pinging google.com [64.233.177.100] with 32 bytes of data:
Reply from 64.233.177.100: bytes=32 time=33ms TTL=42
Reply from 64.233.177.100: bytes=32 time=32ms TTL=42

OK, so a ping round-trip takes 32ms, leaving 12ms to do everything included above. BUT WAIT, THERE’S MORE: Stadia can’t send uncompressed frames, because that will take too long to arrive, so there’s compression overhead as well, meaning there’s also going to be added decompression overhead on the client side. Even with a hardware H.264 encoder/decoder combo, a finite amount of time is still required to do this. Let’s be INSANELY GENEROUS and say that the encode/decode takes 2ms on each side. Now, even before ALL THE STUFF I ALREADY MENTIONED is accounted for, we’re down to 8ms of time left to hit that 20fps frame rate goal. Remember, in the 8ms remaining, we must still process inputs, run game logic, and render out the frame to be compressed…and this is also an ideal situation assuming an otherwise completely unused connection with no or very minimal network congestion going on. This also assumes that input comes in as early as possible, which is basically never the case. There will almost always be at least one frame of input lag just because of this.

Even if you reduce the goal frame rate to 15fps, the total time available between frames only rises from 50ms to 66ms. While that does constitute a tripling of the time available to run game logic and render a frame, it’s still a really short time frame, and any network usage by any device on the same connection or other households on the same shared network node will essentially render this work pipeline unusably slow. Multiplayer gaming with client-side rendering has the advantage of only sending extremely small packets of data that transmit quickly and act as “commands” for the client software, meaning all existing multiplayer network gaming is sort of like a specialized computing cluster for that game, with the heavy lifting done where the latencies have to be the lowest. Stadia combines all of the horrible problems of live video streaming with the problems of multiplayer latencies. It was dead on arrival. It is destined to fail.

Anyone with simple networking and gaming knowledge can figure this out.

But a multi-billion dollar international corporation that snarfs up the best and brightest minds somehow missed it.

Let that sink in.

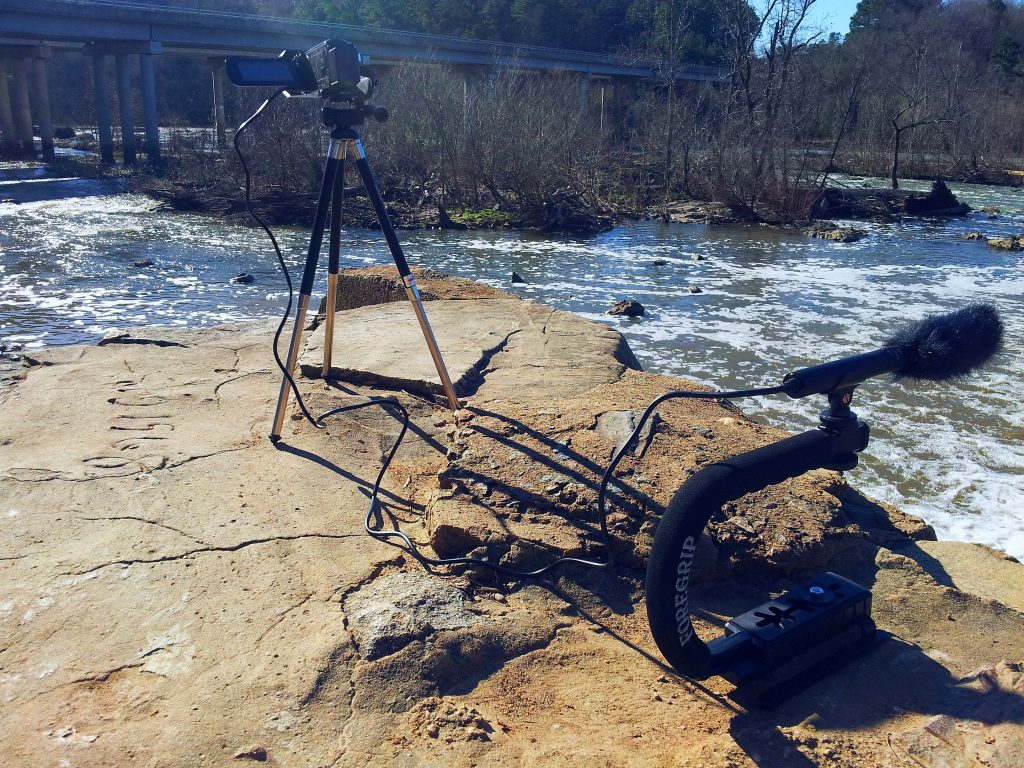
Camcorder and microphone on rock above waterfall

Should beginner videographers learn photography first? Yes and no.

(This is my response to the question in the title, posed somewhere on Reddit.)

Filmmaking is a combination of creative writing, audio recording, photography, and motion handling. There are so many things that go into even the simplest decent-seeming video production work that it’d be difficult to say “learn this first” to any one of them. You need all of them or you’ll have glaring deficiencies in your skill set. Even “just a guy who points cameras” benefits from understanding the editing process, how audio works, etc.

That being said, I got into photography as a hobby in 2010 when I purchased my first DSLR, and it was definitely a huge benefit by the time I got the filmmaking itch around 2015. Understanding composition, lighting, and manual controls is absolutely critical to good filmmaking, and you can experiment with all of that in photography. Things like audio can be learned with education and a little bit of experimentation, but composition is difficult to teach since it’s an artistic thing more than a technical one. You can learn about handy shortcuts like the rule of thirds and still take a very poorly composed photo.

When I started offering my video services professionally instead of just making short films in my backyard and office for fun, I had been doing photography for 7+ years and filmmaking as an occasional hobby for about 2 years. The biggest problems I ran into once I started professional work were as follows:

  • Audio can require a lot of experimentation to get right, and having good audio gear is extremely important. My Zoom H4n has been the best tool in my toolkit. It was hard dropping $200 on a recorder, but I challenge anyone to get better audio on a budget than my H4n attached to the podium with a SmallRig double-ball arm clamp. Shotgun mics and booms look cool, but are not appropriate for everything.
  • Poor gear choices from photography plagued me. I have a Targus (read: real cheap) tripod and a Manfrotto Compact Advanced ($90, pretty nice for photography, not a great choice for any kind of pan/tilt video work) and I had two video cameras. I bought a Magnus VT-350 7ft fluid-head tripod because the pan/tilt motion was so sticky on the other two and I had a severe problem with people walking in front of the camera during a packed event. On another event, I put the wide camera on the Magnus to avoid the people problem and was stuck with my manually operated camera and telephoto lens on a sticky tripod, ruining 70-80% of my close-ups due to the painful jerks when I’d move anything. I ended up buying another VT-350 that night and had it before the other two shows they were doing. Know what gear you need to have and spend the money on good support hardware. The VT-350 is still a cheap tripod and suffers from some issues like low weight and a little flex in the plastic QR plate, but in practice these are not major issues. GET GOOD GEAR.
  • I didn’t want to spend $25 on gaffer’s tape. It seemed stupid to pay that much for tape. BUY GAFFER’S TAPE. Pro tip: also buy a small roll of glow-in-the-dark gaffer’s tape and tape it to stuff like your tripod and wires so they’re very visible at events.
  • Every hour you spend in pre-production work will save you two or more hours in production and post-production. Anything you can plan ahead will spare you tons of pain. Arrive 90-120 minutes before an event begins to set up so you can test your stuff way before the people show up. Write and revise a script a couple of times before you shoot interviews or a wedding or anything else that requires storytelling; don’t “do it live” because you’ll burn tons of time planning on-the-spot and produce an inferior work product while doing so. Make sure your equipment is good to go the day before a shoot, with charged batteries and empty memory cards and bags all packed and all required wires and adapters accounted for.
  • Clients generally don’t know jack about video, and nothing prepares you for dealing with them and their grand dreams or demands. Think of yourself as the guy with cameras and lenses and light kits, and then think of the client as the guy with an overpriced iPhone that loves shooting in that fake bokeh wannabe “portrait mode.” These people might understand videography, but more likely they’ll think that you can do anything they’ve ever seen done on YouTube or cable TV. You’re going to have to explain to them exactly what can and can’t be done, and temper their expectations. No, you don’t have a camera boom like they used at that concert on TV, so those cool sweeping shots aren’t going to happen. Be polite but firm on what you can and can’t do. If they want something more than you have, they’re gonna pay for the required rentals.
  • Video is photography with motion. This seems like a silly and obvious point, but it’s a major problem when moving out of photography to video work, especially for someone else. If you do event coverage or sports especially, you’re going to have to track subjects that move in ways you can’t easily predict. You’ll have to learn how to do this one way or another, and it’s really hard at first. The best thing to do is to leave enough room around the subject to allow for your reaction delay without losing them when they move around. A field monitor can be especially handy for sports video. Don’t let your shoots get compromised by a sudden movement. If you need practice, go outside to a place with birds or dragonflies or other fast-moving natural things, and take something telephoto (a camcorder with a nice optical zoom will do), and try to anticipate their movements and keep them in frame as much as possible. It will get easier as you practice it more.

One thing to note is that the lines between photography and videography are blurring. I recently helped a local mayoral candidate with video and photo work, but the only traditional photography involved was the portraiture. All of the photos on the site are really just 4K frame grabs. I shot the 4K footage with the intent of frame-grabbing any needed photos later, so I used a 1/100-1/125 shutter instead of 1/60 to significantly reduce motion blur. It makes the video portions a little less smooth-looking, but it’s worth it for the ability to pull clean 8MP photos out all day long.

Comparison of brown color reproduction between film and digital camera

PROOF: Follow-up to my “Vox Media says light is racist and that’s stupid” video

Vox published a video a few years ago about how “color film was made for white people.” There were two major claims that dictated the entire framework of the video:

  1. Color film made dark-skinned people look really bad, especially when white people were in the same frame, and
  2. Manufacturers of color film left out chemicals that “would bring out certain red and brown tones.”

Anyone who understands a decent amount about photography and especially about beloved ancient color films such as Kodachrome 25 can easily debunk point 1, because it’s a simple and visually very obvious matter of poor dynamic range and decisions about exposure. Old film has 6-7 stops (a “stop” is an exponential change, where a stop of difference is a doubling or halving of light) of dynamic range, but new film and most digital cameras have double that dynamic range. When you expose for correct midtones on old film stocks, you would inevitably lose all your darker and lighter areas, meaning an outdoor photo would have little to no texture on clouds and very bright surfaces and anything about 3 stops lower than the value exposed for would be very dark and featureless. New film has no such problem, and digital cameras and camcorders don’t sense images the same way as film.

Debunking “racist chemistry” is hard

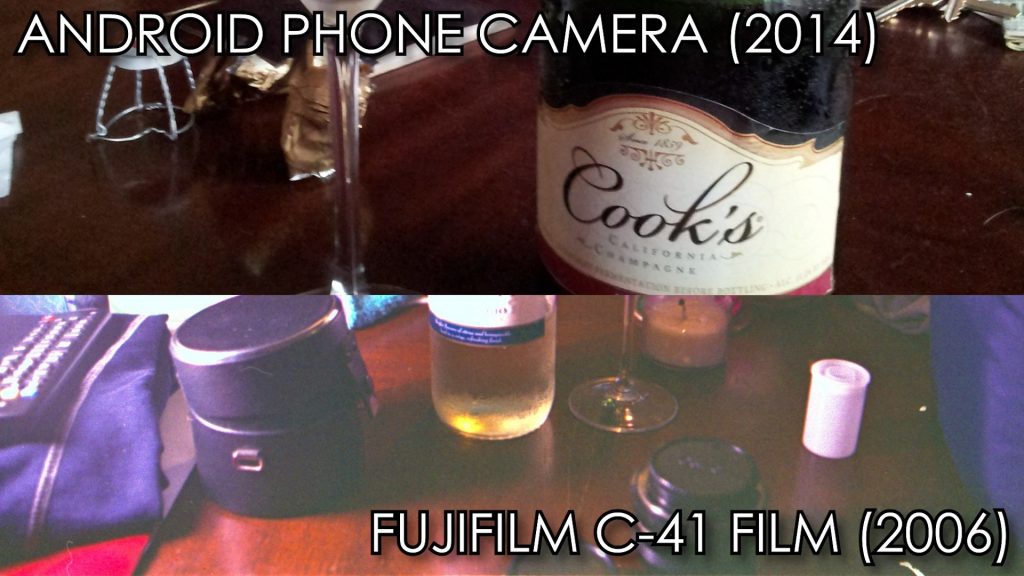
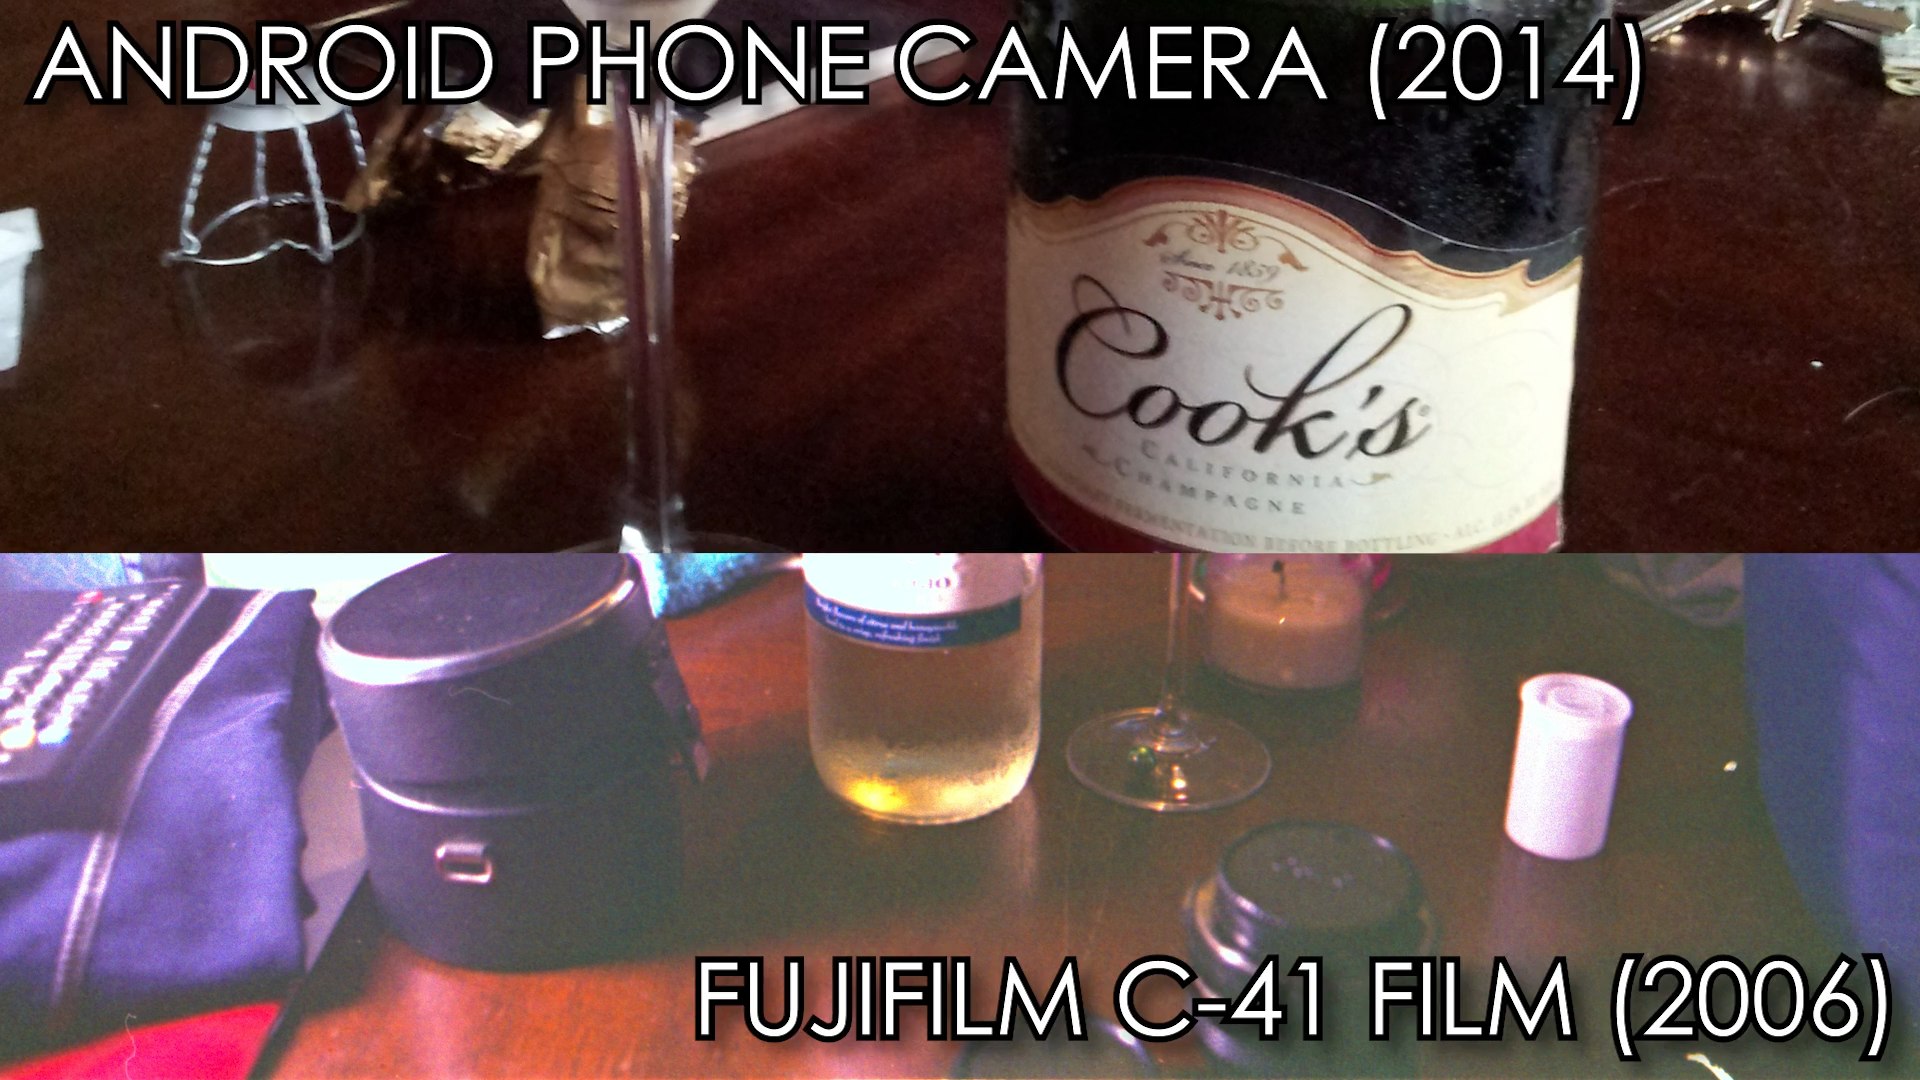
But what of point 2? The color film formulation claim is not so easily dismissed with simple physics and easily researched facts about film stocks. I’m not personally willing to do the level of digging required to find out what film chemistry was like in the 1940s, assuming that such documentation still exists and is somehow still accessible. However, I was poking through my scanned color film negatives one day, and I was surprised to discover that I had taken a photograph that might illustrate that Vox’s “no brown tones in the chemistry” claim was a lie. It was a dark brown wooden coffee table with some very slight reddish tones in the finish. Shuffling through other pictures I had, I found a cell phone picture from a year or two prior that contained the same table, taken with different lighting but the differences were way too visually obvious to resist. In my film photo, it looks almost like a cinnamon finish even in the shadows and even though the rest of the photo has good white balance. In my cell phone photo, the darkness of the finish is obvious, and the two brown tones look almost like different tables entirely.

The film photo was taken on good old standard-issue FujiFilm ISO 400 from Wal-Mart that expired roughly around 2006 and uses the C-41 color film process for development. The phone photo was taken on a relatively cheap ($150 or so?) Android cell phone bought around 2014-2015.

How is this still a problem, Vox?

The problem with Vox’s claims start to become immediately apparent. Sure, Kodak is an American company that makes film with the (majority white) American market in mind, so it’s at least plausible that Kodak might not have added the necessary chemistry for various reasons (cost, complexity, or perhaps even the Vox video’s implications of racism), but FujiFilm has always been a Japanese company that would operate primarily with the Japanese market in mind. Japanese people have a wide variety of skin tones with plenty of variations of olive, pink, and yes, the notoriously “left out of the chemistry” brown. The film stock I used is also from the 2000s, well after the racist film problem was supposedly solved to appease wood furniture sellers and chocolate makers. Here’s the relevant screenshot from the video, in case you haven’t watched yet:

Comparison of brown color reproduction between film and digital camera
Oh no! Vox Media’s political narrative is crumbling! The shock! The horror!

In case it’s not clear, the Android phone photo’s color is pretty close to the actual color of the table, but the film photo is way off, even if you only look at the shadows and ignore where the sunlight is hitting it.

So, if Vox Media’s video about racist color film is correct about their film chemistry claims, why would a Japanese company with a target market full of colorful brown people put out a film stock many years beyond the “fixed brown tones” mark that doesn’t reproduce brown tones accurately? Are we to believe that Fuji is racist against their own people? No, that’s ridiculous, just like Vox’s claims of racist film chemistry are ridiculous. Fortunately, I have come up with a much simpler explanation that makes a lot more sense.

Brown makes brown look bad

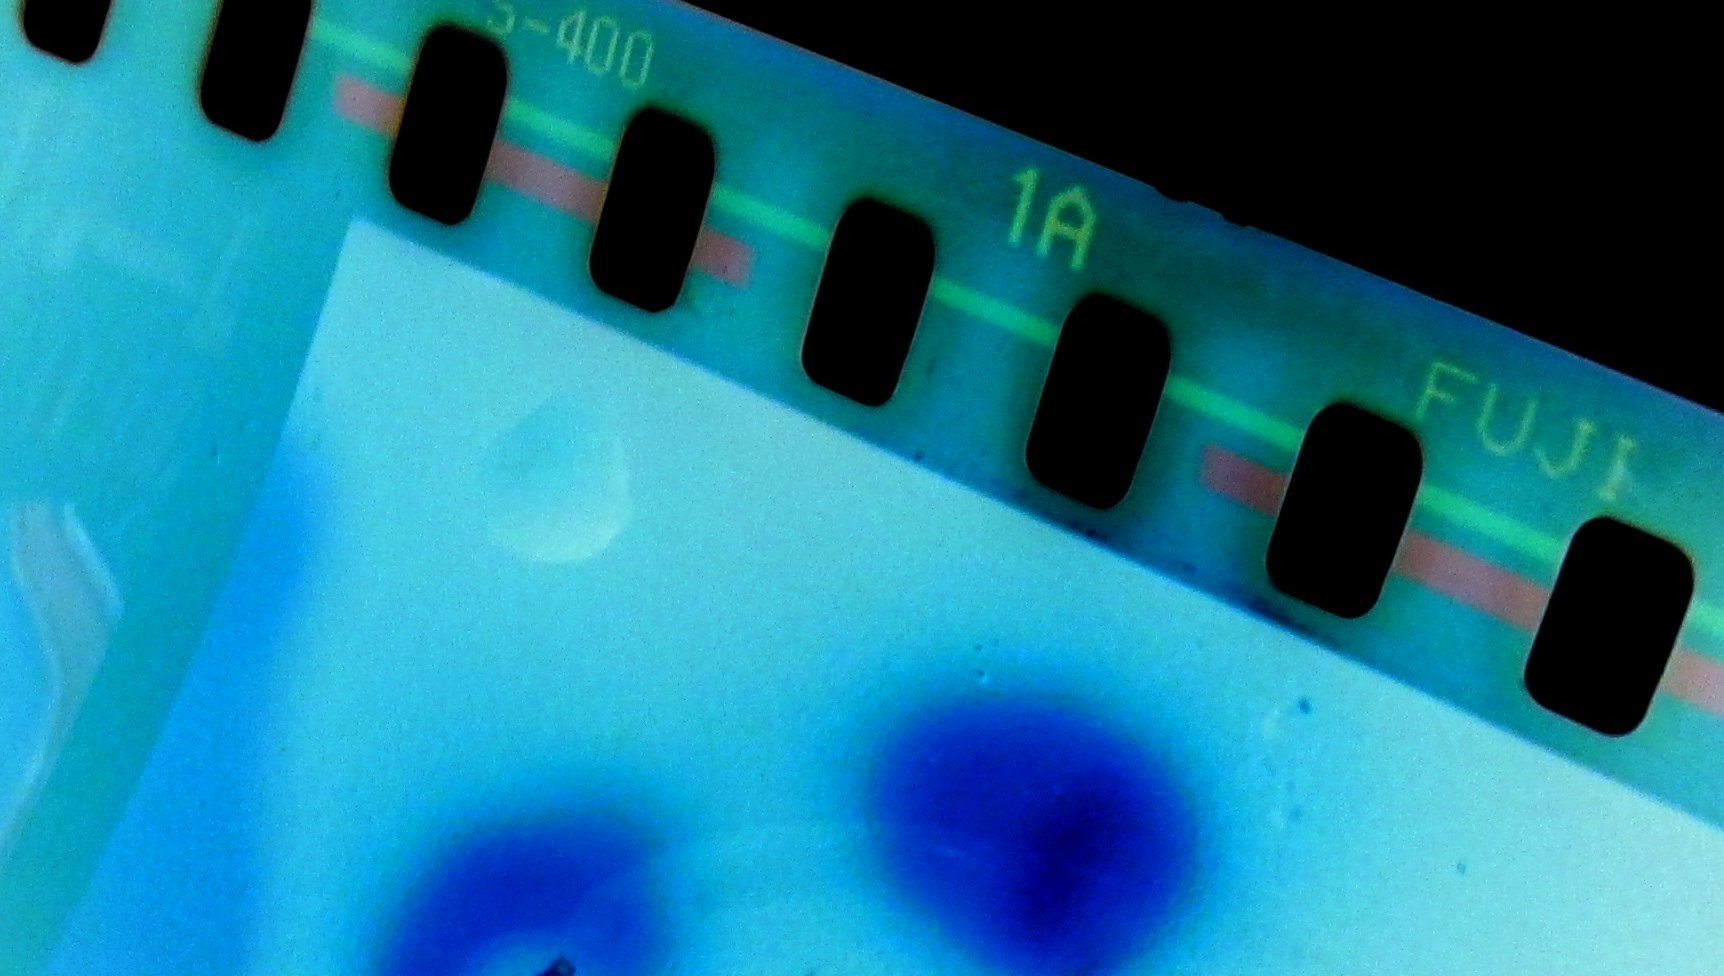
FujiFilm ISO 400 C-41 film negative

The picture above is not just any film negative; it’s the first C-41 color film negative I ever developed on my own, and it’s one of about six rolls of Fuji ISO 400 that I got with my Canon T50 film SLR when I bought it and picked it up in a literal hurricane a few years ago. What color is the negative material outside of any photos? If you said “brown” then congratulations, you have fully functional eyesight. A negative must be converted to a positive before it can be used as a normal photo, so the colors must be inverted. Here’s how that would look when done on a computer:

Inverted image of color film negative

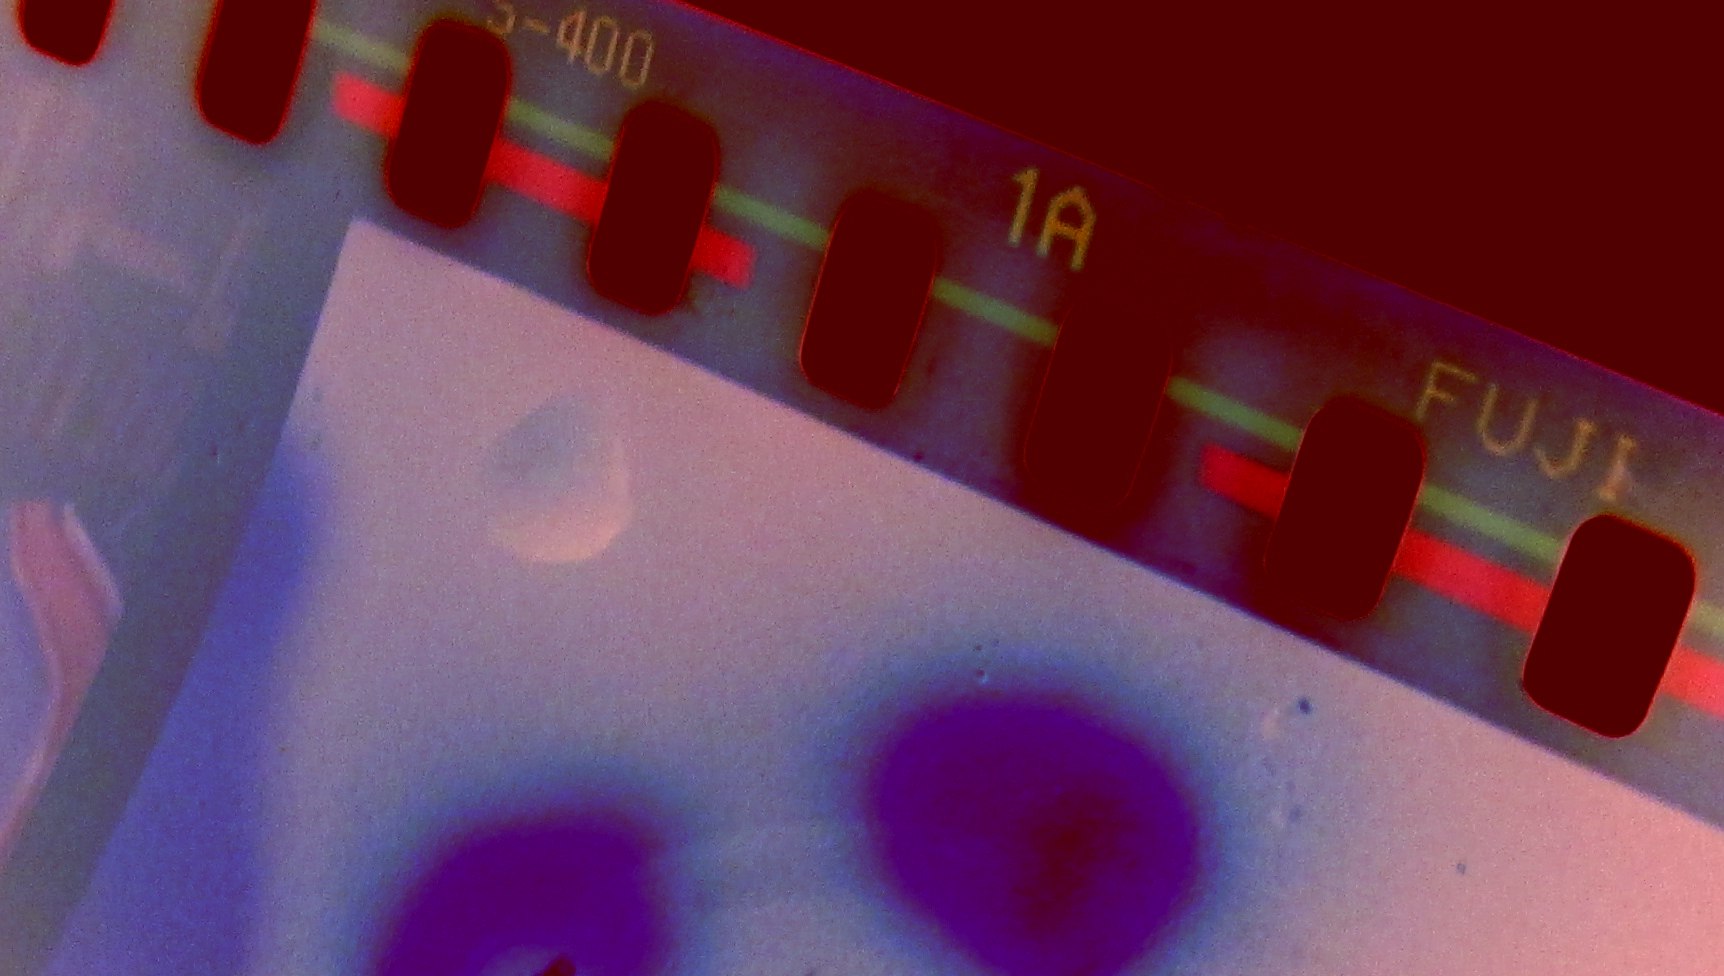
Ouch. Instead of the brown stuff, we now see the lovely color cyan. Cyan is the inverse of orange, so brown (dark orange) will invert to dark cyan. To fix this, we’ll have to remove a lot of cyan from the image…Color film negative, inverted and color-shifted to restore normal color balance

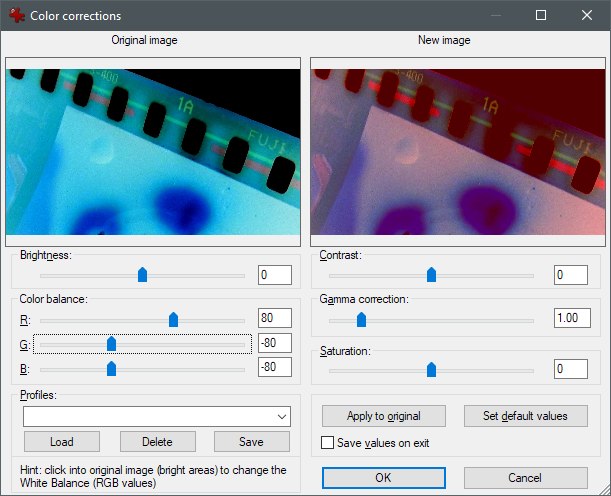
That’s not perfect, but close enough for this demonstration. Basically, you have to artificially boost red and lower green and blue to get the original image from the inverted negative. (No, I didn’t try very hard for this demonstration, so don’t complain.)

IrfanView color correction for film

The positive image being heavily skewed towards the inverse color of brown means that reproducing brown with color negative film is only possible with a reduced level of accuracy. Brown in particular will be reproduced less accurately than its brighter relative (orange) because brown already has a weaker effect on the film due to being a darker color, plus it’s fighting a heavy color shift towards its inverse. This also affects the reproduction of cyan (obviously), but unless you’re spending your whole day photographing the lichen Xanthoparmelia with color film for some reason, you won’t see enough cyan in nature (or even outside of nature) to notice the reduced color quality. Anytime you shift the tint of an image, you necessarily artificially reduce or increase the amount of a color that can be accurately reproduced. While film is an analog medium, it has its limits just like any digital image, and the more you “push” or “pull” that image, the more observable those limitations become.

Imperfect proof, but quite sufficient

This doesn’t offer definitive proof that Vox’s claims of racist color film chemistry are false, but it heavily strains credulity that the cause of poor reproduction of “certain brown and red tones” was racist film chemistry formulations when all of that was supposed to be a problem before the 1990s (at the latest!) and an film stock made for a market full of brown people from the 2000s and sold in stores all across the globe still exhibits the same exact issues. The brown backing of C-41 color film and the tricks required to neutralize the effect of that brown tint only further erode support for the notion that it’s a problem of “oops, we left out the brown people ingredients” film chemistry.

If I have to choose between “racist conspiracy of white America that somehow still applies to film made for countries full of brown people” and “the brown backing makes it harder to reproduce brown because you have to remove the brown to make it look normal,” I am definitely going to pick the latter. It’s a simple explanation that can be easily observed and tested in an imaging program rather than an elaborate conspiracy theory presented by notorious social justice race-baiters and that doesn’t fit easily observed facts.

(I’m also never going to let them live down that trick in the original video where they used Kodachrome with very bad dynamic range as the “black people looked bad” example and much newer Kodachrome with good dynamic range as the “white people looked good” example. You dirty lying bastards knew exactly what you were doing when you chose those two photos.)

Developed CHDK RAW of the same cat JPEG

RAW vs. JPEG: what does RAW mean, and what good is shooting RAW? (with examples)

Photographers are a very diverse category of people. Some shoot to capture memories forever. Some shoot for the joy of composing an interesting photograph. Some shoot to capture things that will impress others. Some shoot to make money from their photos. Most fall somewhere in between, and with the exception of the for-profit group, caring about image quality is just as diverse. Some don’t care as long as you can tell what it is that’s in the picture when you look, while others want as much visual quality as technically possible and will fight to squeeze every last bit of goodness out of a single picture; a third category wants maximum quality until it takes too long to share their work.

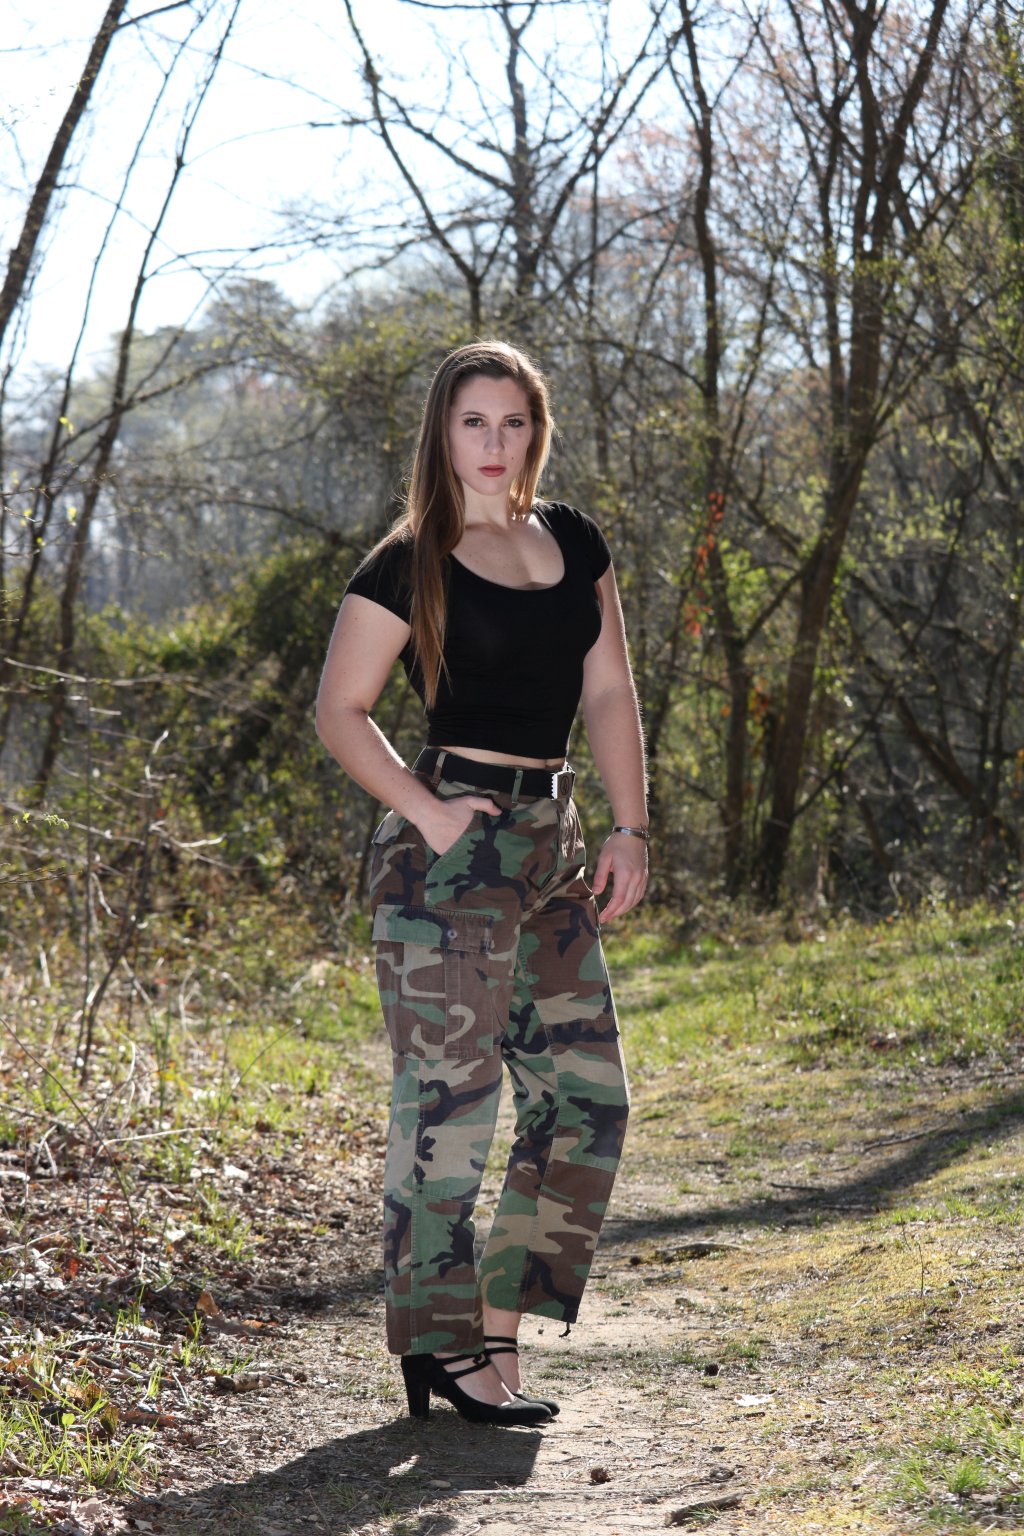
High-quality photo of Brittany Davis
Unedited picture from a shoot I did with Brittany Davis. We were shooting for professional quality images that were as good as possible before any editing, so I used my best DSLR, some flashes, and careful composition to achieve this result. Definitely one of my favorites from the whole shoot!
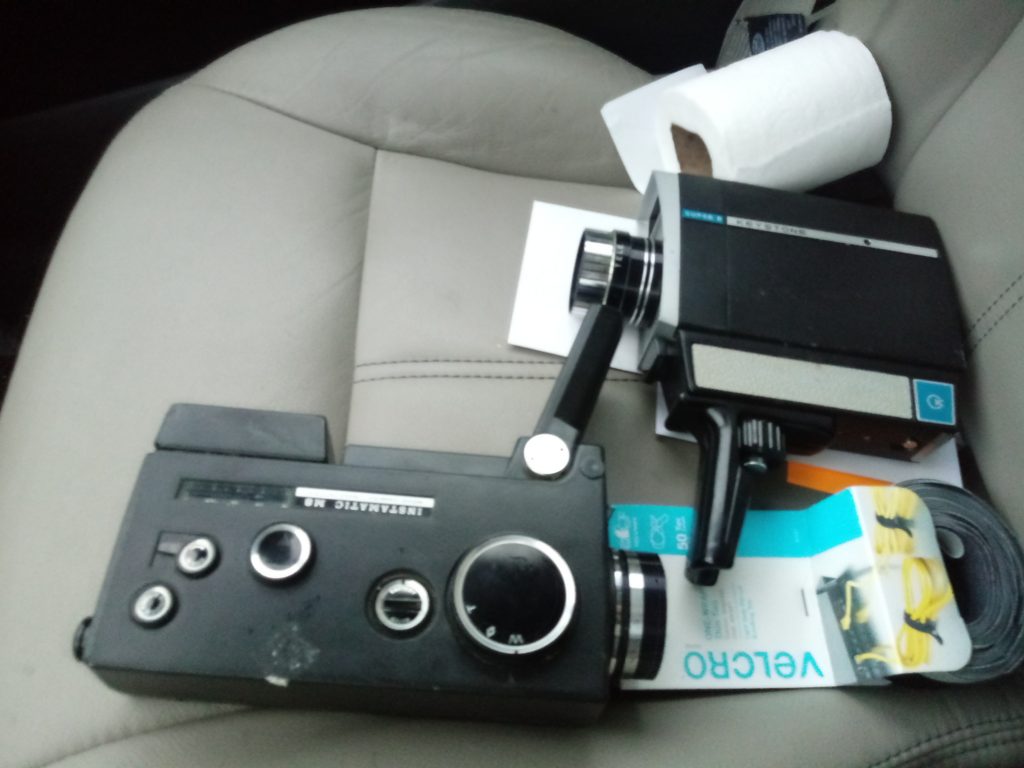
Two Super 8mm video cameras from the 1950s
Two Super 8mm video cameras from the 1950s, taken rather poorly with a cell phone. I wanted to show someone what I found at a consignment store. The image quality didn’t matter, so why bother whipping out a big camera and meticulously composing a gorgeous shot?

Two versions of the same picture

The RAW/JPEG divide exists because the needs of photographers are so widely varied. But what are RAW and JPEG? The specifics are beyond this article, but here’s a short explanation. RAW is what it says: every single bit of information that the camera sensor produces. JPEG is a lossy image compression format where image information is thrown away to greatly reduce the size of an image file. RAW is meant to be a “digital negative,” the equivalent of film negatives for your digital camera, containing every last drop of data about a picture you took. JPEG is intended to be a compact “delivery format” image, easily moved between computers or published online due to the small size, with some quality loss that most people can’t see without modifying the picture.

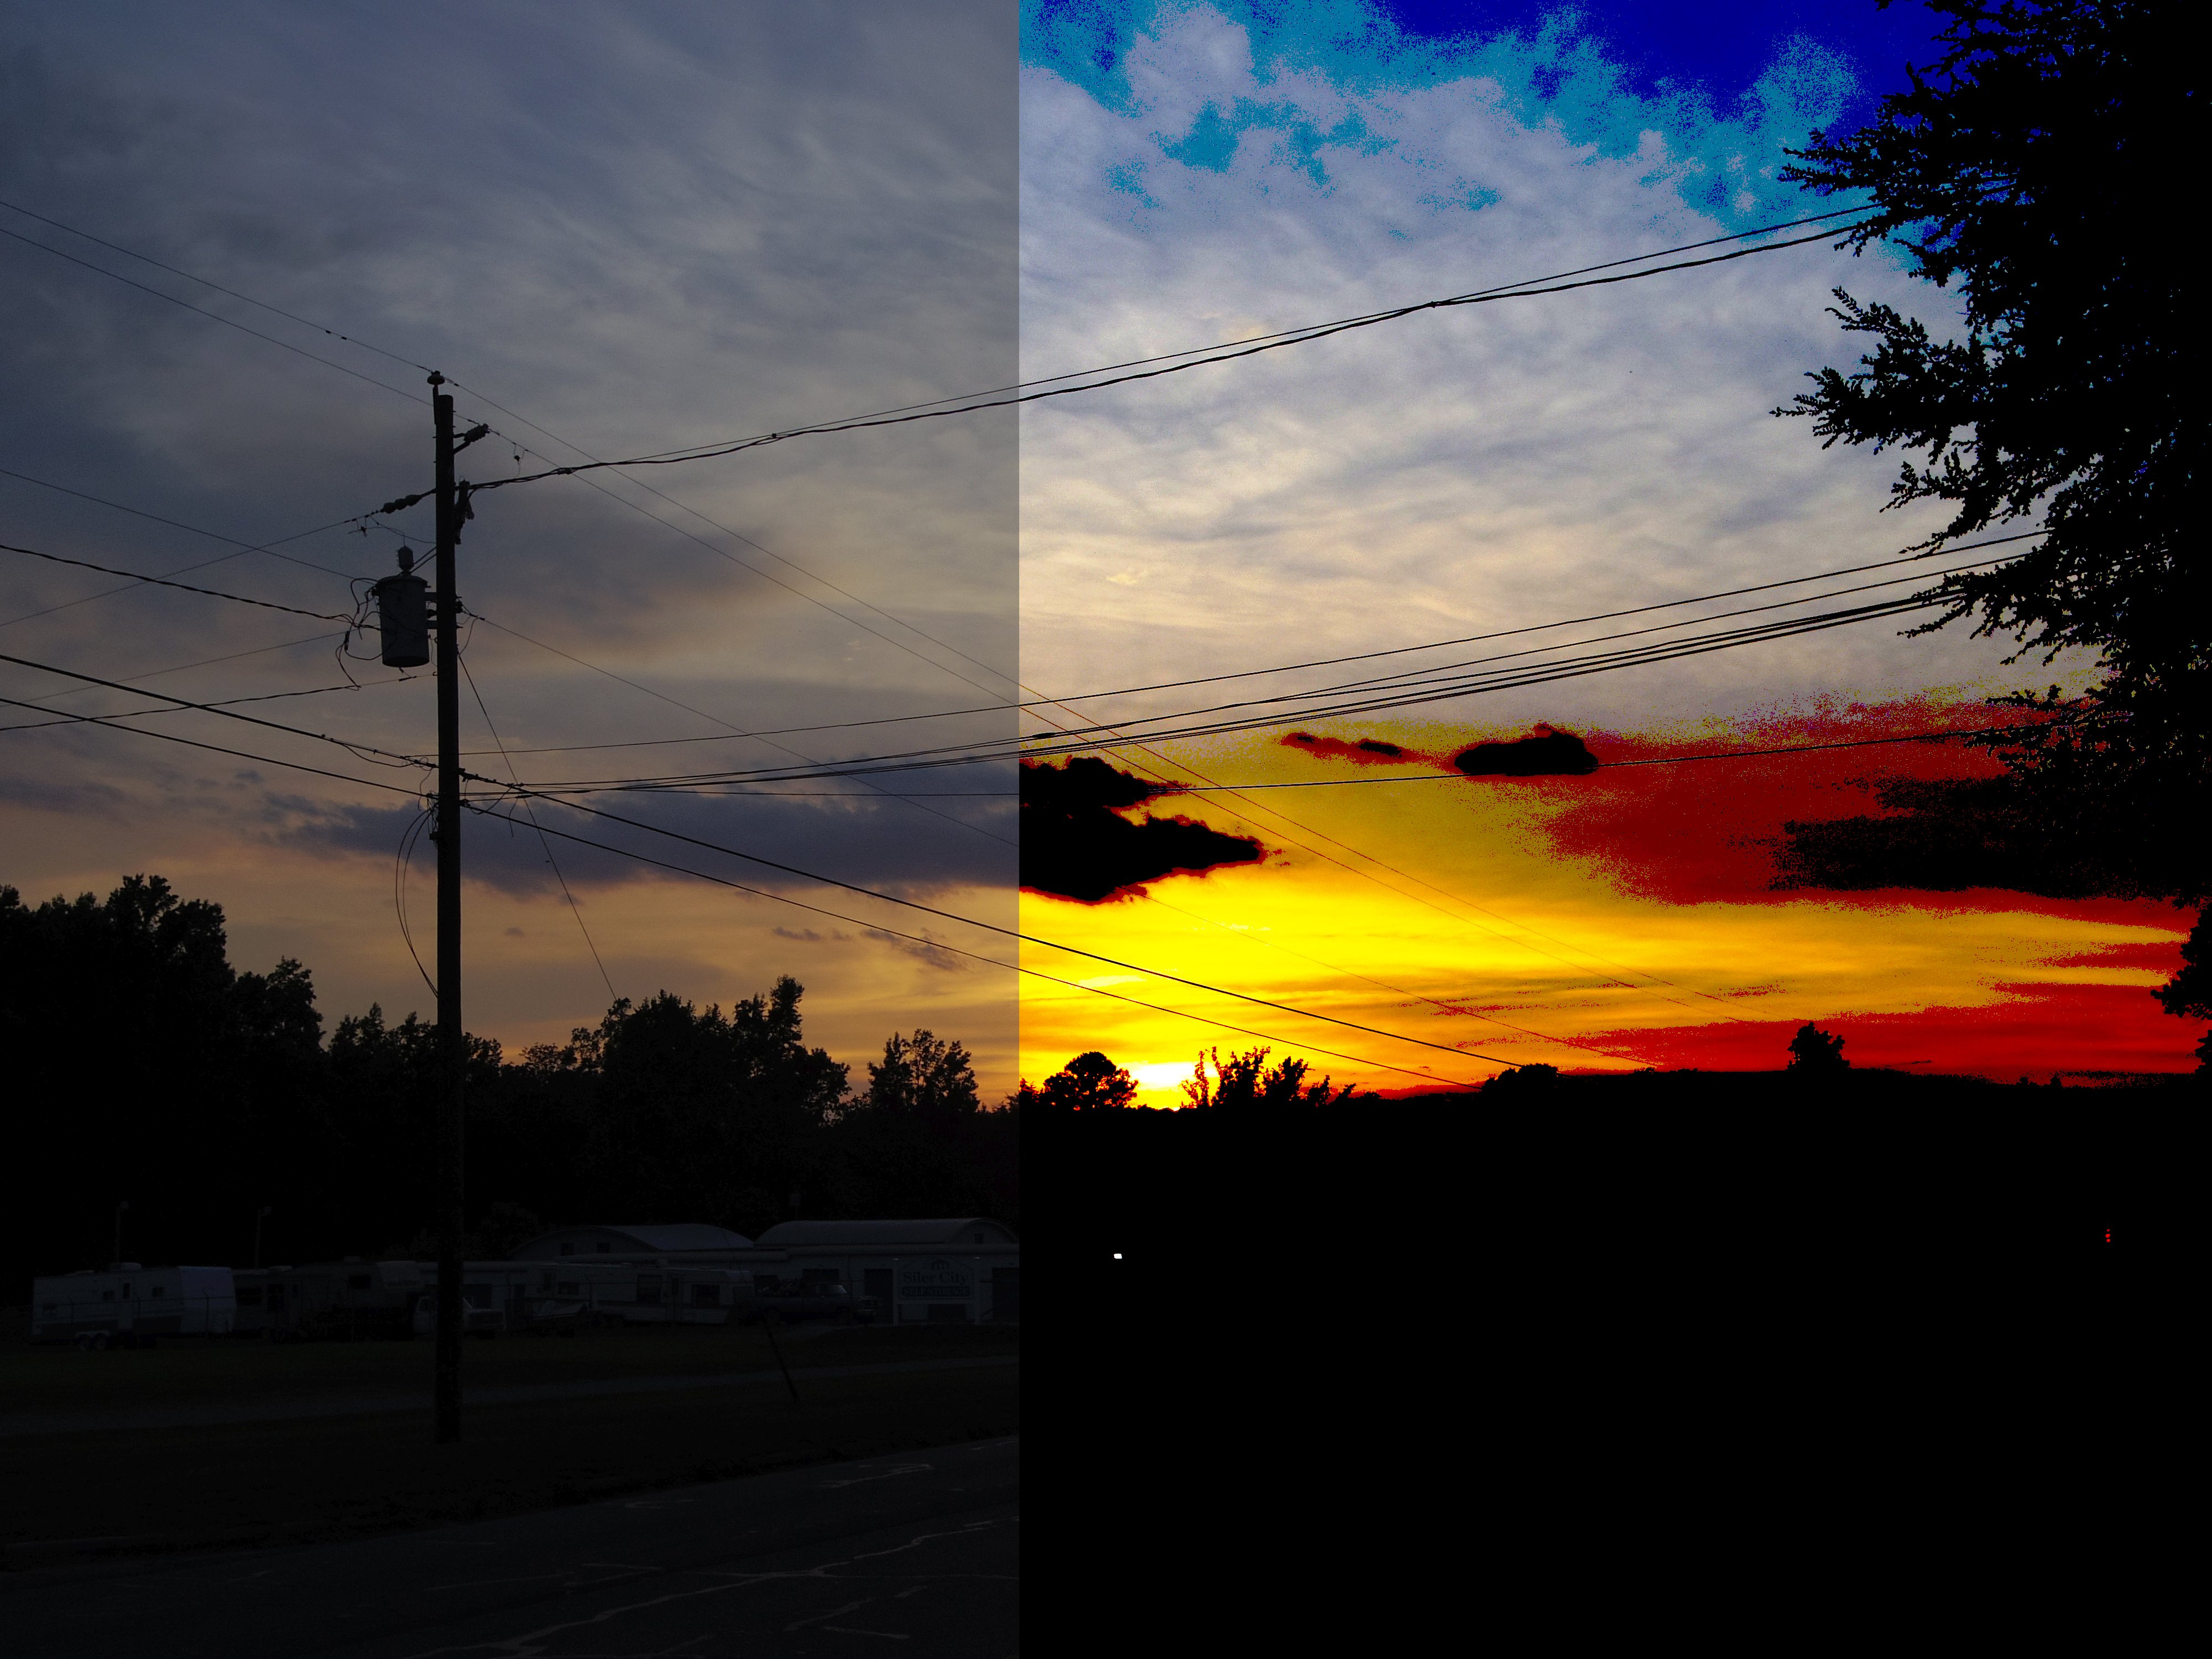
Split picture with normal sunset on the left and over-processed sunset on the right
The left side of this JPEG is unchanged. The right side has been pushed to the point that the image is very obviously breaking down. There isn’t enough information in a JPEG to handle drastic edits like this.

I just checked a RAW+JPEG shoot from my Pentax Q7 camera and while the size of a RAW is always about 19-20MB, the “in-camera developed” JPEG varies between 0.97MB and 2.25MB. The RAW file is about 10x to 20x the size of the JPEG file, and when you open at the RAW file in a RAW file developer program, they’re the same exact picture. So why would anyone ever want to capture these enormous RAW files instead of (or in addition to) JPEG files? If you’re just going to use the picture with minimal editing–or none at all–it just makes perfect sense to shoot JPEG and avoid RAW entirely. For a very long time, I never shot RAW because I was perfectly happy with my JPEGs. They looked great and I could edit quite a bit and never notice any loss of quality. Most beginners are in the same boat: JPEG images are more than enough and there’s no reason to shoot RAW with its colossal files and minimal perceived benefit.

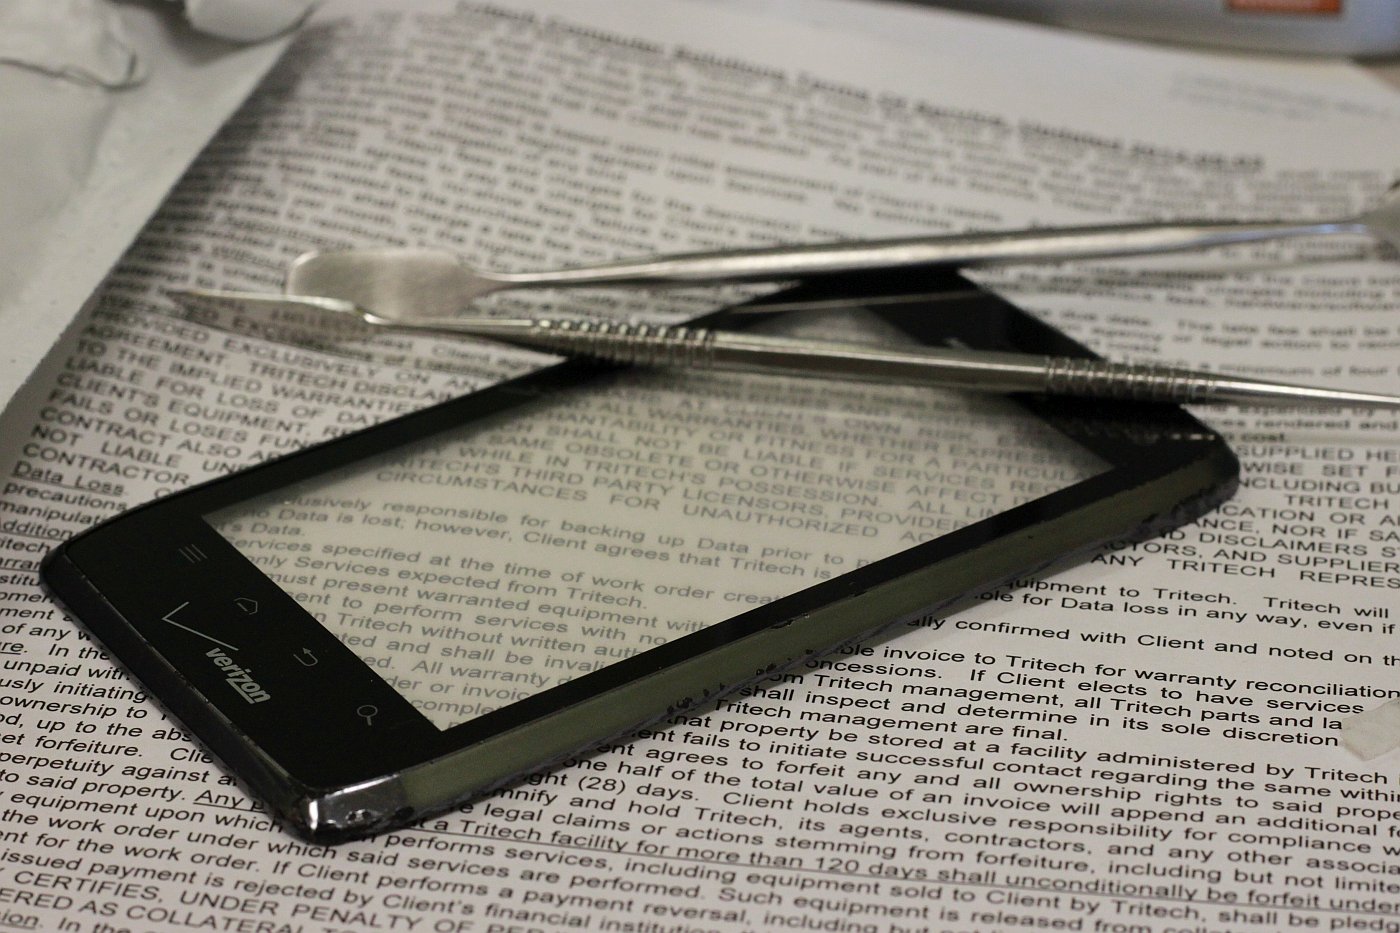
Cell phone screen with pry tools on top of a contract
This JPEG from 2012 has no corresponding RAW file to develop, but it doesn’t really need to. It looks like a stock photo (and probably should be one!) and I’ll probably never need to edit it beyond minimal corrections.

The benefits of RAW, told through real photos

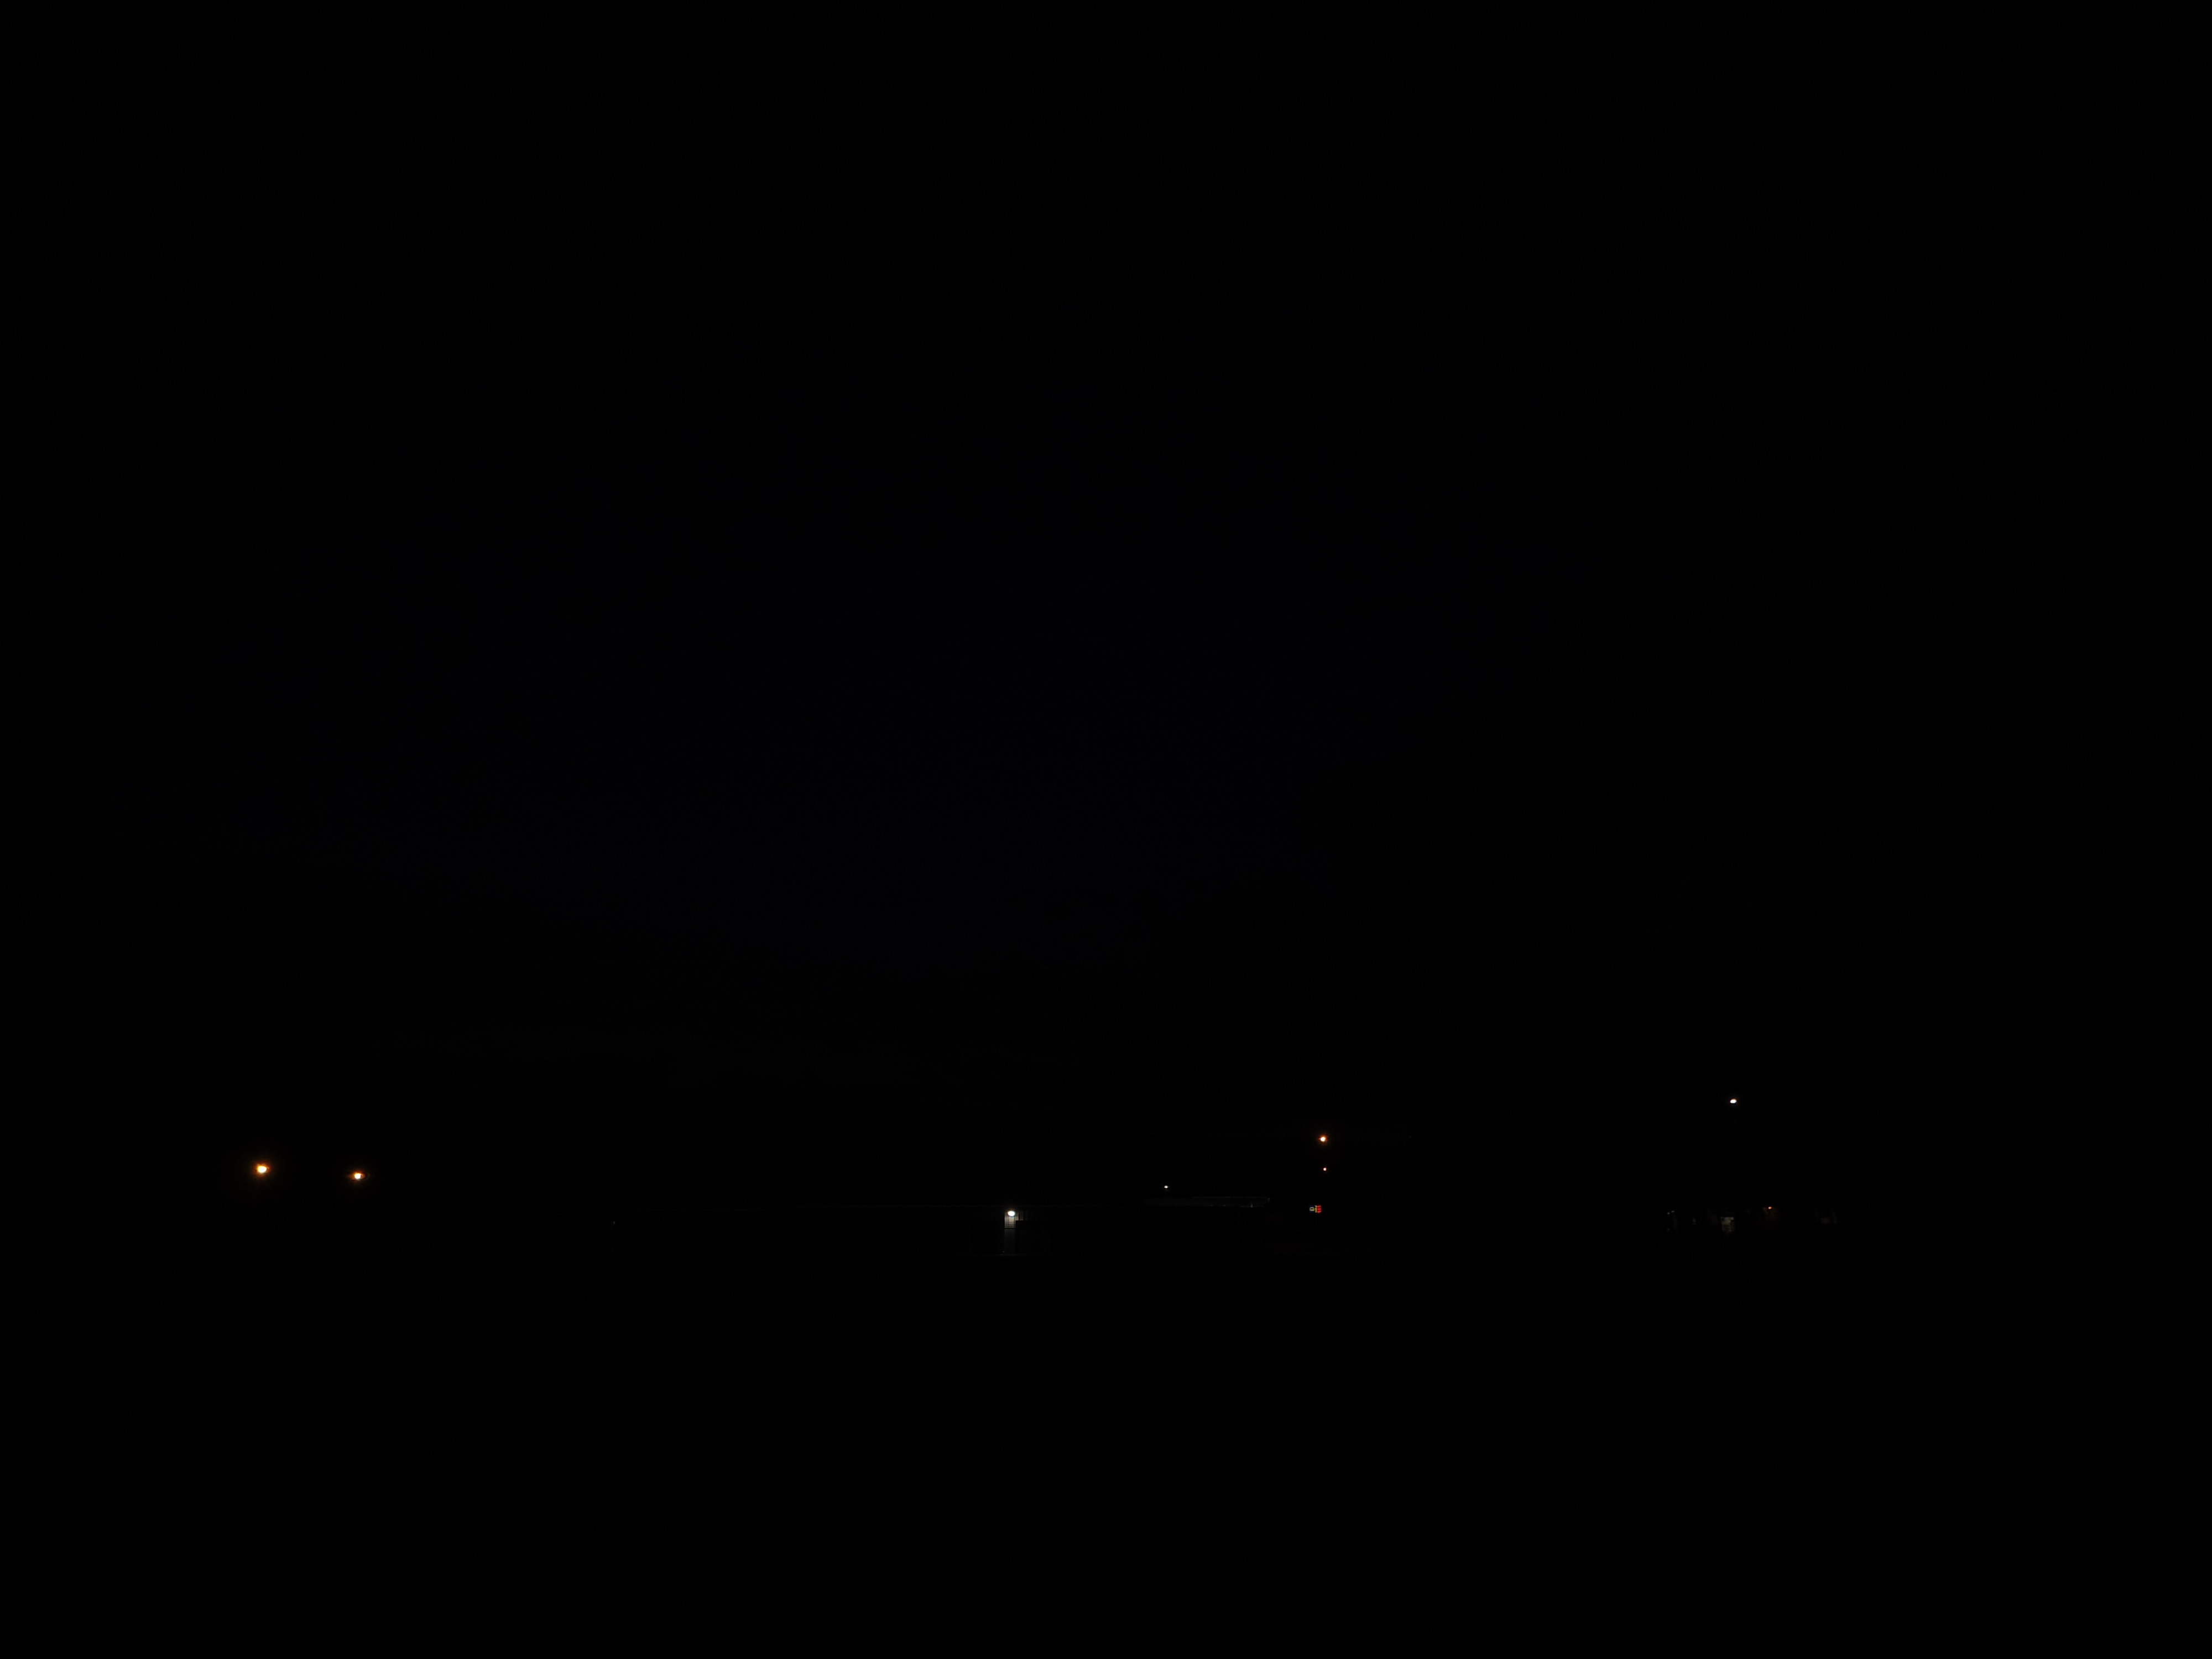
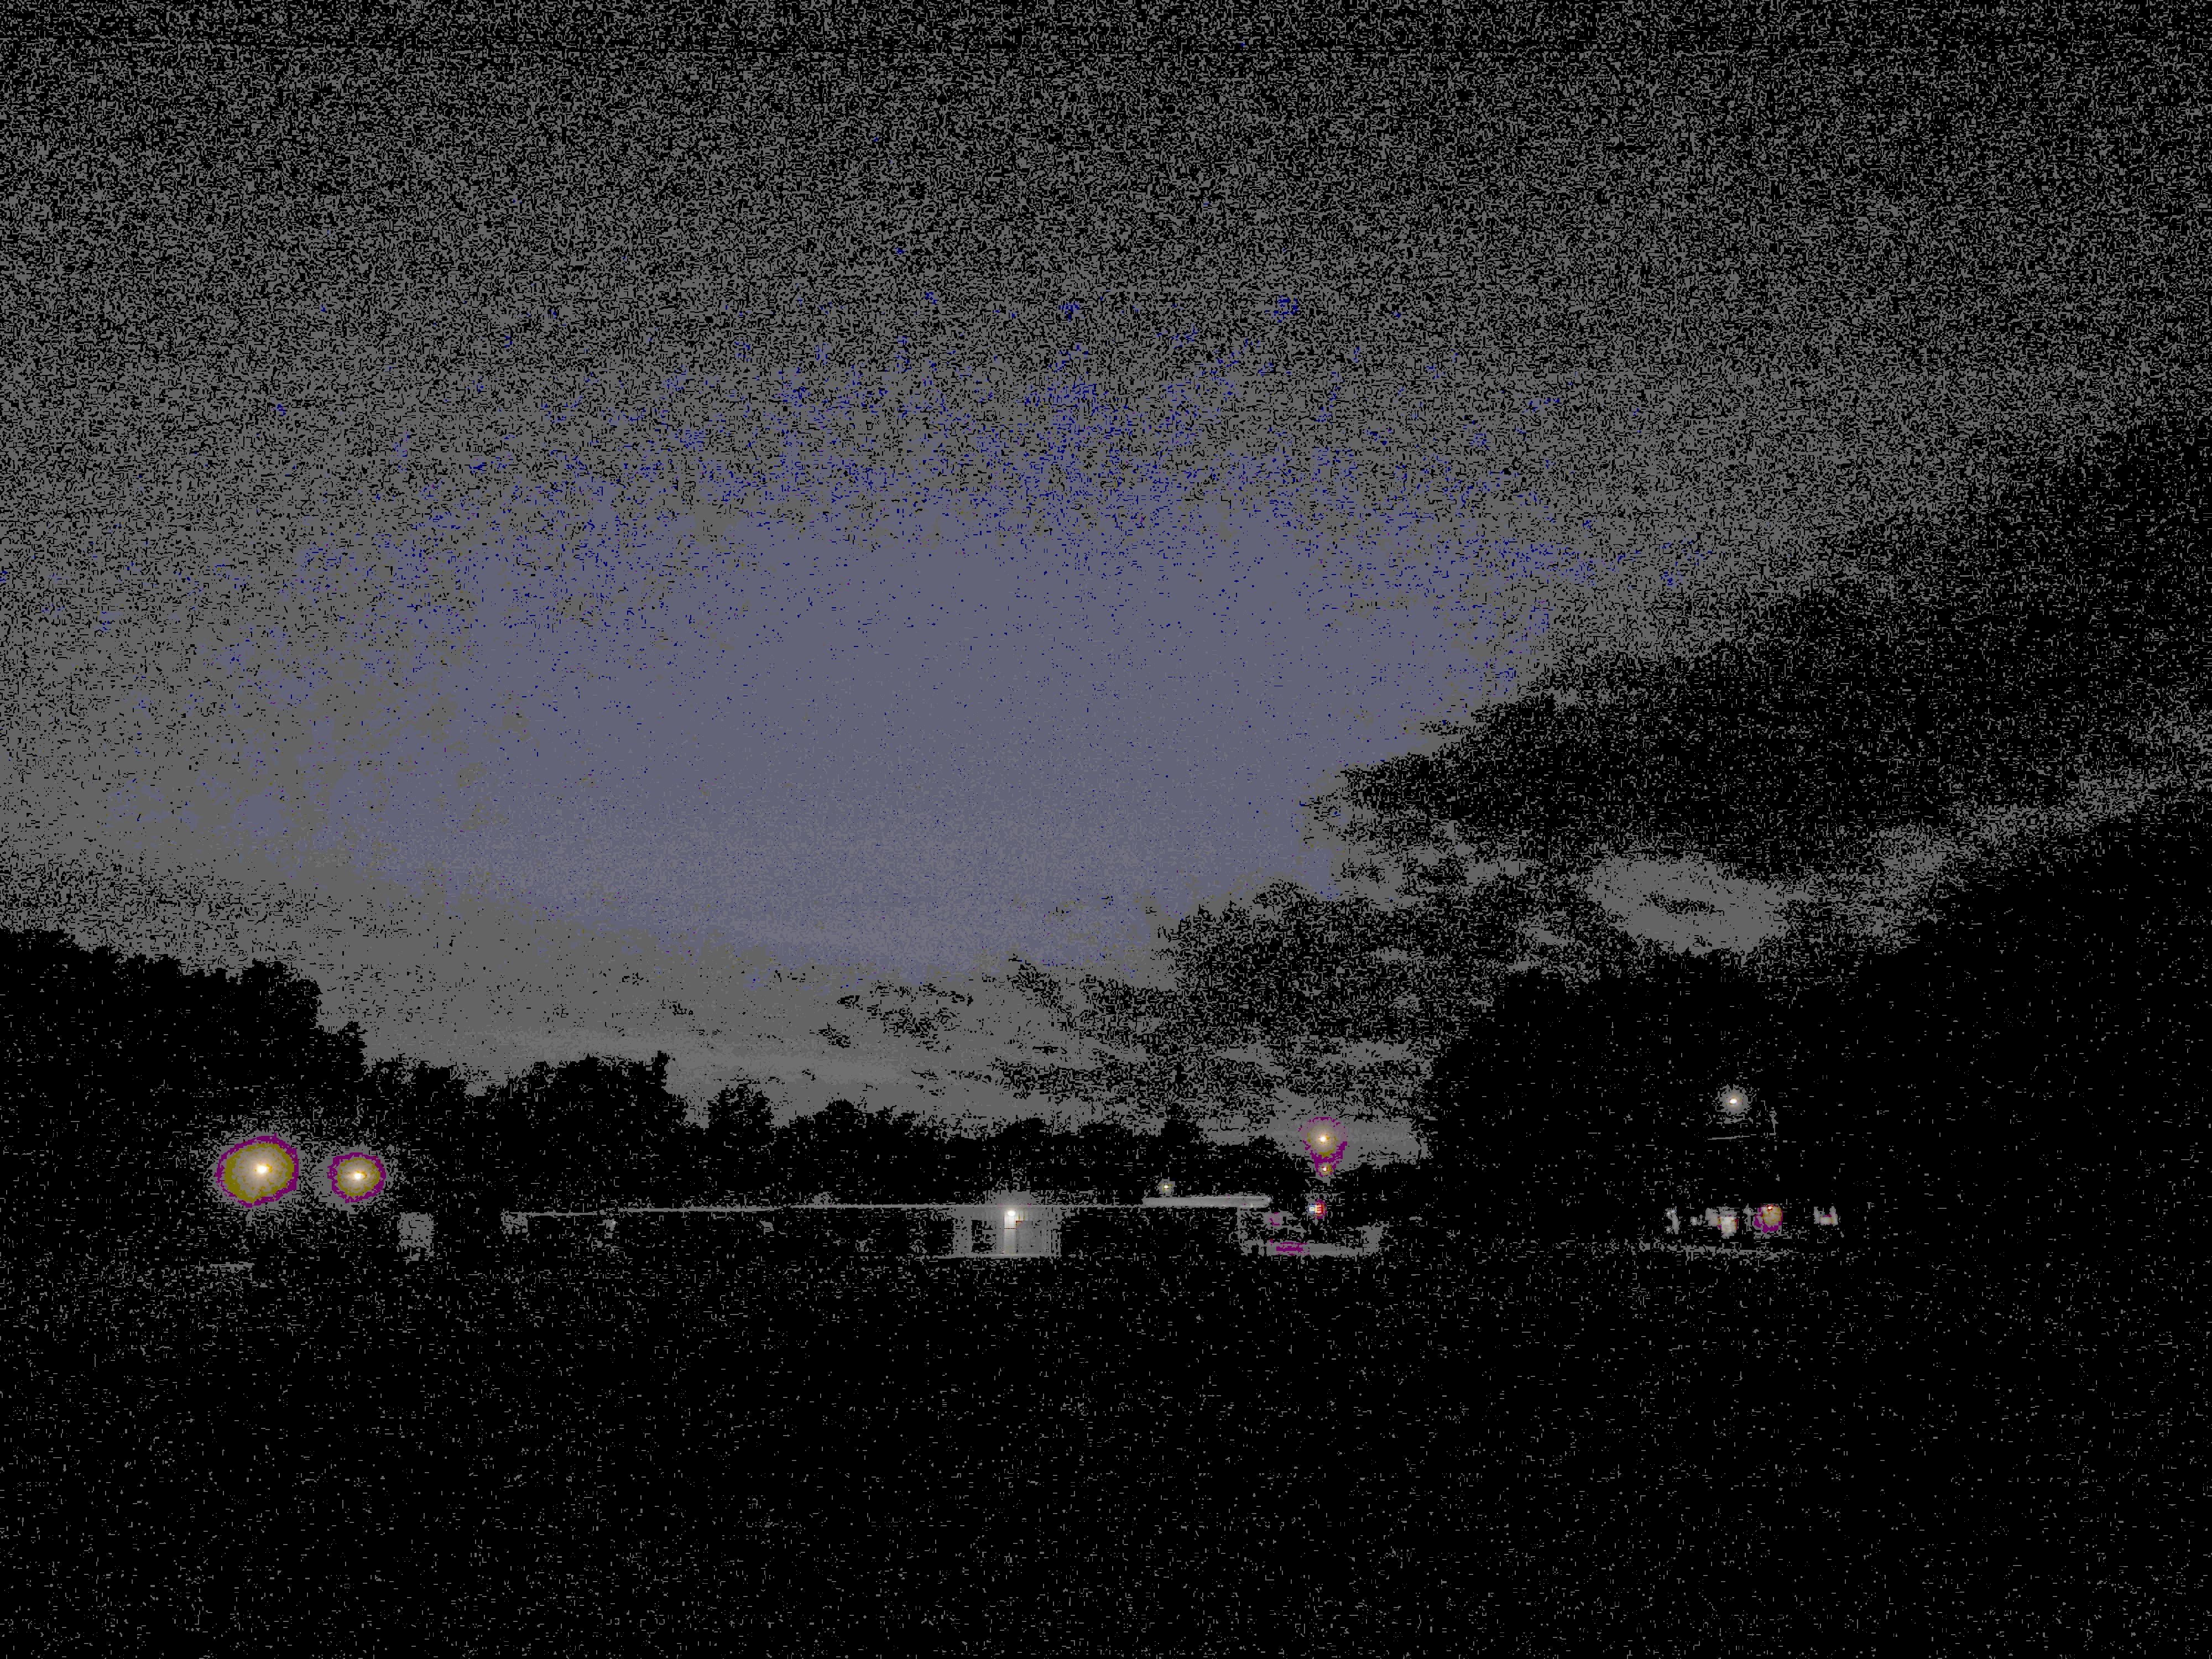
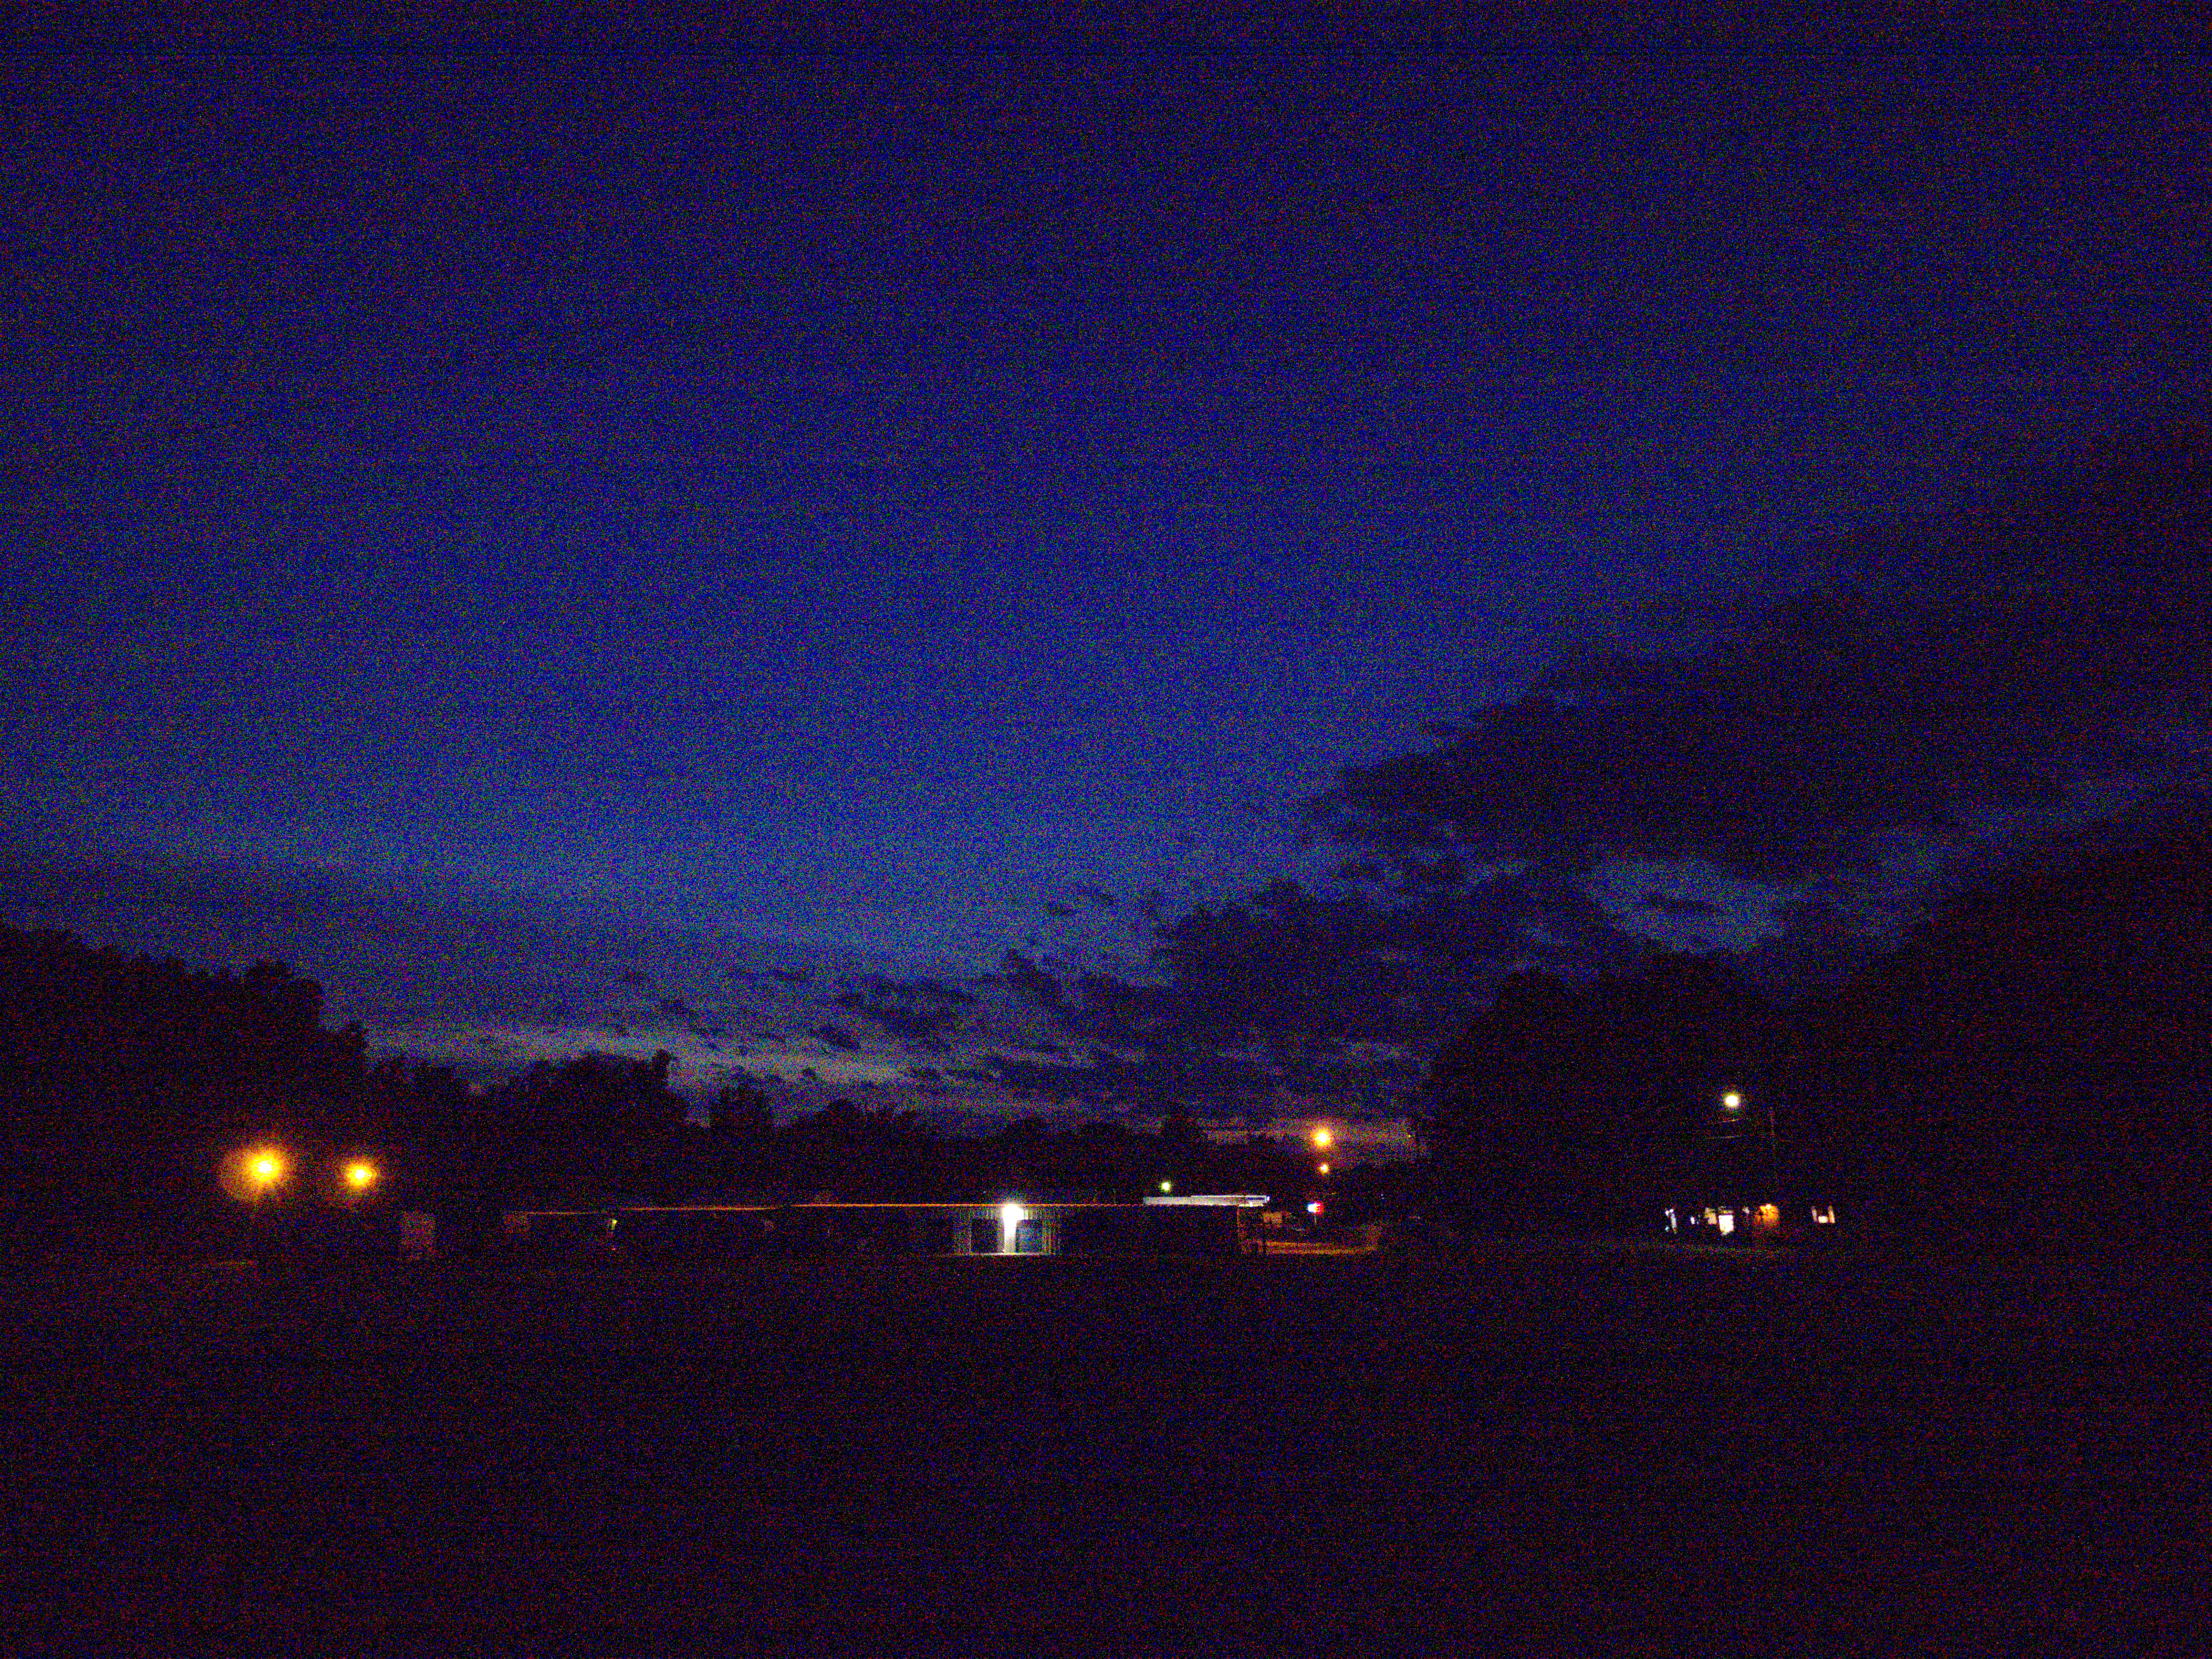
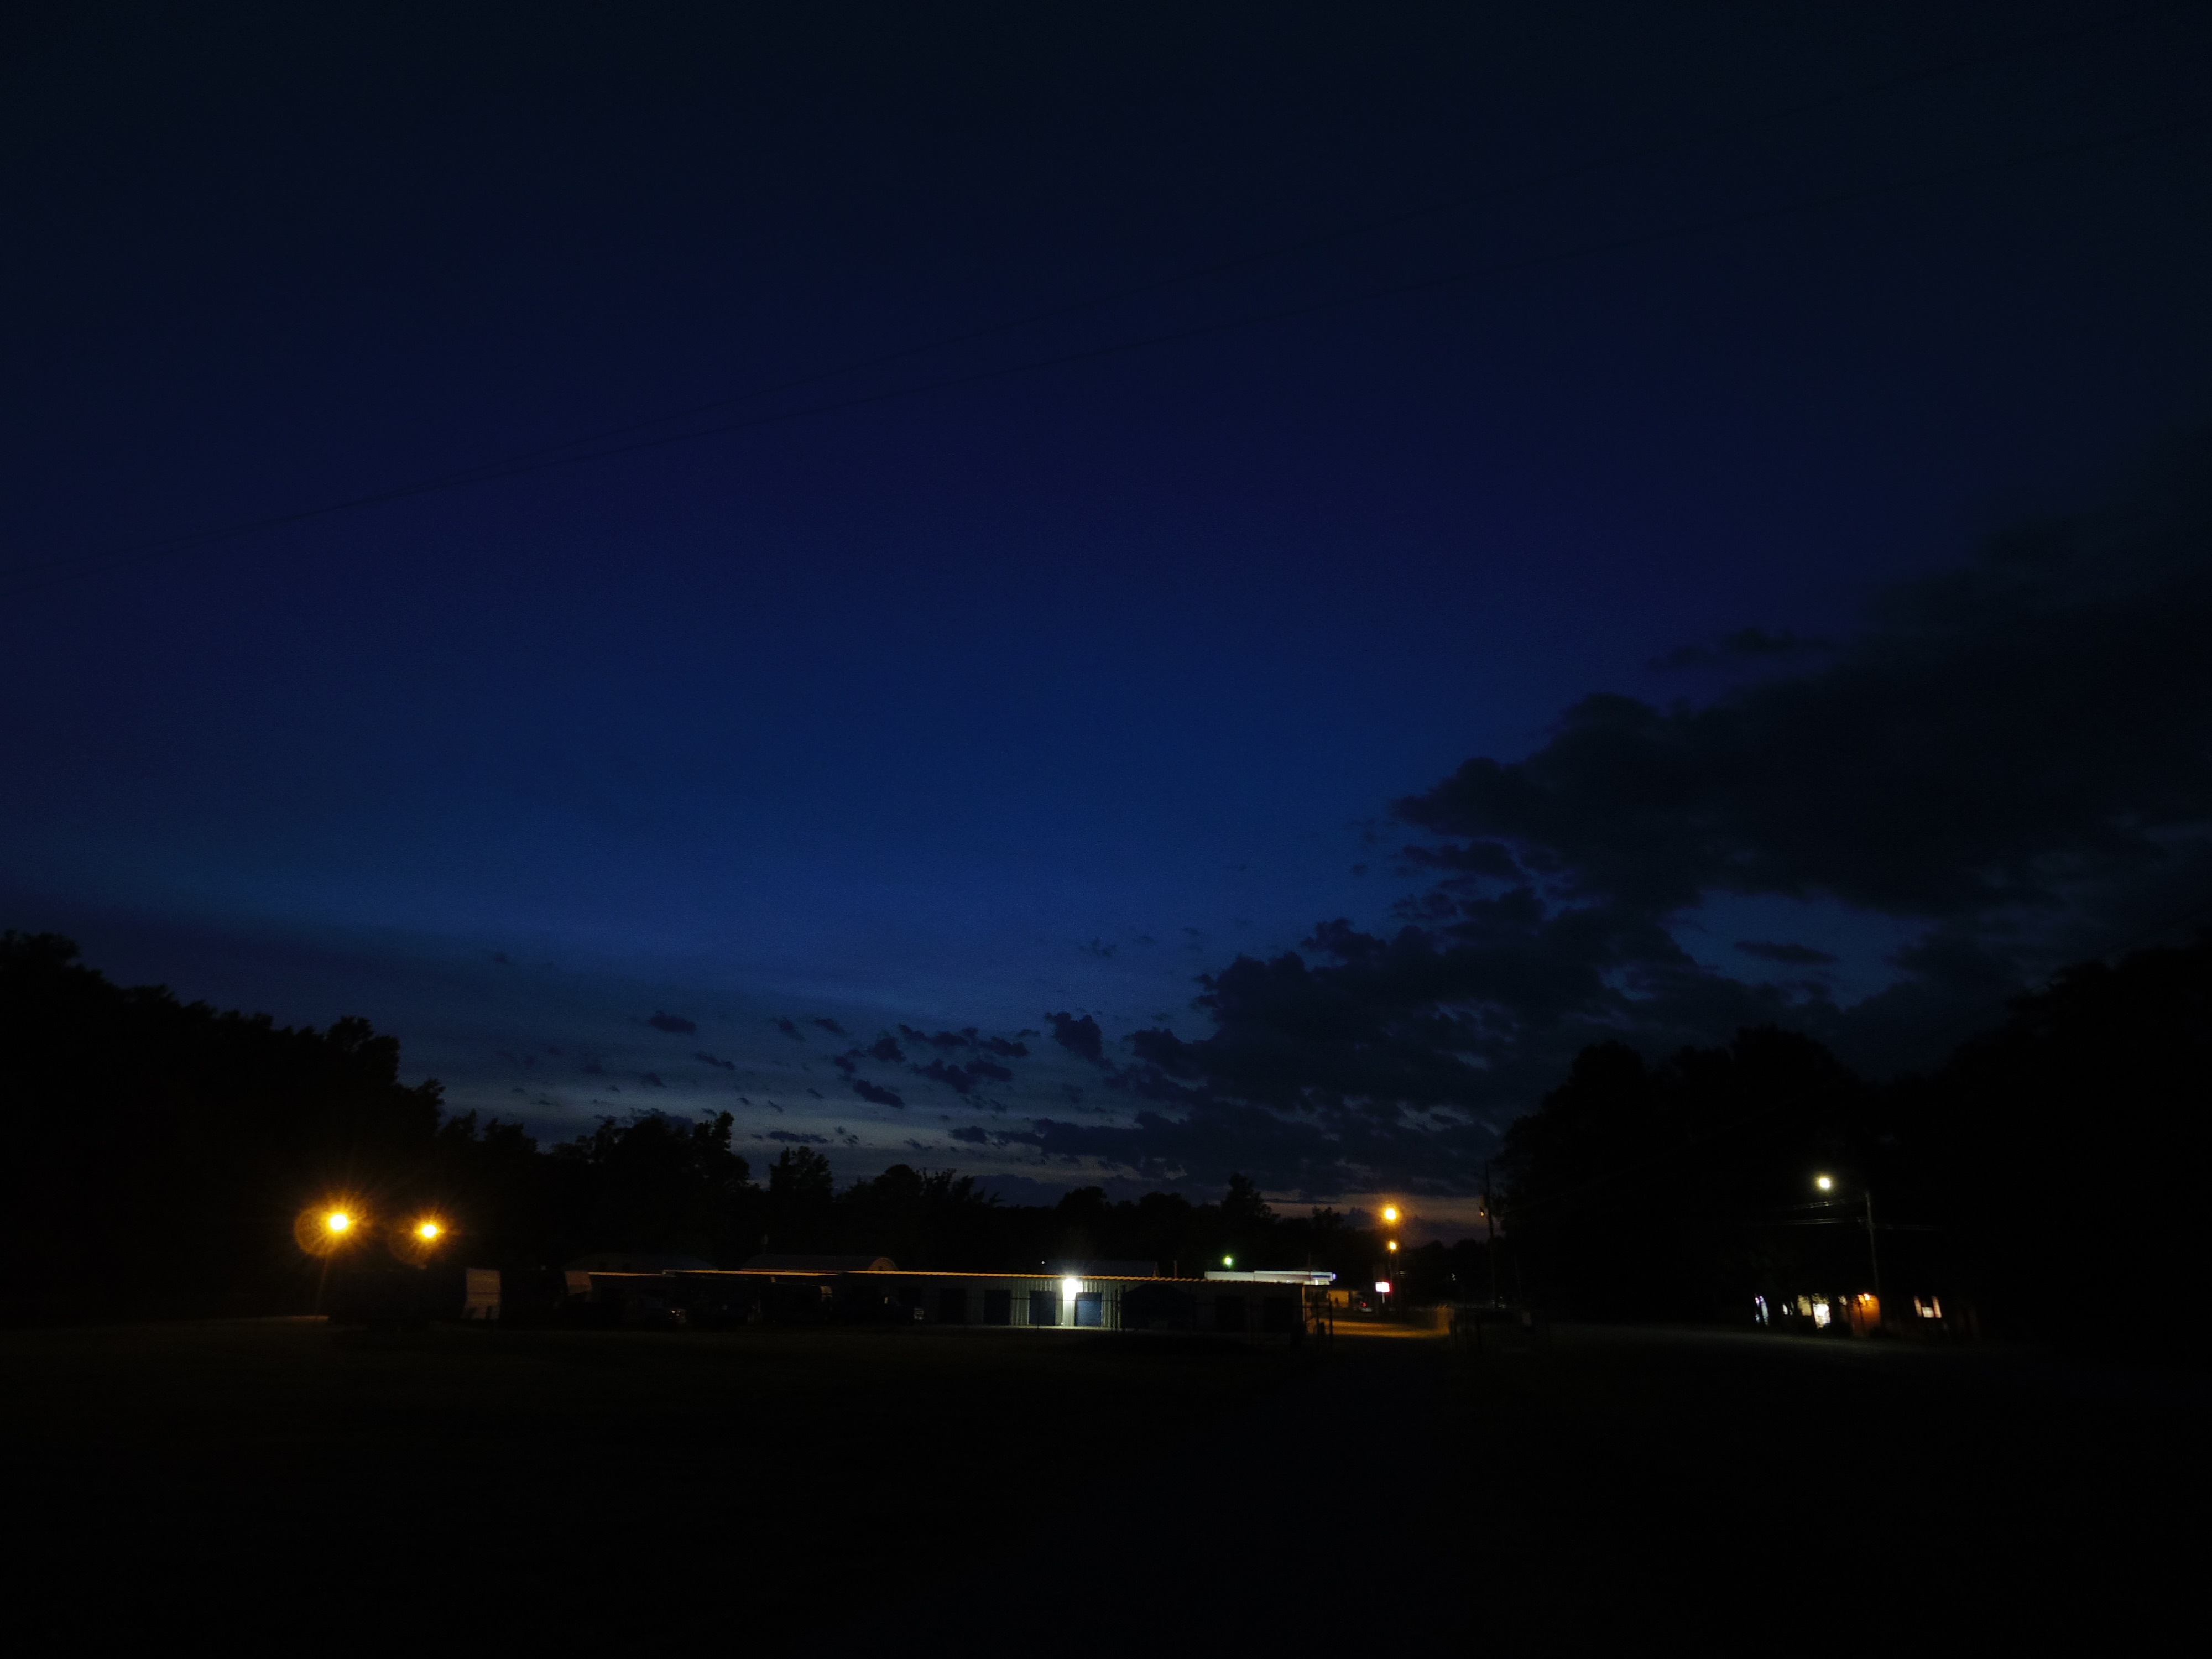
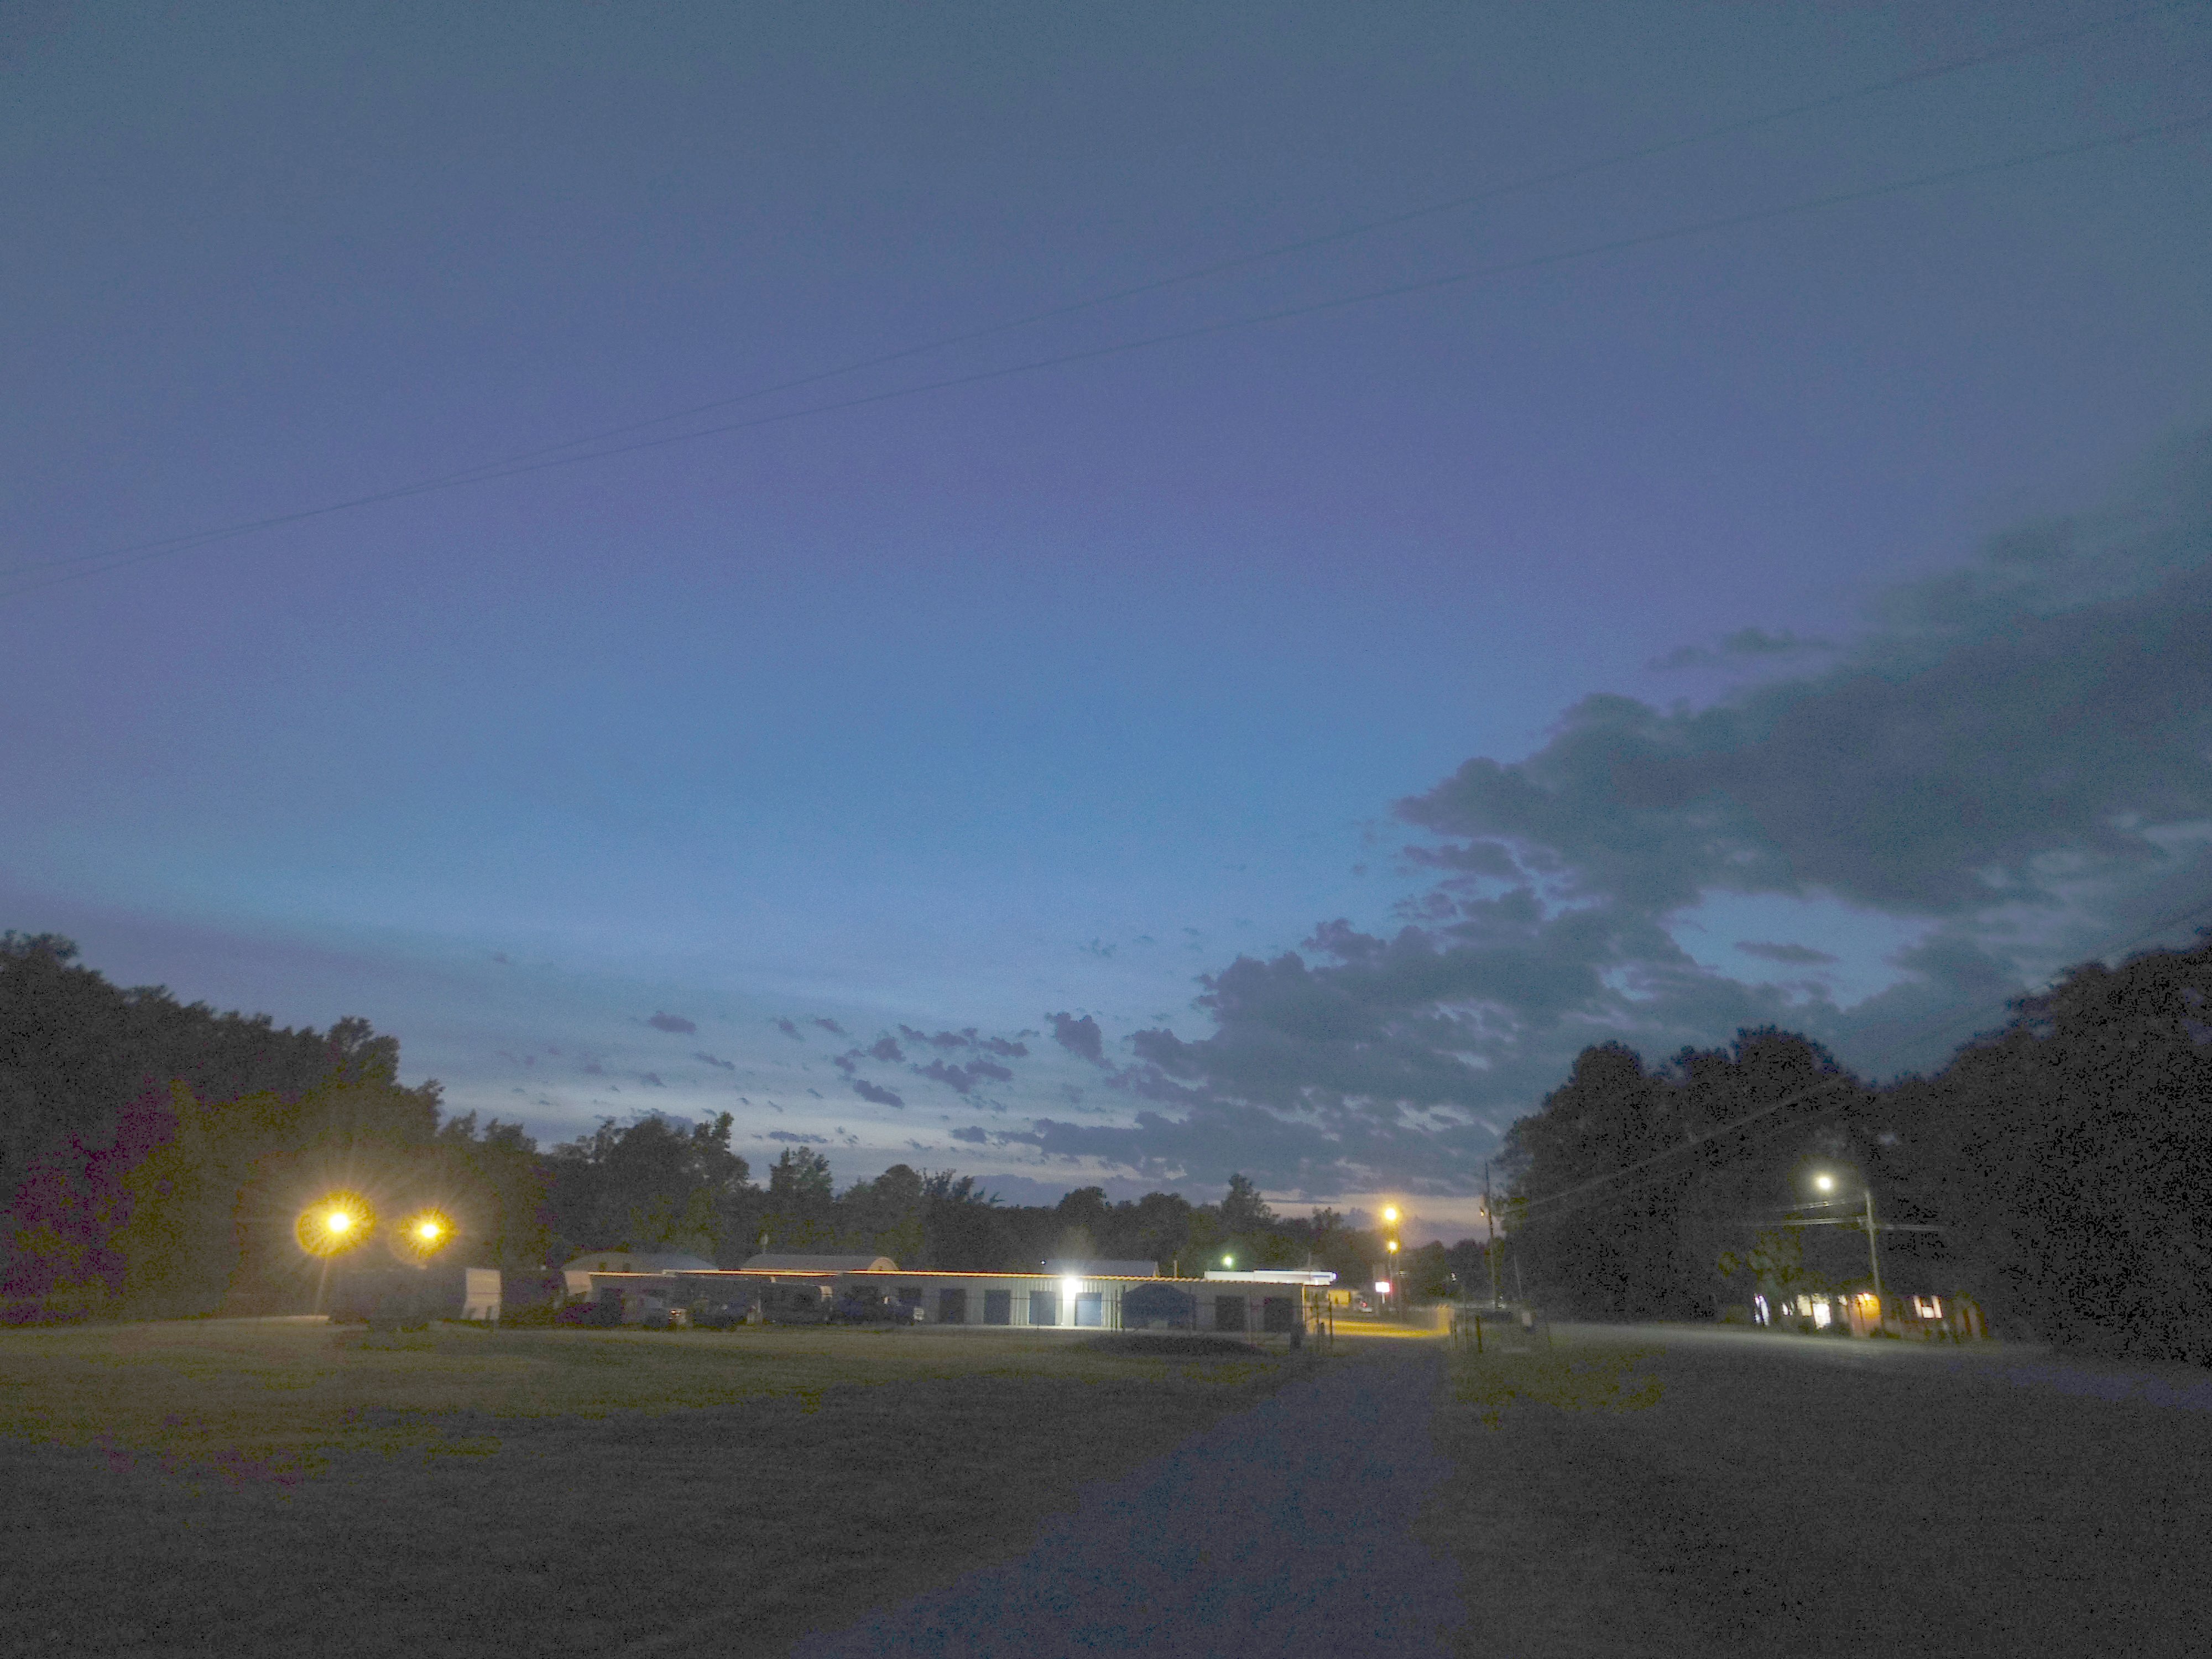
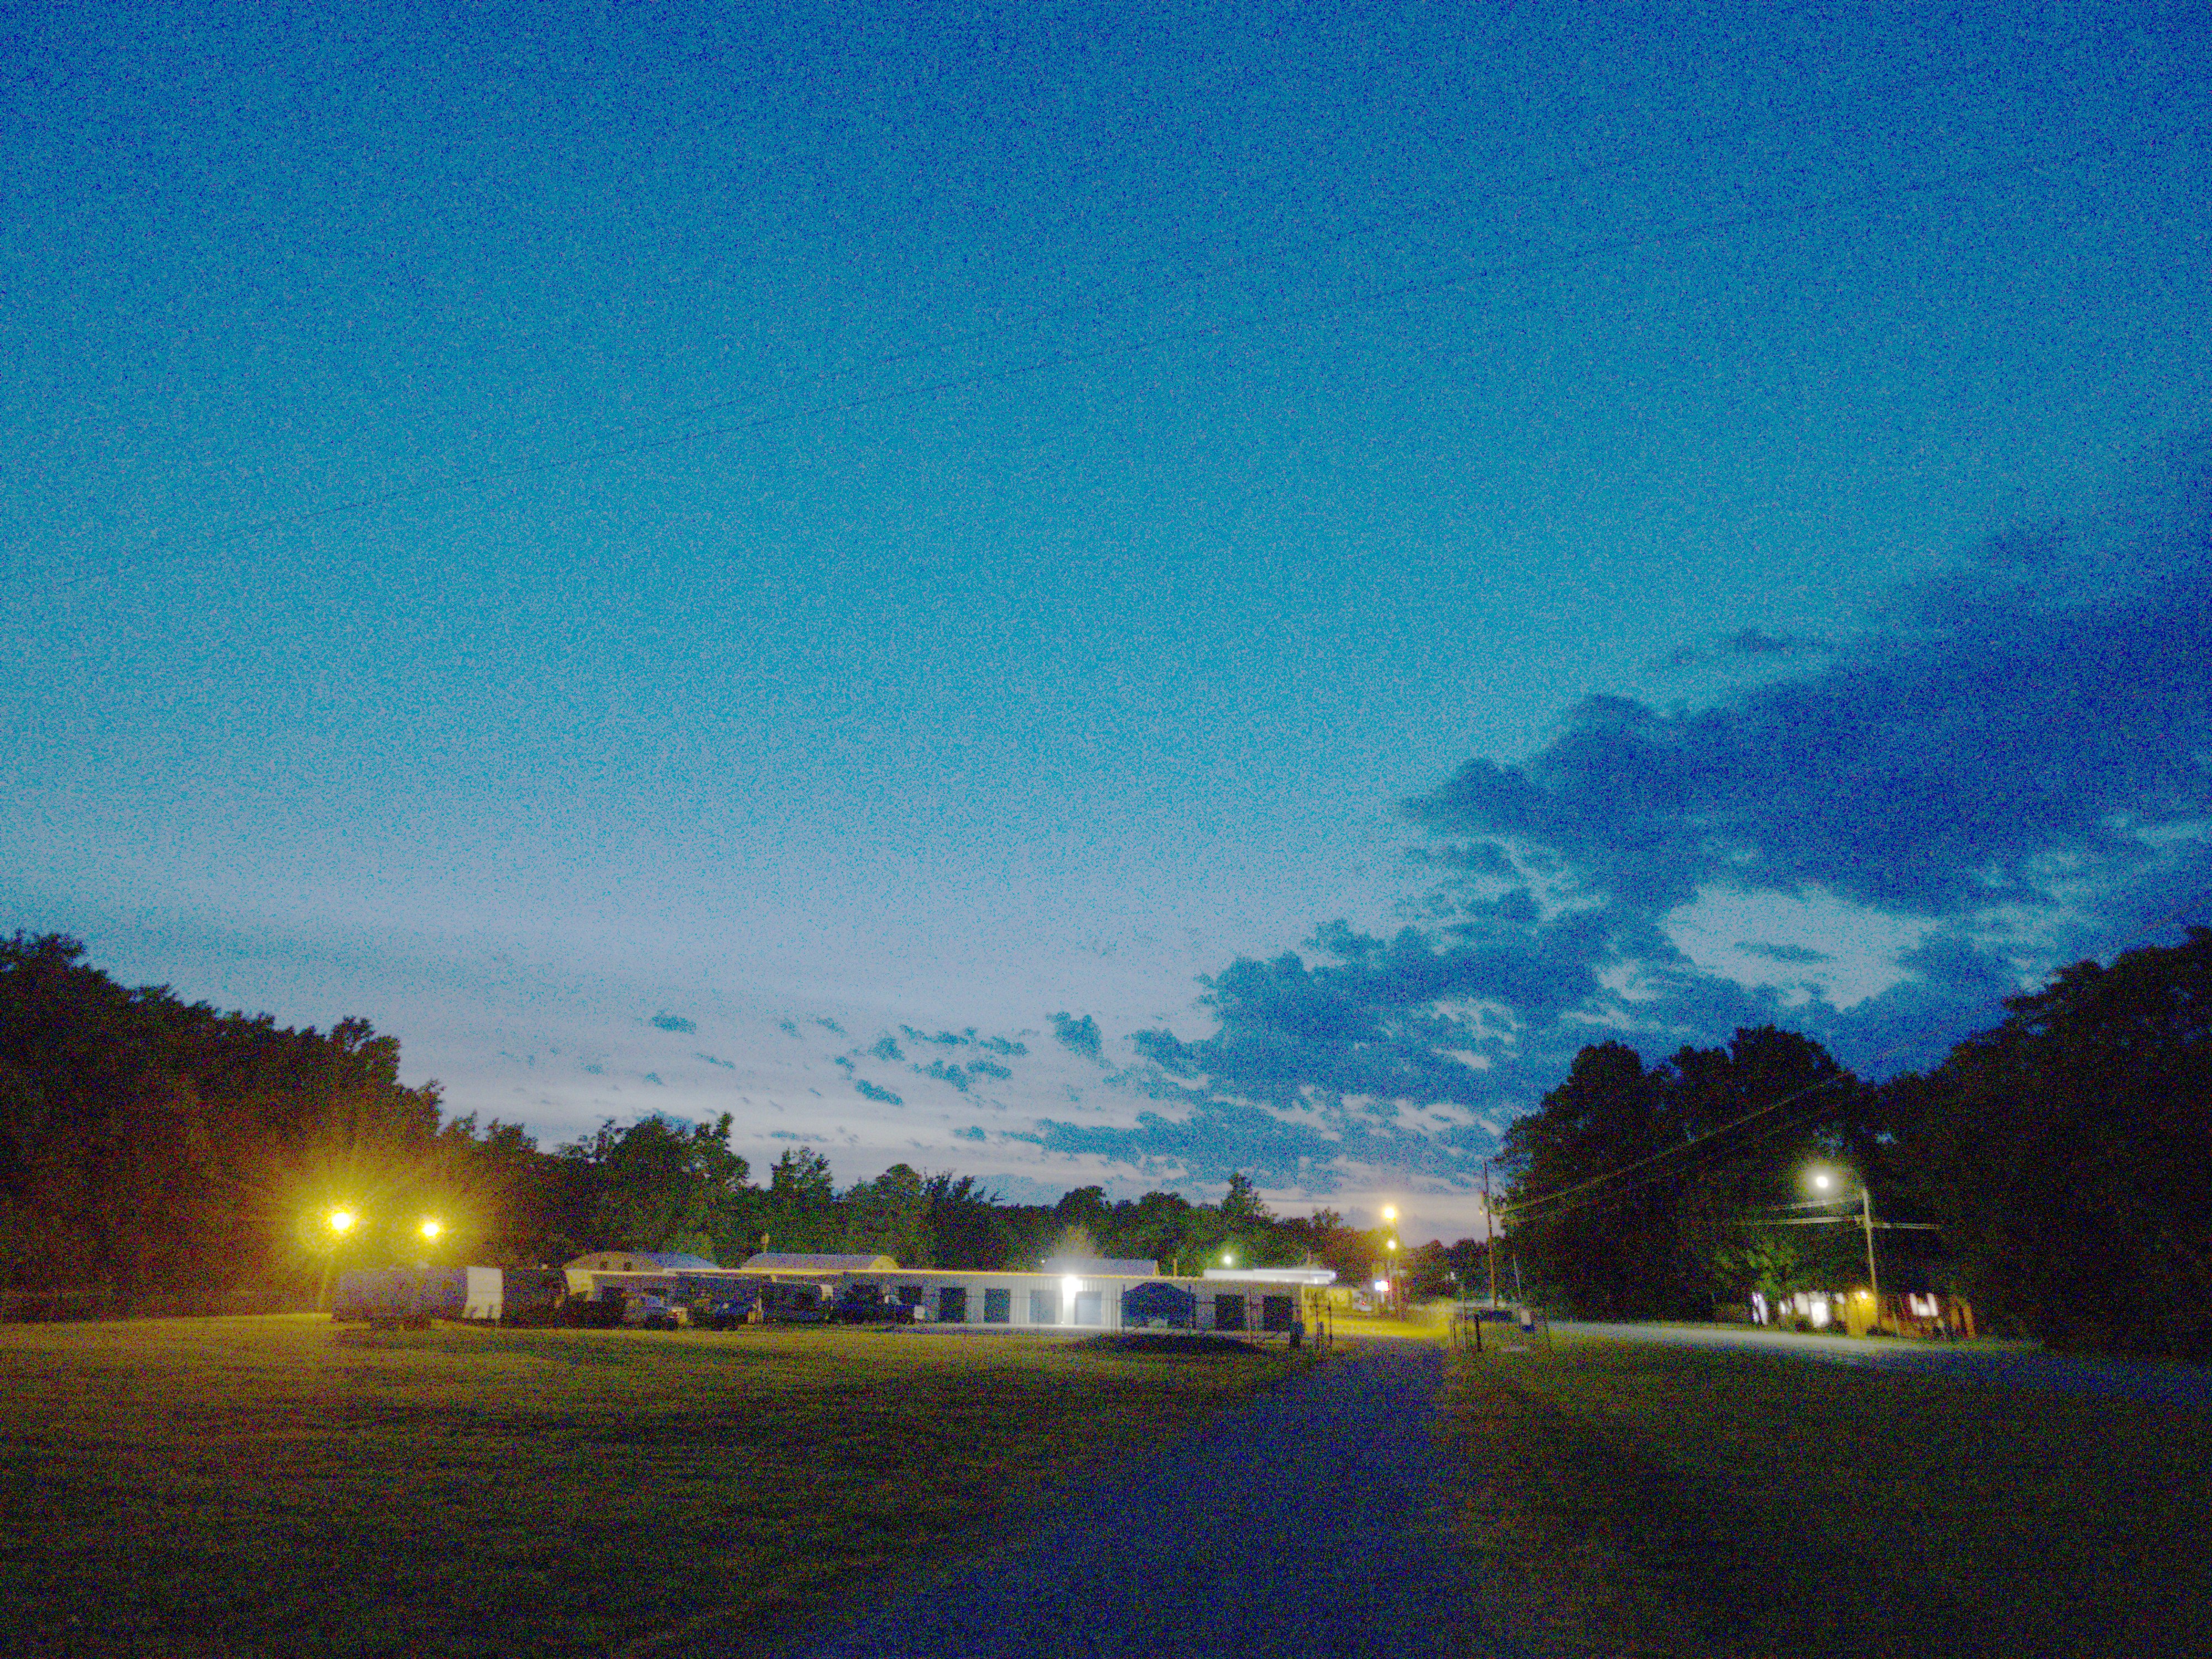
Why do I shoot RAW+JPEG today? As the saying goes, “a picture is worth a thousand words!” Take a look at the following three pictures. One is almost solid black because it’s the original JPEG, severely under-exposed, and all you see is the point light sources. One is the “black” JPEG with the gamma curve boosted to bring up the “black” area. One is the same picture, except this time it’s the RAW version with the gamma boosted to maximum and exposure set to +1.5 EV. The third one is a properly exposed JPEG of the same scene shot right after the “black” frame. What differences do you see?

"Black" original JPEG picture with no visible sky or environment.
“Black” original JPEG picture with no visible sky or environment. I accidentally set the camera to ISO 100 at twilight. Pentax Q7 with lens “08 Wide Zoom,” ISO 100, 1/60 sec., f/3.7
The same "black" JPEG picture with a massive gamma boost to reveal the "black" area.
The same “black” JPEG picture with a massive gamma boost to reveal the “black” area.
Developed RAW copy of the "black" JPEG with a gamma and exposure boost. It almost looks like a normal photo, except for the revealed sensor grid dot pattern.
Developed RAW copy of the “black” JPEG with a gamma and exposure boost. It almost looks like a normal photo, except for the high amount of noise.

Now that you’ve seen the immense power of recovering image details from a RAW file, let’s take a look at a properly exposed picture of the same scene taken right after the under-exposed one, and see what can be done with it.

More properly exposed JPEG of the same scene as the others, but not the same picture and not modified in any way. This is what the "black" picture was meant to look like.
More properly exposed JPEG of the same scene as the others, but not the same picture and not modified in any way. This is what the “black” picture was meant to look like. It is obviously better because it was exposed as originally intended. Pentax Q7 with lens “08 Wide Zoom,” ISO 3200, 1/30 sec., f/3.7
A similarly brightened version of the properly exposed JPEG above
A similarly brightened version of the properly exposed JPEG above. Notice how almost all color information is lost in the dark areas and has been reduced to ugly, noisy splotches of yellow, red, and green.
The same properly exposed JPEG, except instead it's the RAW developed and brightened.
The same properly exposed JPEG, except instead it’s the RAW developed and brightened. The noise is very high, but even when brightened up more than the brightened JPEG, the picture looks more like the original scene.
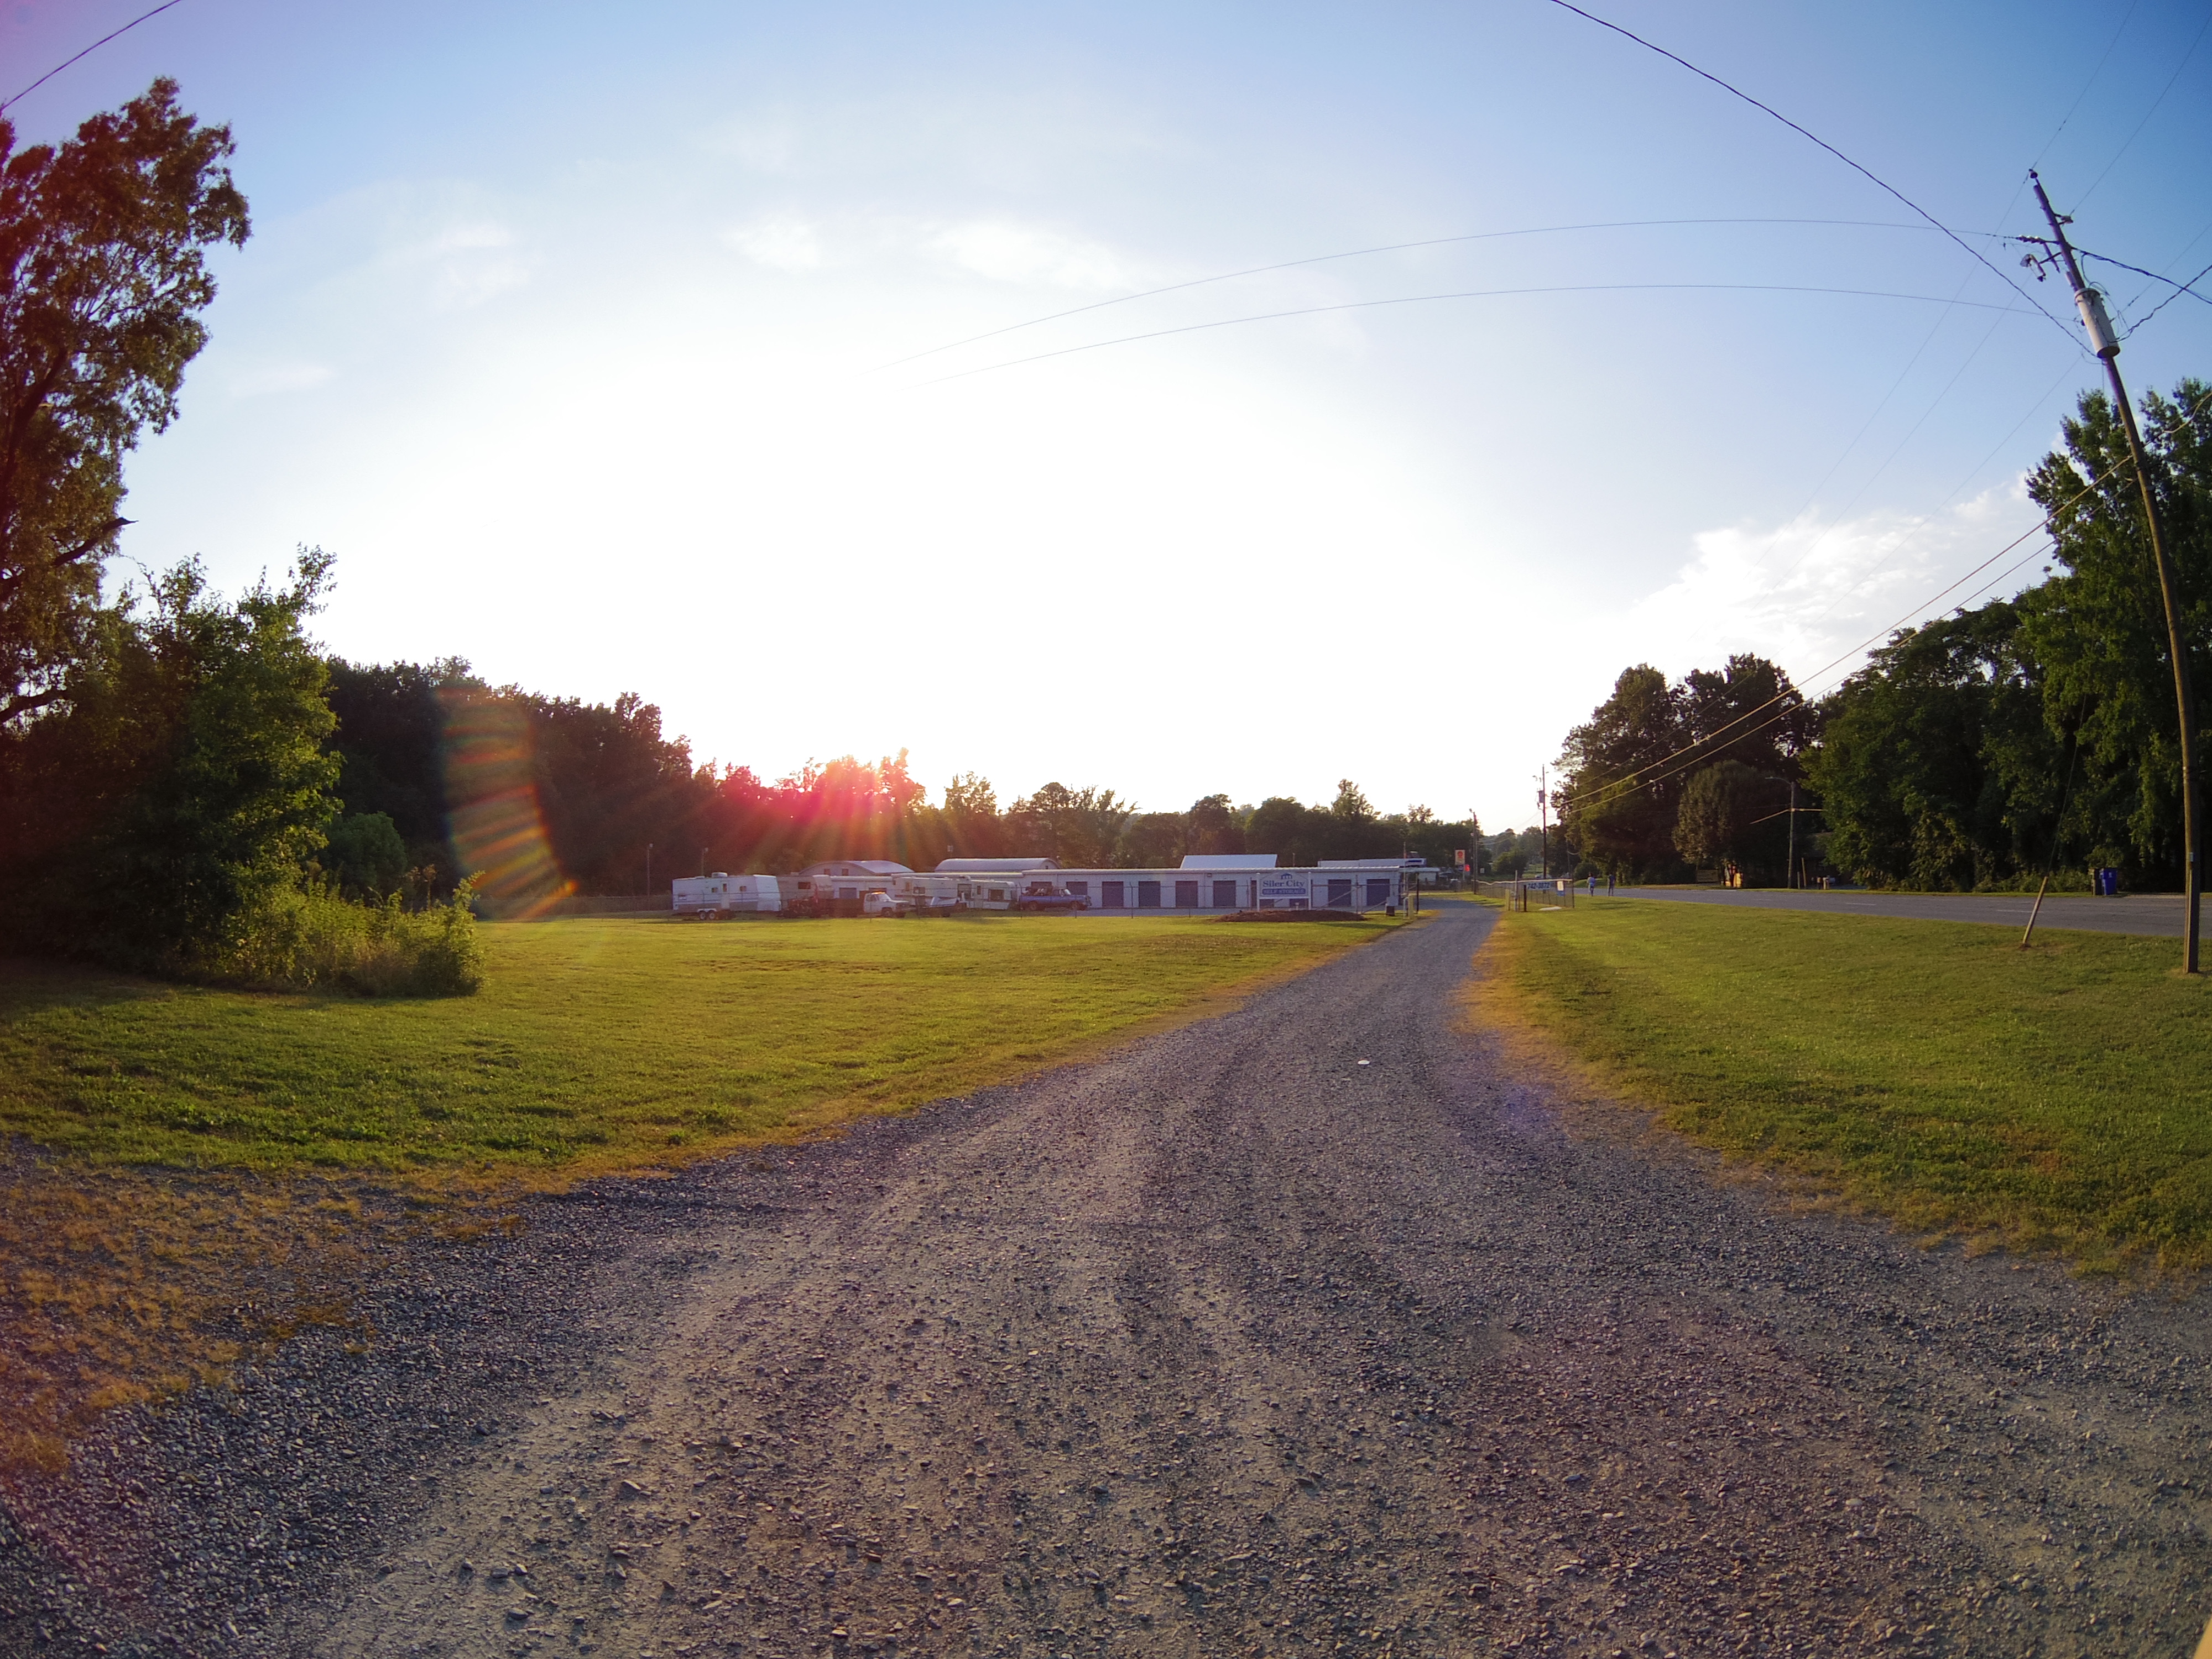
The same area just before sunset.
The same area just before sunset. This was shot with a fisheye lens on a different day, but it gives you a general idea of the layout underneath the noise in the other pictures.

It should be painfully obvious that getting the correct intended exposure the first time around is the best way to take a photo, but what if you only get one chance and you under-exposed? That sort of common mistake is where taking RAWs becomes very useful.

A technical explanation of what’s going on

A JPEG typically stores 8-bit color data with 4:2:2 chroma subsampling (half the color data is thrown away), but a RAW stores 12-bit (or more) data for four color channels (red, blue, 2x green is the most common format) and doesn’t subsample at all. That’s why RAW files are huge: they store 50% more color detail for red and blue, and 3x the samples for green, and they don’t throw away color data for half of the pixels to save space. This is a major disadvantage for sending and storing pictures because there’s so much data that isn’t needed for human visual perception, but the above pictures show off the powerful detail recovery capabilities that you get when you capture RAW files. Because a RAW file contains (roughly) four times the data of a JPEG file, there is a lot more subtle detail available, and this becomes important once you start pushing pictures towards the limits of what they can handle. Where the boosted JPEG above has so little data that only a monochrome ghost of the scene is recoverable from the shadows, the RAW has 16 more subtle levels of brightness for every color channel that makes up every pixel. That means that if you increase the exposure of the picture by 5 stops, you won’t lose subtle gradients to the limits of 8-bit values. Do you really need more proof of RAW’s amazing flexibility when pushed to extremes than the pictures above?

Of course, a RAW doesn’t matter much if you’re just going to pull it into Lightroom or RawTherapee or UFRaw and “develop” it to JPEG without any changes. JPEG images are drastically smaller and you can shoot continuous bursts of them almost infinitely with a modern camera. Most photojournalists today shoot JPEG because news agencies don’t want RAWs and time is almost literally money to them. JPEGs are so much smaller that you can store an order of magnitude more JPEGS in the room taken by RAWs. As with so many things, it’s a trade-off, and many people will shoot JPEG forever and have zero regrets. That was me for a very long time, in fact! JPEG is good enough for most needs.

When to shoot RAW only

  • You want to preserve every last bit of detail in a picture
  • You plan to edit your pictures and need the added latitude offered by RAW format
  • You don’t need continuous burst shooting (most cameras can only buffer a few RAWs before they must stop shooting to write them out)
  • You don’t need quick sharing or interchangeable editing ability
  • You will batch process the RAW files to JPEGs later
  • You want to bypass the in-camera noise reduction and preserve as much fine detail (and noise) as possible

When to shoot JPEG only

  • You need to be able to share images quickly without dealing with the RAW development process
  • You don’t have (or want to use) the storage space required by RAW files (Depending on the camera and the photo, RAWs are 3x-20x larger than JPEGs)
  • You need to be able to do continuous burst shooting without pausing
  • You don’t intend to do heavy editing to your pictures
  • You are happy with the results provided by the in-camera noise reduction
  • You don’t mind a small but usually imperceptible loss of image quality and having no way to recover that lost quality

When to shoot RAW+JPEG

  • You need both quick sharing ability and RAWs for custom development or heavy editing
  • You don’t need continuous burst shooting (RAW+JPEG uses the most space and stops burst shooting sooner than just RAW)
  • You have plenty of storage space and don’t mind managing duplicate versions of every picture you take
  • You are asking yourself if you should shoot RAW or JPEG and can’t decide

It’s your choice, so make it a good one

As with all things, RAW versus JPEG is a set of trade-offs.  You have to decide what suits you. I spent about eight years only shooting JPEGs and I never had a complaint, but I was also shooting those JPEGs on a Canon DSLR and a good Panasonic mirrorless camera, not a cheap point-and-shoot. When I started buying old cheap point-and-shoot cameras to challenge myself, I discovered that the results were generally poor compared to my better cameras, partly due to the smaller sensors, but more because a cheap point-and-shoot will do heavy in-camera image processing on a weaker CPU than that of a big camera. For Canon point-and-shoot cameras, I discovered the awesome CHDK firmware which adds RAW shooting capabilities and makes a huge difference. CHDK RAWs transformed my point-and-shoot Canon cameras into much more useful tools. Check it out:

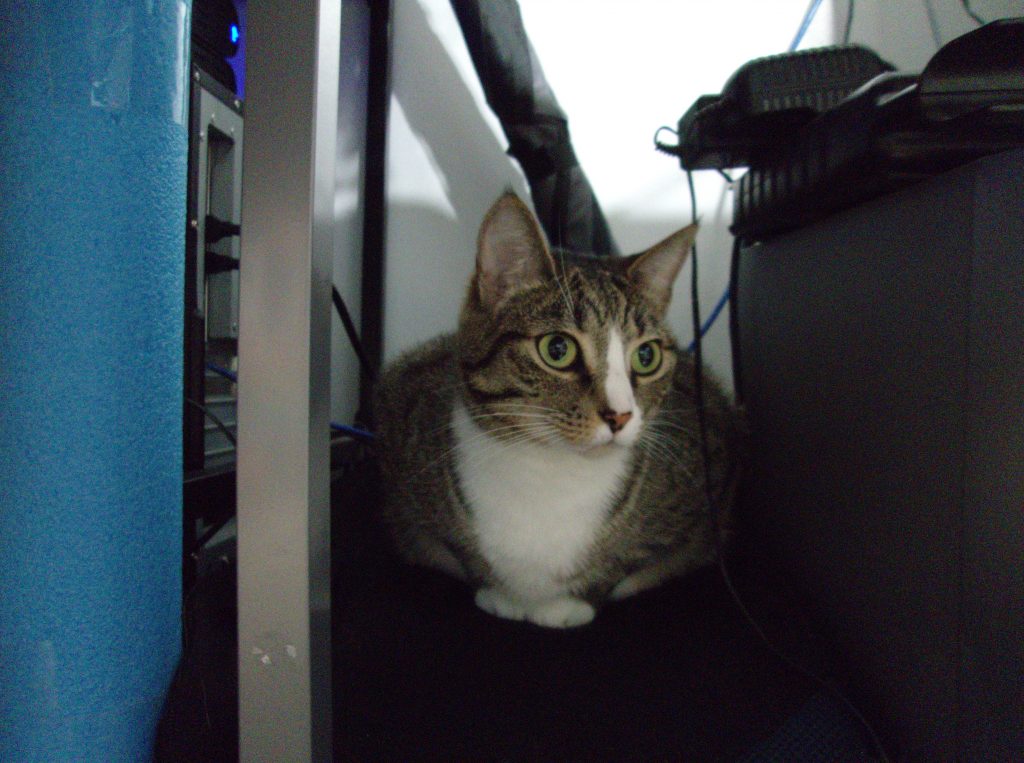
JPEG of a cat from a Canon PowerShot A3400 IS
Out-of-camera JPEG of a cat from a Canon PowerShot A3400 IS (ISO 800, 1/4 sec., f/2.8). The heavy smoothing of the in-camera noise reduction is obvious in the face and fur and eyes, where all fine detail has been smudged over.
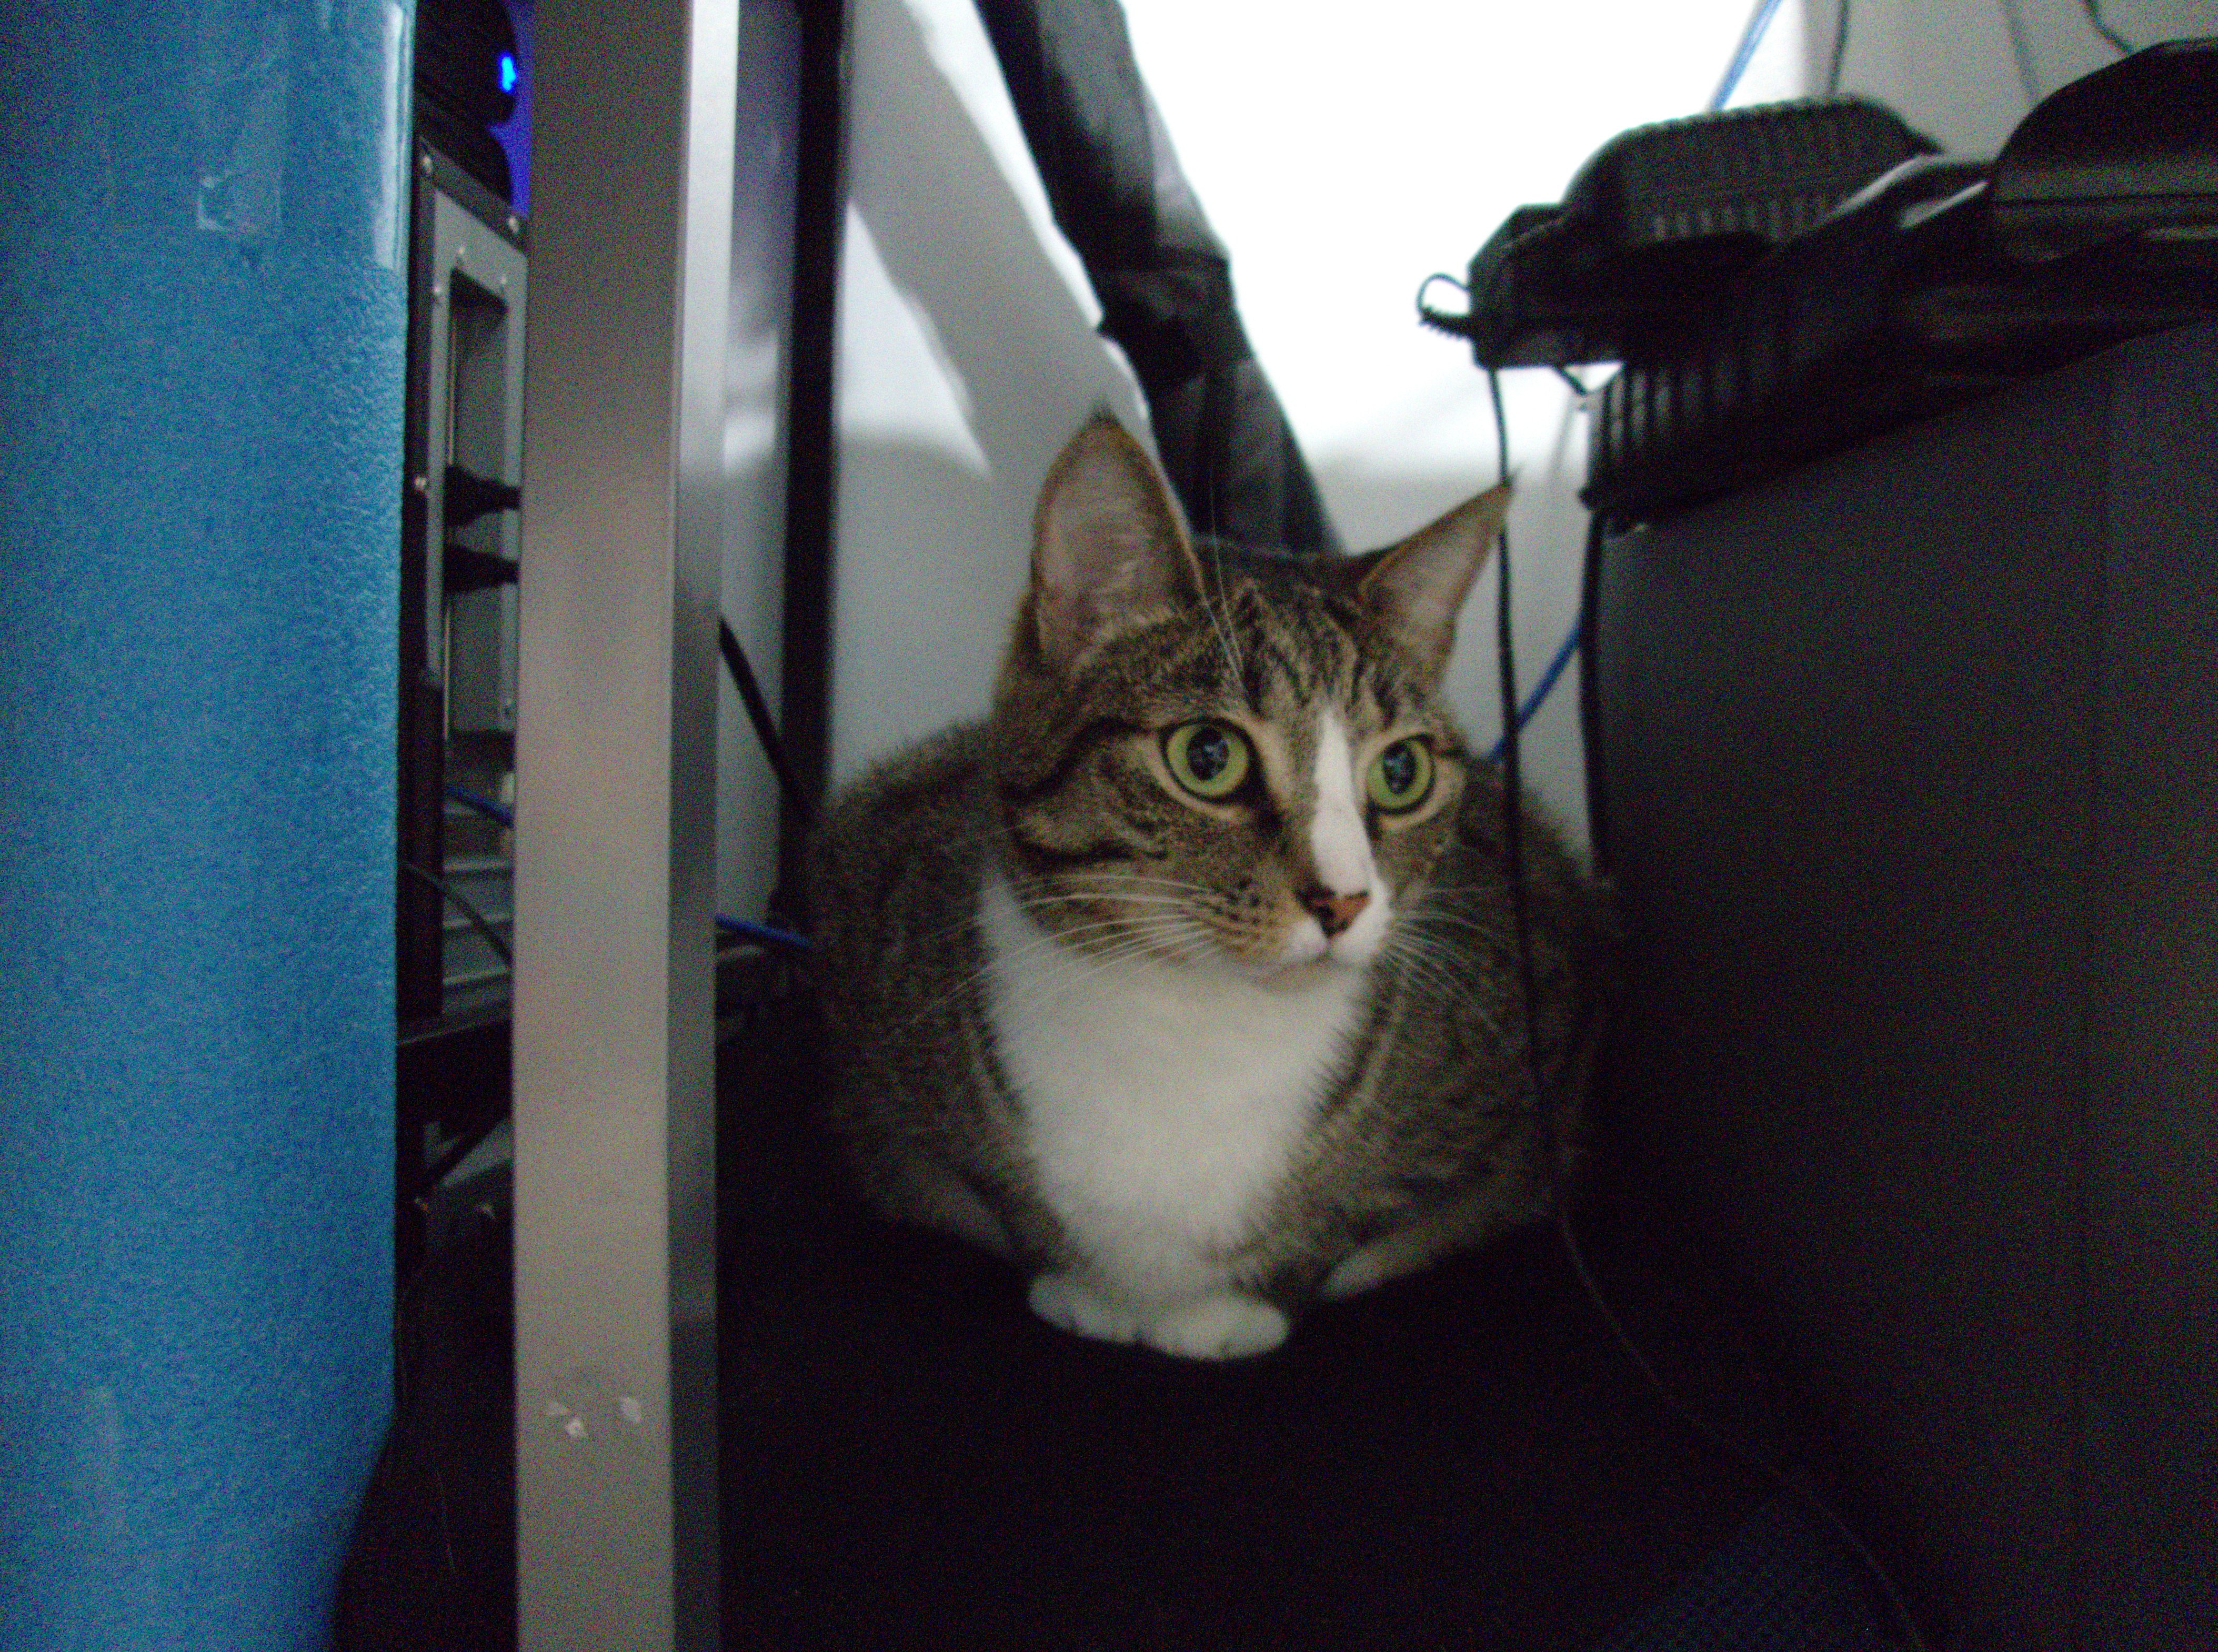
Developed CHDK RAW of the same cat JPEG
Developed CHDK RAW of the same JPEG, with distortion correction but no noise reduction applied. The added detail is obvious in the cat whiskers and the textures of the fur and the blue foam. The brown colors in the cat’s face are richer, though the chroma noise visible on the metal desk leg and other flat areas is not attractive. The noise can be selectively cleaned up in post-processing by most RAW developing software.

Feeling artsy? You should be shooting RAW

Today, I always shoot RAW+JPEG whenever possible, but on older digital cameras like my beloved Canon PowerShot G3 where RAW is an option by itself without a JPEG option, I shoot JPEG only, primarily because RAW takes a long time to write on those old cameras and they’re supposed to be “fun” cameras for me, and waiting several seconds on a RAW to write on an old CF card is the polar opposite of fun. The main reason I shoot RAW+JPEG is the lack of noise reduction in a RAW file and the resulting boost in detail I can achieve for photos that are worth going to the extra trouble to develop. The ability to boost saturation and play with colors without JPEG compression artifacts appearing is also compelling to me. I find that scenes with landscapes and skies can be very striking if you open a RAW and take some creative liberties with the saturation and color balance.

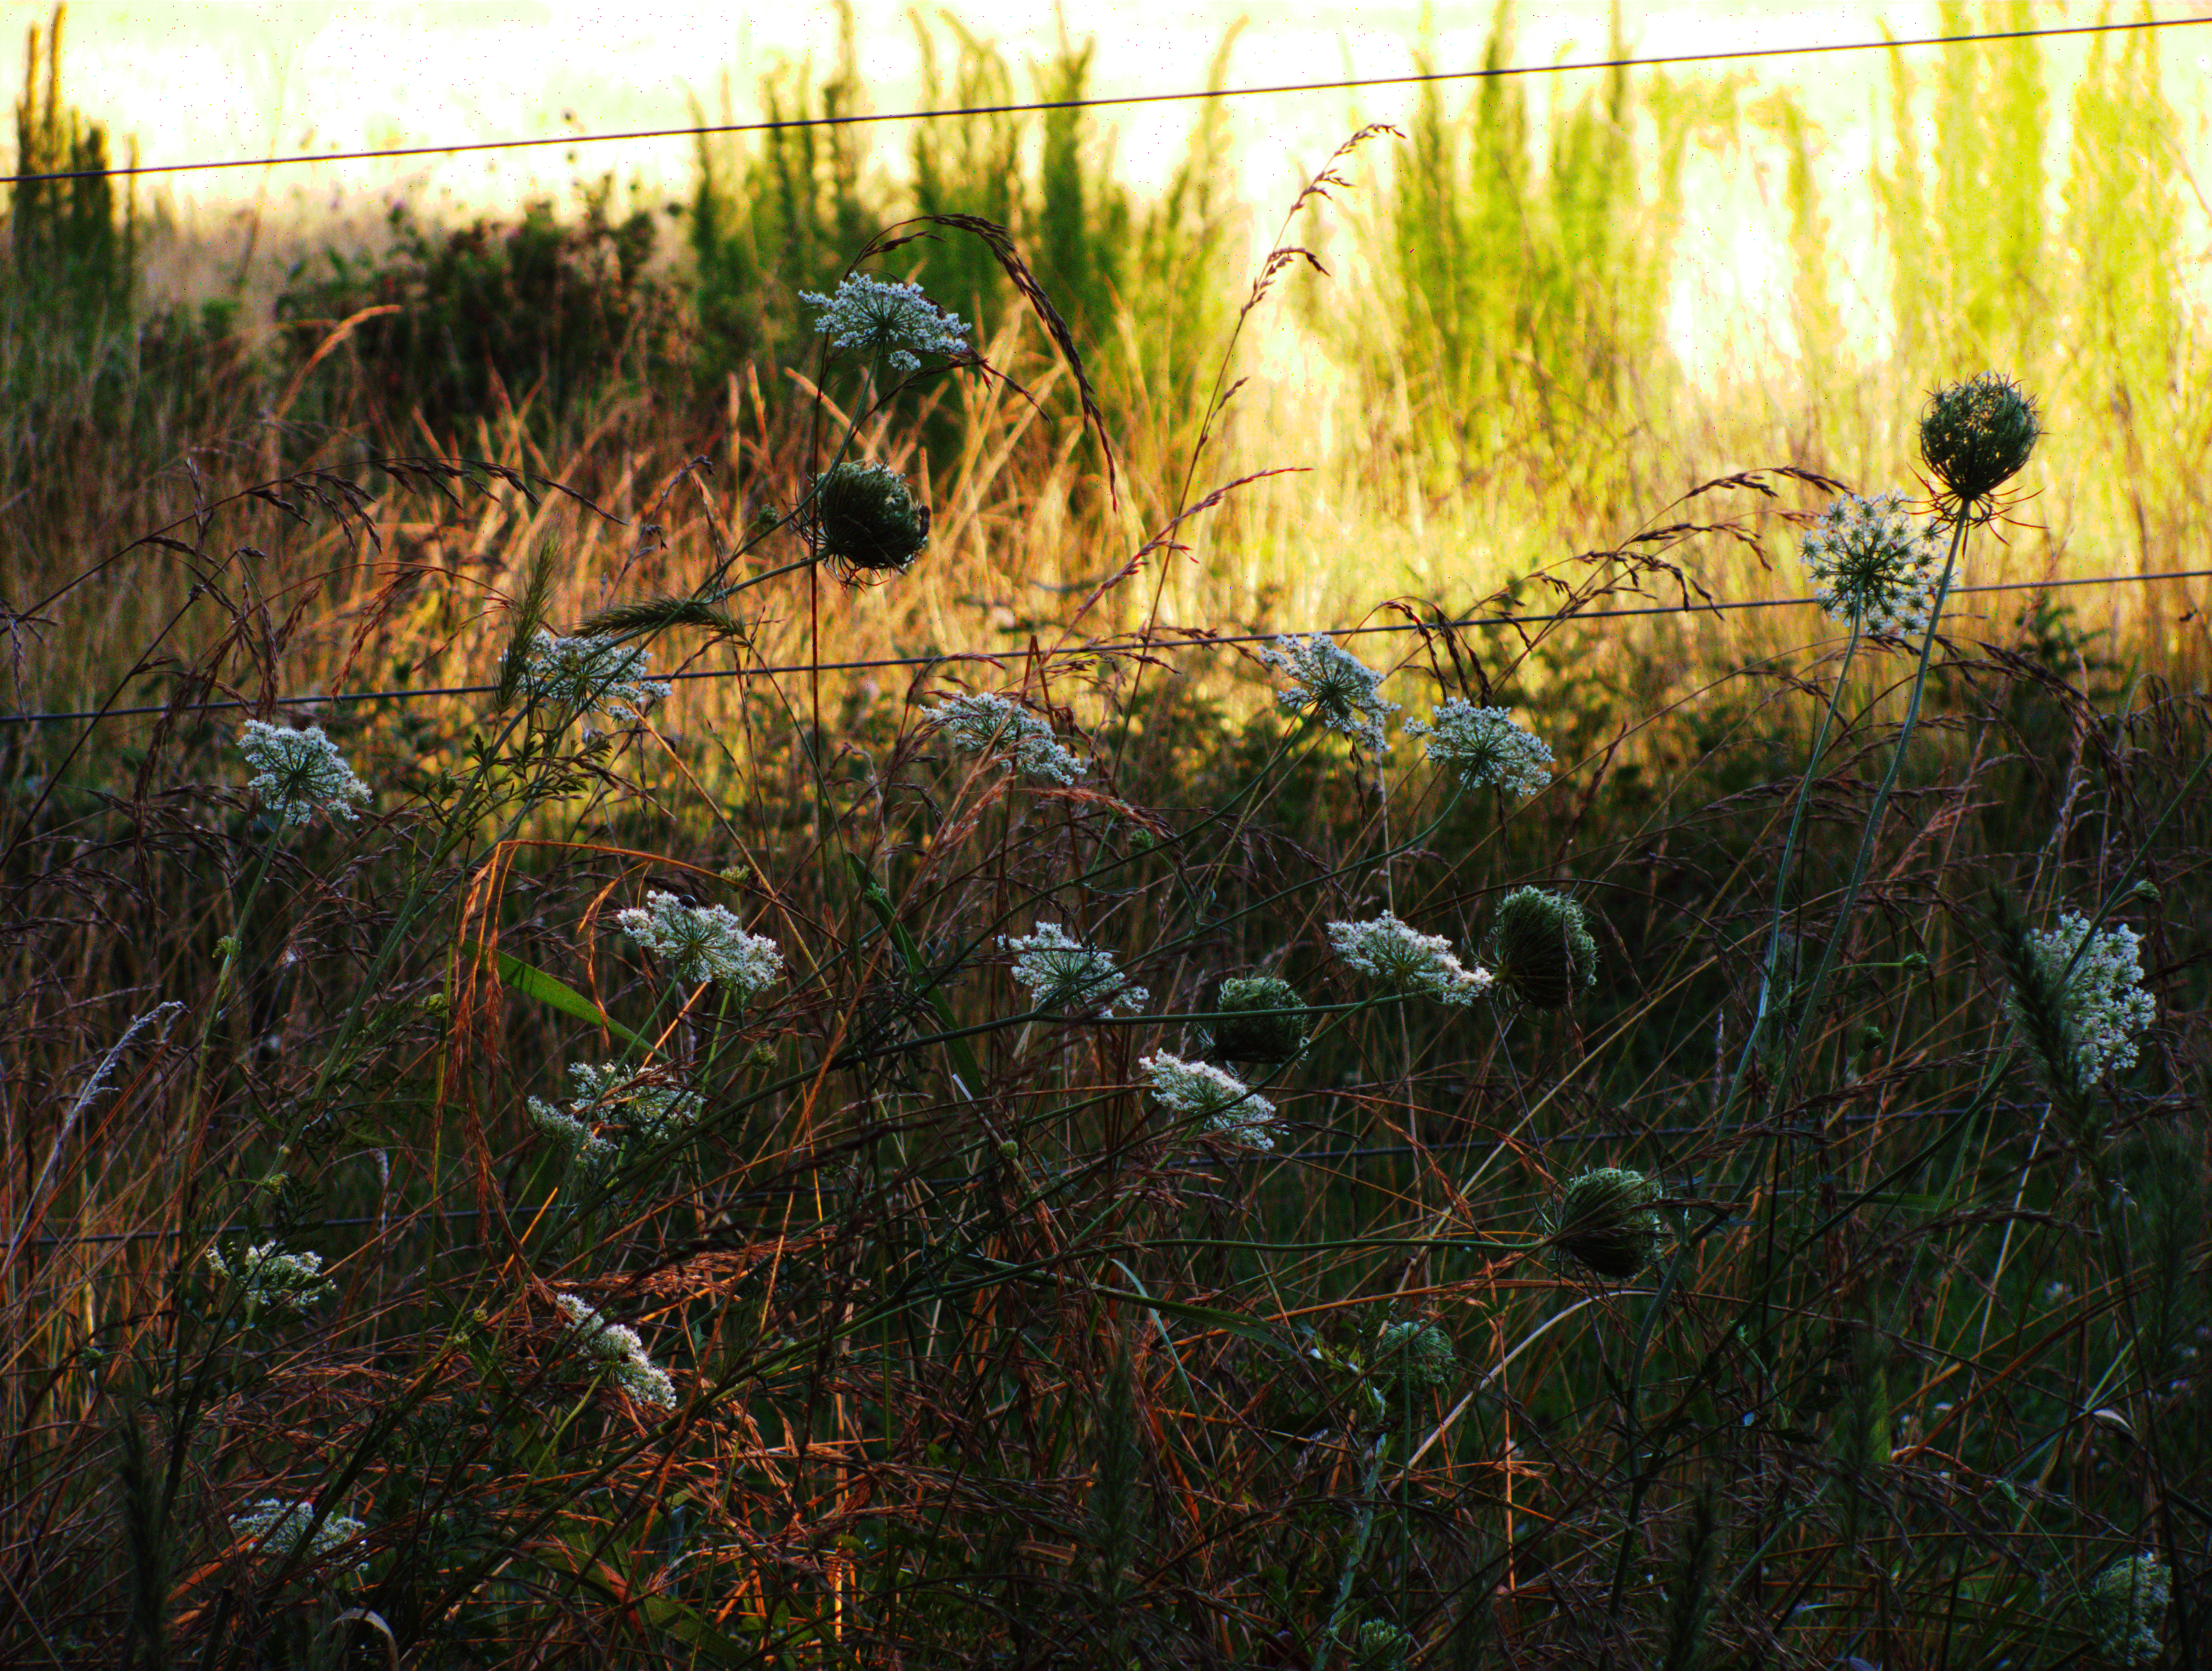
Queen Anne's Lace in front of a cow pasture
Original JPEG of Queen Anne’s Lace in front of a cow pasture (Canon PowerShot SX120 IS, ISO 200, 1/250 sec, f/4.0).
Queen Anne's Lace in front of a cow pasture, edited with strong colors and contrast
The RAW from the Queen Anne’s Lace JPEG, developed with several creative liberties taken. Higher contrast, strong saturation, exposure curve tweaked to make the white flowers stand out while retaining the flower detail. A JPEG would have fallen apart with this much “pushing.”

Which one do you prefer and why? Has this article changed your mind or inspired you to shoot differently? What are your thoughts about the pictures included here? If you’ve made it this far, I’d really appreciate a comment with your thoughts! Comments are moderated, but I try to approve and reply to them quickly.

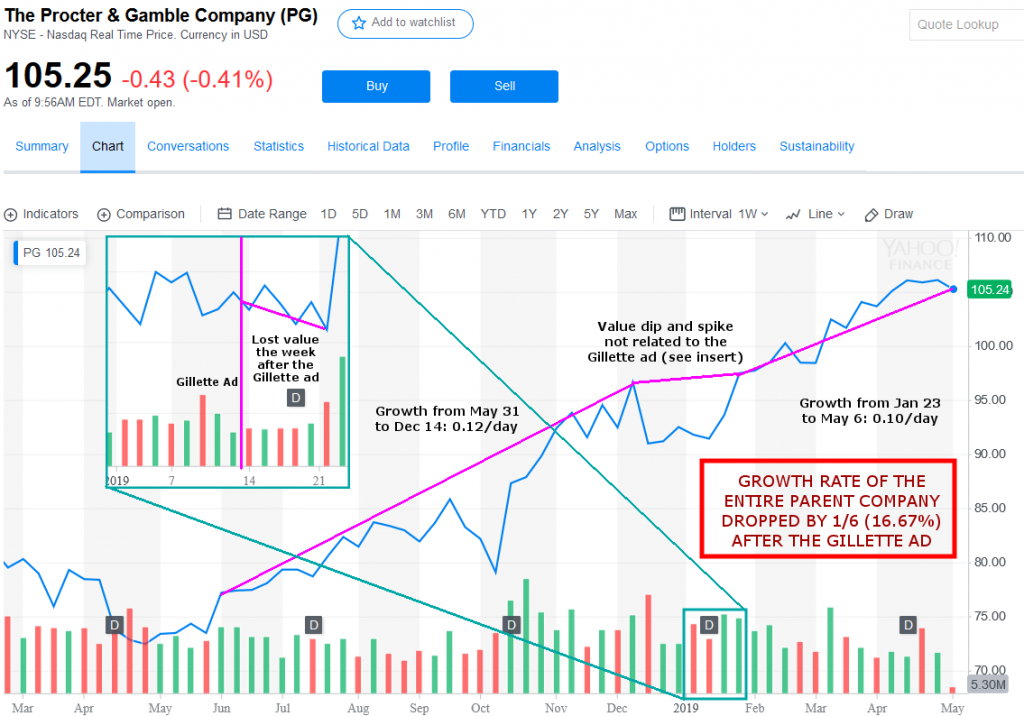
P&G growth before and after Gillette ad

Gillette: get woke, go broke? How Gillette’s “woke” advertisement stifled their parent company’s growth

Get woke, go broke? Some have argued that Gillette’s parent company benefited from the Gillette ad, citing the spike in stock value that took place over a week after the ad ran. Others argue that the ad harmed Gillette’s stock and was a net negative.

P&G growth before and after Gillette ad
P&G growth before and after the Gillette “The Best Men Can Be” ad. Yes, I know that I started a couple of the lines on the wrong data point, but the calculations and dates in the text are correct.

Here, we see the truth. Gillette’s parent company, P&G, was growing at a rate of $0.12 in value per day from May 31, 2018 to December 14, 2018. There was a big drop at Christmas (not unusual for a retail company’s value to drop after the busy holiday buying season ends) and there was a correction one month later. The Gillette ad ran near the end of the low period spanning the first three weeks in January.

Zoomed out, it may appear that the ad caused the spike in stock value, but zooming in shows that the entire week after the ad was put out represented a loss in value, NOT a gain. The facts speak for themselves: if the ad had any short-term effect at all, it was a negative effect.

The subsequent spike is also easily explained. Because the ad was controversial and the stock spent a week dropping, bullish investors could see that a correction was overdue from the December drop and took the opportunity to buy while the price was going down so they could ride the stock on its way back up. This kicked off the expected correction.

What is most interesting about the charts (and ignored by those who endorse fact-free “woke” political agendas) is the long-term growth rate. Before the drop and correction, they were gaining value at $0.12 per day, but after the Gillette ad ran (and the expected correction from the December drop was finished), this dropped to $0.10 per day, a loss of 1/6 (16.67%) of the entire company’s growth. P&G is a huge company and Gillette is only one of their many brands; 19 of their brands rake in over $1 billion annually, and Gillette is one of those brands.

1/19 of the company’s biggest brands killed 1/6 of the company’s growth with a single “woke” advertisement. Get woke, go broke, indeed.


This was written up because of a comment by “Old Blanco Rd Productions” on a Coffee Break video about “woke advertising” on YouTube. Notably, this commenter would repeatedly try to pull the conversation back to an advertisement by Nike featuring Colin Kaepernick, an ad which caused some controversy because Colin is the originator of the “take a knee during the national anthem” thing at football games. The same commenter didn’t want to talk about Gillette and P&G and was only interested in Nike and pushing the statement that “Nike added $6 billion in value after the Colin Kaepernick commercial!” Typical bullshit accusations of “sealioning” by a “Spencer Person” ensued, though sealioning is nothing more than a logically fallacious attempt to discredit people who demand that you support your arguments with facts. Quoting from that last link: “In other words, “sealioning” is a gag to be imposed upon people you disagree with if they argue with you for too long, too persistently, or in any fashion that you dislike.” To sum it up, these two people are keen to control the conversation so they don’t lose the argument. If you’ve read everything above, you can see why they’d rather accuse me of illegitimate tactics than to accept the cold, hard, high-low-close facts in the stock charts.

What that last paragraph leads up to is this: I watched both commercials. The Nike ad was only controversial because Colin was in it, but the ad itself is not actually a “woke” ad. It’s a typical Nike ad with a positive message that encourages you to get out there and be successful and stand up for yourself. It’s a well-done advertisement that does exactly what a major brand wants: to connect their brand with positive associations in the mind of the viewer. The Gillette ad, on the other hand, was a negative ad that stereotyped not only the entire male gender, but also visibly drew racial divides, with white males as mindless villainous rapists-in-waiting and black males as the only thing keeping them from raping everybody out here. Its “positive message” was nothing more than sprinkles on a racist, sexist, man-hating, race-baiting turd of a commercial that reinforces the premise that men are pieces of trash by default. The Nike ad worked out well for Nike because it was a good ad with a good message. The Gillette ad disproportionately hampered the growth of a company that has 18 other billion-dollar brands they derive value from because it was designed to press all of the controversial sociopolitical agenda buttons that it could.

Gab’s Dissenter receives your entire browsing history; bonus: it can be tied to your unique user ID

I fully support the intent behind Gab’s Dissenter platform. The ability to comment on any website is a wonderful move for free speech. What I can’t get behind is the major privacy problem it poses, a problem which unfortunately is very hard to avoid in any “comment on any site” concept.

Gab’s Dissenter stores and retrieves comments by URL. This requires Dissenter to send EVERY URL YOU VISIT out to the Dissenter platform to check for user comments for that URL, and obviously to submit your own comments as well. Since you’ll probably be logged in to Gab to use Dissenter, these URLs may also be sent with your Gab user ID which easily ties them all together. Regardless of what the Terms of Service may say about their data collection and retention policies, there is the possibility that Gab is effectively collecting and storing your entire browsing history while using the Dissenter extensions or app.

Even if they say that they don’t do this sort of collection and retention, you must choose whether or not to trust them. Consider a similar privacy-protecting service: VPNs. Several VPN service providers that claimed to be “no-log VPNs” (meaning they don’t store any information about your activities on their services) have been caught storing logs once police subpoenaed them for logs and they were forced to comply. It’s even possible for data to be retained in places not specifically meant to retain that data; for example, a server debugging log may contain all user requests made during the time period that the debug data was enabled, and that log is then readable to computer hackers/crackers or to law enforcement through a lawful subpoena.

How far are you willing to trust Gab with the data they necessarily must receive from you to keep their service working? It’s your choice. All I want is for you to make an informed choice, not an ignorant one.

It occurred to me shortly after writing this that there is one other possibility, but it’s not really much better. The only other way to do it without sending the URLs directly would be to hash the URL on the client side and send the hash instead, but unlike passwords, an unsalted hash of a (probably public) URL is fairly easy to come up with. Law enforcement, for example, could easily ask Google to provide a hash list of every URL in their database and it’d take Google less than a day to generate such a list. Even a casual hacker could build a simple web spider that follows URLs and hashes them to build that list. It’d be sort of like copy protection: it protects against completely ignorant users making copies, but hackers and pirates will break the protection easily and do as they please. Likewise, any method to conceal the URLs sent to Gab’s Dissenter would only count as obscuring the URL and could be easily cracked. If you think about it, there’s simply no other way to do it: how else can Dissenter know what comments to store and retrieve?

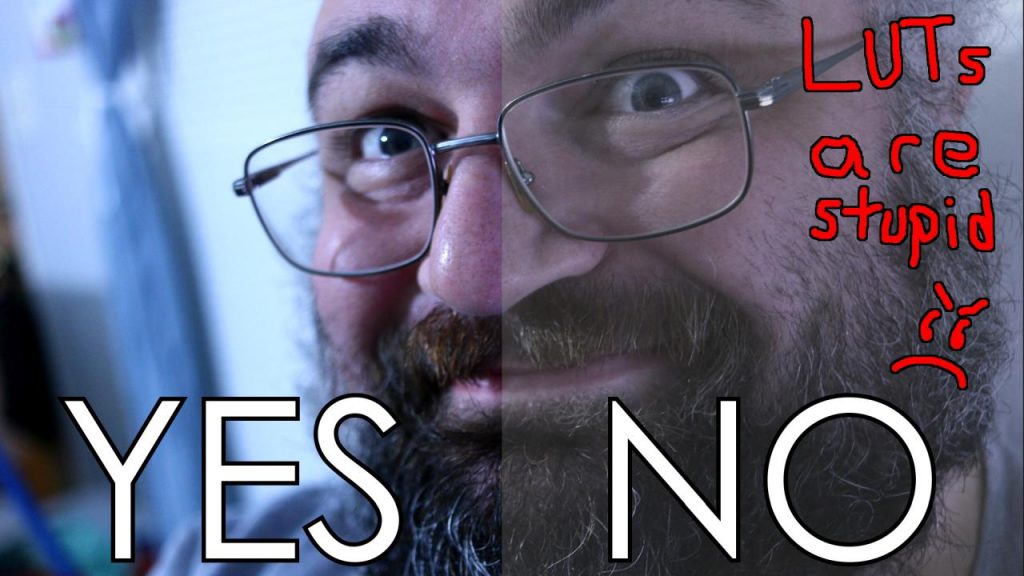
LUTs are stupid

“No, This Doesn’t Look Filmic” – Shooting log, flat, and LUTs all suck

Shooting log, shooting flat, using LUTs, turning down the contrast…stop doing these things! Unless you have a 10-bit capable camera, shooting with log profiles like Cine-D, V-Log, C-Log, S-log, or Technicolor CineStyle will only damage your footage and limit what you can do with it in post-production. I usually explain this in mathematical terms, but that can be hard to grasp, so this video serves as a short overview of the things that you should avoid in the realm of picture profiles and saturation/contrast settings.

For a lot more information about this subject, this article will satisfy most of your curiosities: YouTube video experts don’t understand why flat/log footage on 8-bit cameras is a bad idea

UPDATE: There’s a new video I put out that covers a lot of the same ground, but gets more technical and has more examples and information. Feel free to watch both.

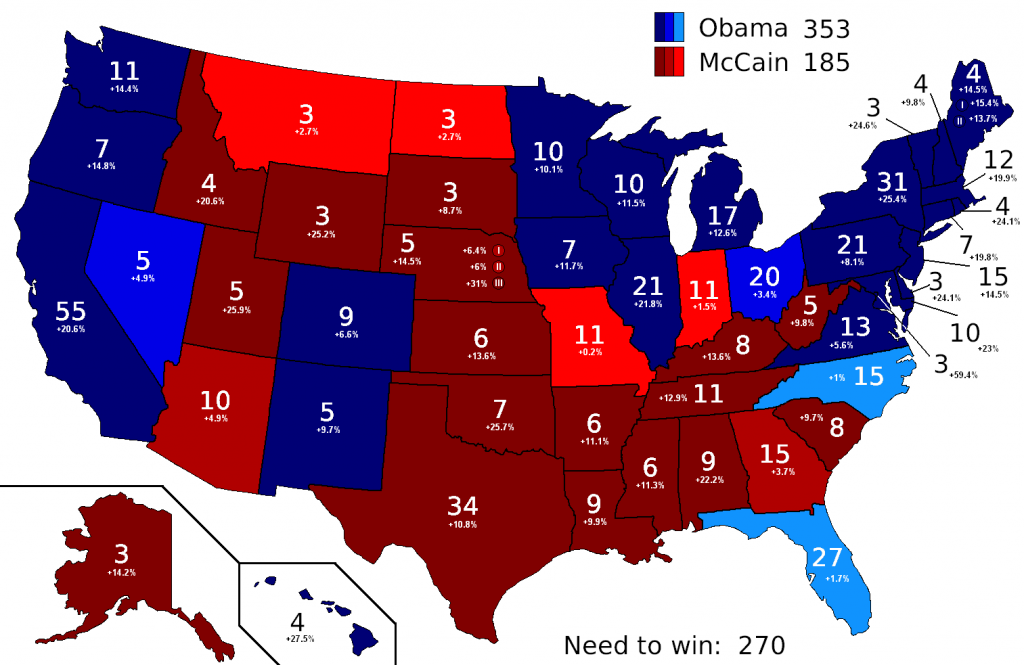
2008 Electoral College map

Win 38 cities and you become President; or, why the electoral college matters

UPDATE (2019-05-03): It has been pointed out to me that elections in cities do not typically lean so heavily to one side as to make what I’m discussing a likely possibility. That sort of thinking misses the point. It matters not because of its likelihood, but because it is possible. We are seeing very recent (as of May 2018) trends in legislation that are designed to directly modify the power of an individual’s vote in ways that no one could have foreseen, including a recent law proposed in California which was explicitly designed to block President Donald Trump (and no other potential candidate) from being eligible for re-election, and a set of laws under the umbrella term “National Popular Vote” which is supposedly an end run around the Constitution to force the popular vote to be the determining number for Presidential election, but ironically works by “reverse electoral college-ing” the votes in the states that pass it. It is therefore a reasonable concern that the areas discussed in my original article below could pass laws (similar to the NPV movement laws) that flip all non-winning votes in their districts to match the winner of the district by local popular vote (which would practically be nothing more than a highly localized form of the electoral college.)

When is “fairness” not actually fair?

In the past 20 years, two Republicans have won the electoral college vote while losing the popular vote, making them President of the United States of America despite having less than 50% of the voter base wanting them to win. I don’t want to go into detail about the mechanics of the electoral college here, but you need to read up on what the electoral college is and how it works before reading any further. Suffice it to say that the President is not elected by the people, but by the electoral college, and this system exists primarily to protect the interests of rural areas from being wholly dismissed based on not having a high population count.

When your candidate loses a Presidential election despite winning the popular vote, you’re going to get mad because you feel like your person should have won. It’s difficult to argue against those screaming “one person, one vote, otherwise it’s not fair” because their appeal to fairness based on equal value of human beings is easy to make and is a core ideal that all free societies strive towards. The truth is that the electoral college is an unfair thing, but it’s unfair because what happens without it is ironically a far more unfair situation, a situation that the National Popular Vote movement in particular is trying to force upon us.

Voters in just 38 cities can unilaterally elect the President.

I know it sounds like I’m exaggerating, but I’m not. 38 of what are called “metropolitan statistical areas” are where half of the total United States population lives. These include the major cities like New York, Los Angeles, Chicago, and Houston, plus the suburban and economic areas immediately surrounding them that are “closely economically tied to the core,” a fancy way for saying that they may have different names but they’re part of the major city for all practical purposes.

If we ignore a few details that would require far more time than I’m willing to spend (number of citizens who are eligible to vote and voter turnouts, to name a couple) we can quickly confirm this is plausible based on one extremely simple metric: population of these combined metropolitan areas relative to the total population. We need to add up the population counts until we reach a figure that is roughly 1/2 of the United States population of 328 million. If you want to follow along, pull up the table yourself and start adding numbers.


Winning the popular vote by the numbers

The largest metropolitan statistical area which is basically New York and the cities and towns that make up its suburbs is over 20 million people, representing at least 6.1% of the entire population of the country, packed into 6,720 square miles of space which is 0.18% of the total land in the United States.

The next largest (LA-Long Beach-Anaheim) is over 13 million people or at least 3.96% of the total population. That’s a whopping 10% in the top two metro areas. The vast majority of the largest MSAs vote Democrat and based on some simple math from the list of MSAs on Wikipedia, the top 30 MSAs (all of which are “blue”) have a population of roughly 148.5M which is not far from half (164M) of the 328M population of the country.

Once you get to the 38th ranked MSA in terms of population, the total population hits the halfway point. Technically, I think it’s about 200,000 people short, but enough “blue” areas exist outside of the top 38 MSAs that 200K people is essentially background noise. I stopped at MSA #38 because MSA #39 (also “blue”) pushes the total 1.3M beyond half of the population. Win 100% of the votes in the top 38 (if you’re practical) or 39 (if you’re a hardass and desperately don’t want me to be right) cities and their suburbs and you’ve won the Presidency, end of story, no further votes needed.

7% of the country picks the President for all 100% of the people

People making arguments such as “the 100 biggest cities in the US are not even 50% of the population” are technically correct. The 38 biggest metropolitan areas make up half of the population and as far as I can tell, they’re ALL “blue.” There are over 300 MSAs and a sizable amount of the USA isn’t covered by an MSA at all. With an average square mileage of 6,839 sq. mi. (based on the size of the top 10 MSAs only since I’m lazy) inside a country that covers 3,794,101 sq. mi., that’s about 3,534,218 sq. mi. of the country (a whopping 93.15%) whose votes become completely irrelevant. It’s true that New York and Los Angeles can’t pick the president on sheer population counts, but the sentiment behind that assertion is 100% correct.

The bottom line

If we’re playing the popular vote game instead of the electoral college game under the existing first-past-the-post voting system where >50% = winner takes all, simply winning every vote in the top 38 metropolitan statistical areas will immediately win you the Presidential election and the rest of the country literally does not matter. Adjust as you want for not winning 100% of the votes and the number of required MSAs increases, but it always remains true that winning enough metro areas in the election wins the popular vote.

If this tyranny of the majority that the “fairness” of the popular vote being how we elect the President sounds a lot more unfair now, that’s because it is, and the math proves it. The electoral college makes all of the states (and the entirety of each state) relevant in Presidential elections and representation rather than only a few extremely dense cities.

Bonus fact: any argument against the electoral college can be made against keeping the Senate, too. The Senate grants all states an equal amount of votes despite vast size and population differences. For some reason, those who so adamantly fight the continued existence of the electoral college never have anything to say about abolishing the Senate. I’d speculate that this is because they want the EC gone due to being mad about their candidate losing an election and parroting what they’ve heard without doing the smallest bit of critical thinking. I’ve tried to bring this to the attention of people advocating for EC abolition, but for some strange reason they always block me before a conversation can take place. Radical ideologues are not known for being able to think for themselves.