Blog

AMD’s FX-9590 is still the top CPU value four years later

Back in 2014 when Jesus rode dinosaurs and Nazca aviators ruled the skies, I wrote an article about the AMD FX-9590 and how it beat all of the modern Intel chips of the day in a price-to-performance comparison I performed. It was a better value than every Intel Haswell and Broadwell chip available in 2014. Of course, benchmarks of newer systems against the aging FX-9590 show that gaming performance is clearly way better on newer platforms, largely due to PCI Express 3.0 support (FX-9590 boards max out at PCI Express 2.0 x16) and, more recently, the rise of consumer DDR4 memory and NVMe solid-state drives. As I was poking around various system benchmarks for newer platforms, I got curious about the FX-9590’s price-to-performance ratio today, four years and several processor generations later. You’d expect a chip that’s several generations long in the tooth to fall behind in value due to improvements in newer platforms, especially with AMD’s new Ryzen architecture fighting Intel’s 8th-generation i7 offerings.

Imagine my pleasant surprise when I saw this:
AMD FX-9590 best value on PassMark
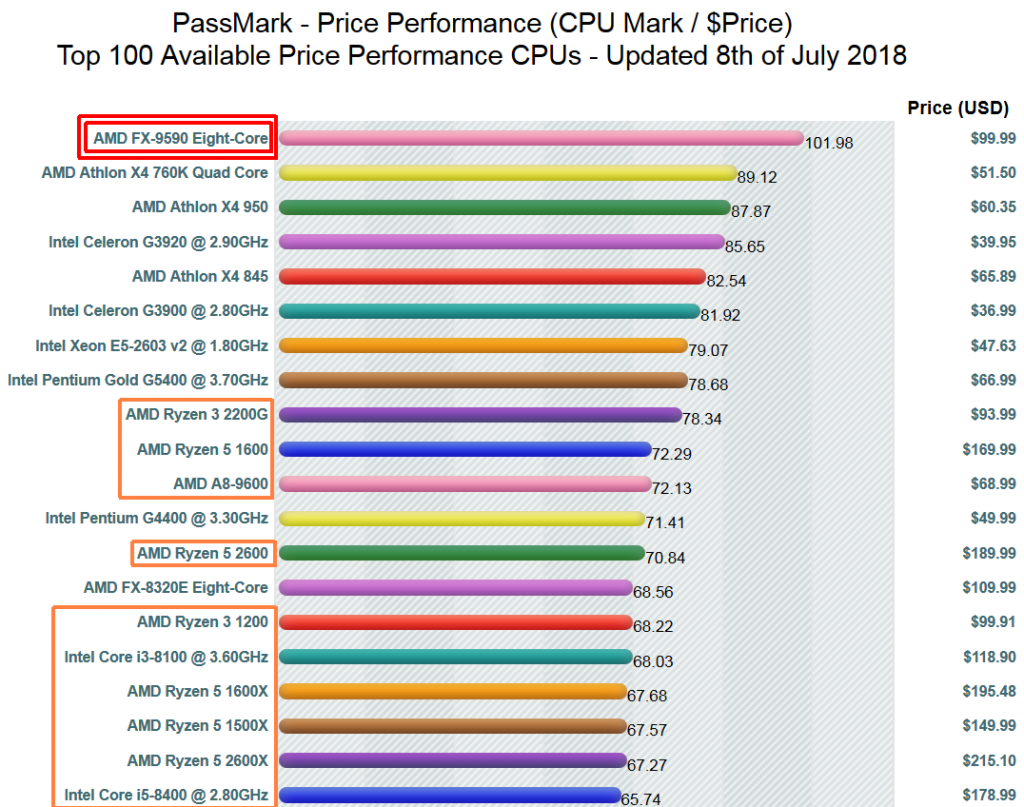
AMD FX-9590 is still the best performance value on PassMark

Modern CPUs in the picture are boxed in orange. Notably, the price of an FX-9590 is way down from the $250-$300 range where it hovered for a long time. Amazon prices really are close to the stated $99.99 price tag. Four years after the power-sucking 220W 8-core beast was released, it continues to dominate in provided performance per dollar. I’m still using the FX-9590 system I built four years ago for heavy-duty computing work and video editing. I have other computers that are actually from the current year, but none of them is as fast as the FX-9590 box.

Long live the AMD FX-9590. You’re my favorite space heater and I hope you keep humming under my desk and making me uncomfortably hot for a long time to come.
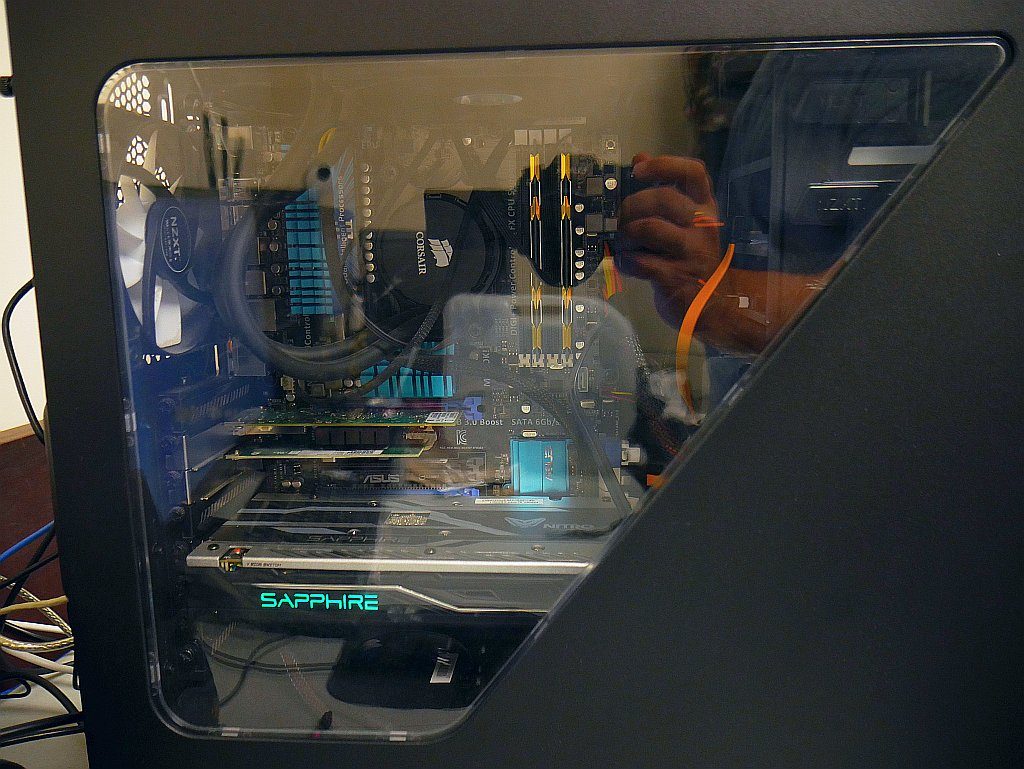
Flamethrower FX-9590Affectionately known as “Flamethrower.”

[SOLVED] Premiere Pro: “The importer returned a generic error” when loading media

(Fellow video dudes: while you’re here for help with Premiere Pro’s bad behavior, maybe you’d also be interested in my article about why you shouldn’t be shooting with flat, log, or “cinema” picture profiles. It’s the second most popular article on the site. The one on disabling Adobe’s ever-growing log files might also be of interest.)

I recently had a Premiere Pro project I’d been working on for a couple of weeks that refused to import some clips. When I attempted to link the media again, I’d get a box that said “the importer returned a generic error.” What’s especially annoying is that the failing clips were from the same camera as several successful clips; there seemed to be no reason for these three or four clips to simply not work and I could play them in a media player just fine. The failure didn’t even happen after an update because I’d been working in the project using the latest updated version.

I checked file permissions on the network server and everything was good.

I deleted all of the Adobe caches and manually killed all Adobe processes in Task Manager.

I restarted the computer and even tried opening an auto-save of the project, yet all of these failed to resolve the problem.

Adobe suggests that these generic errors on import can be caused by activation issues, so I signed out of my Creative Cloud account and signed back in. Didn’t work.

In the end, what I had to do was open Creative Cloud, uninstall Premiere Pro (keeping preferences), and reinstall Premiere Pro. No reboot needed! I still don’t know why this worked, but it did. Maybe my experience and solution will save you some valuable time troubleshooting this odd error.

Did you open your Kodak EasyShare camera and now it says “high camera temperature?”

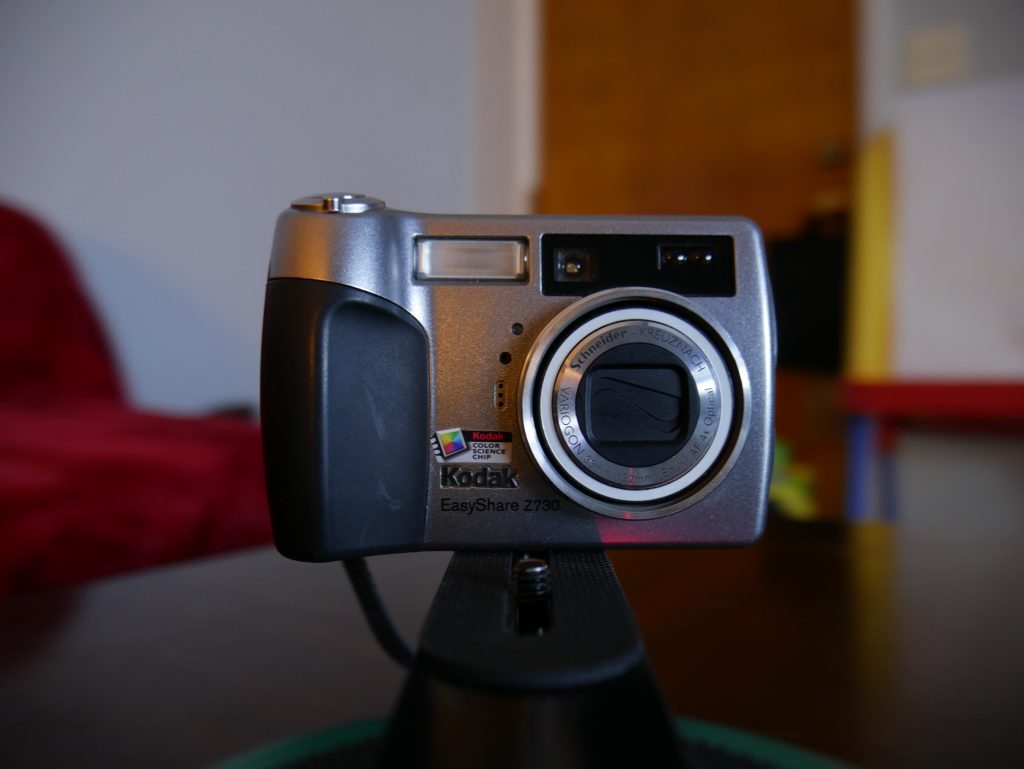
I recently got my hands on a Kodak EasyShare Z730. It’s actually a really neat little point-and-shoot from 2005.

I originally bought this cute little camera for $25 with the intention of converting it to full-spectrum (infrared) but it didn’t focus at all with the hot mirror removed. Unfortunately, I “broke” the camera while reassembling it the first few times because I didn’t push a flat ribbon cable all the way in. The camera would power on, then report “high camera temperature” and shut down. As it turns out, the flat cable that goes to the top board in the camera has two levels of contact pins and is pretty hard to get all the way in. I had actually failed to reconnect it properly and as a result the camera thought it was overheating. Once I realized that the end of this cable had multiple levels of pins and it obviously wasn’t in the socket far enough I was able to fix it. Obviously the camera’s temperature was never the real issue.

This camera is 13 years old as of this post, but I hope that anyone else who tears into a Kodak camera and gets this error message will be helped by it. Please leave a comment if this helped you!

The Old Man’s Pendant III (TOMP3) Video Log #1

I’ve decided to document the process of making The Old Man’s Pendant III and this is the first installment. In this debut entry I discuss the challenges of the first two films and the thought process that defines the third one which I’m currently working on.

A new reason to really HATE that stupid Asus keyboard power button

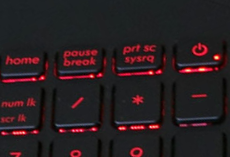
Instead of a highly useful “end” key, Asus has been putting the power button in the top-right corner of their high-end laptops.

Asus laptop power button
That should be an END key. I hate Asus so much for this.

Aside from the fact that the “end” key is something I use constantly when typing out things like the post you are reading right now and I have to disable number lock to work around the missing editing key, lately I have been waking up and walking over to the laptop in the morning only to discover that the computer has somehow died overnight! I thought it was some sort of extremely hard to reproduce hardware problem until I also found some white stuff on the keyboard one morning. On closer examination, it was kitty litter.

The cat has been lying on my laptop at night and the stupid Asus power button on the keyboard lets the cat hold the power button to force my laptop off.

Picture of a cat
The cat is a lot cuter when not turning off my laptop

Needless to say, this has seriously pissed me off. I already had a major problem with the missing “end” key and with the risk of accidentally tapping the power button, but to have the cat killing my computer in the middle of the night is absolutely ridiculous.

Asus, you need to install a proper power button on your high-end laptops. This power button on keyboard thing is really stupid and I’m very unhappy about it.

Protip: filmmakers, STOP “shooting flat” or using cinema color profiles on your camera

Update: I’ve written a much more comprehensive article on the subject of shooting with flat/log color profiles at the Gazing Cat Productions blog. This post is a good short example, but I show better examples and explain the problem in great depth at GCP. If you have the time and want to grow your knowledge about digital video, it’s definitely worth investing the time to read the 3000+ word post there instead of this one.

I plan to do a much deeper video on this subject later, but for now I’ve found a perfect example of the sort of “you should shoot flat [for that coveted film look of course]” bad advice I see online all the time. If your camera does not output files that have 10-bit (or higher) color channels, you should NEVER SHOOT FLAT, LOG, or CINEMA COLOR PROFILES, EVER. (Hint: if you don’t already know whether your camera produces 8-bit color or 10-bit color, it produces 8-bit color.) I’ll point you to this article  “Should I Shoot Flat and Underexposed?” with a Technicolor CineStyle example image so you can read their advice and then I’ll show you with THEIR OWN IMAGE why shooting flat on your DSLR is a really bad idea, then I’ll explain what’s really going on.

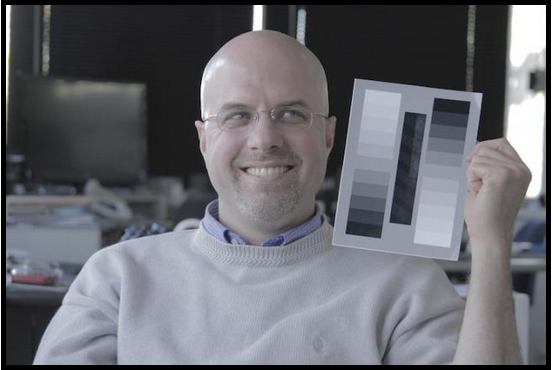
Here’s their original image which was shot with Technicolor CineStyle, a “flat” picture profile that supposedly helps you get more dynamic range and therefore better looking video:

Technicolor CineStyle example image
Technicolor CineStyle example image from The Association Blog

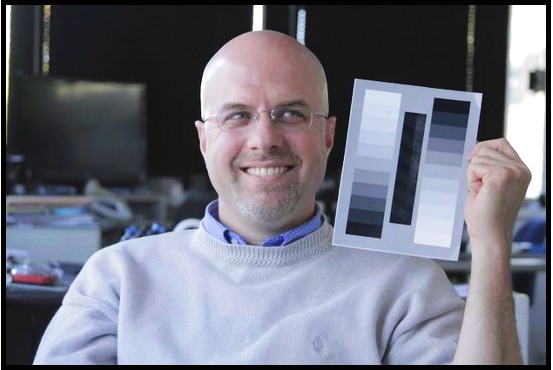
And here’s what it looks like after I pull it into an image editor, boosting contrast, saturation, brightness (a little) and gamma (a little) to make it look “normal” again:

CineStyle image after color correction
Color-corrected image. Note the blocky artifacts and unnatural colors.

Let’s take a closer look at the face side-by-side, before and after.

Original CineStyle, vs Corrected
Original CineStyle, vs Corrected, double size to show detail more clearly

Keep in mind that this is a small JPEG image from their website, not a lossless shot of the original frame. There are JPEG artifacts visible in both images, but those artifacts help us get a better picture of why “shooting flat” on cameras without 10-bit color is a bad idea: notice how the JPEG artifacts in the corrected image are WAY more obvious and the quality loss after my simple color correction drastically lowers the apparent “production value” of the image? That’s a big part of the problem, but the other part is the colors. The reduced saturation requires heavy saturation boosting to look normal again but the damage caused by discarding a lot of the color DIFFERENCE information cannot be undone; the face has color banding issues that make it look more “plastic.” The flatter you shoot, the nastier this color banding gets. No amount of correction or magical LUT will ever make it look normal again.

When you shoot flat, the 1/2-stop of dynamic range you gain comes at the cost of effectively ruining your color and increasing blocky compression artifacts and noise. That’s why you can’t color grade properly. That’s why it looks like garbage when you push it in post. It’s not your fault; you were given advice intended for $10,000 cameras and you’re holding a $500-$1000 camera. This applies to any flat, LOG, or “cinema” picture style. Technicolor CineStyle, Panasonic Cinelike-D and V, V-LOG, Canon S-LOG, all of them will permanently damage your 8-bit footage and possibly make it useless. You can’t outsmart the basic math: 8 bits of space can’t hold more than 8 bits of data.

Normal vs. Flat Profile
Stretching flat or log picture profiles back to normal curves results in banding artifacts. Once visual information is lost by shooting flat, it’s gone for good!

Use a standard picture color profile with all tweaks set to zero or their default values (turn noise reduction all the way down though, especially on Panasonic mirrorless cameras), take test shots, push the footage in your editor to see how far it goes before falling apart, tune your settings, and repeat until you get the best results possible straight out of your camera.

As I mentioned before, if you happen to have a camera that can output 10-bit color (to the files on your memory card, 10-bit HDMI without an external 10-bit or RAW-capable recorder doesn’t count) then you have 4x or more added color detail that will be lost in the 8-bit final product after editing anyway, but the only DSLR or camcorder I am aware of that is affordable to consumers and has 10-bit color is the Panasonic GH5. Even Canon’s expensive new 5D Mark IV DSLR only outputs 8-bit color! In the camcorder world, 10-bit color is available on the Panasonic DVX200 which is about 40% more expensive than a Canon 5D Mark IV.

If you want to read more, this excellent article does a great job of explaining further, including images that illustrate the problem of “breaking up the histogram” brought about by shooting “flat.” I will post a  video about this eventually, so subscribe to my YouTube channel if this topic interests you.

One final note: picture profiles only apply to compressed video formats. If you’re shooting in a RAW video format like many very high-end cameras can produce, you’re getting 100% of the sensor information already, so picture profiles simply don’t apply in the first place and you don’t have to care about any of this stuff for that camera. Of course, if you’re shooting on a $50,000 camera rig, you probably aren’t reading this post, either…

2017 in Review and Where 2018 is Going

2017 was pretty cool. 2018 is going to be really sweet. I have so many great short films and projects planned and I’m looking forward to seeing them through. Oh, if you want the latest version of that camcorder I held up around 2:50, here you go: http://amzn.to/2EteYYP

Some of the wonderful things I have planned for 2018 include gear reviews, short films (watch out for The Old Man’s Pendant III in particular), and reviews of terrible things I found on VHS tapes. I also plan to continue being super bad at playing the recorder in the classic 8th grade tradition. I haven’t decided on whether or not I’m keeping the hair I’ve grown; it looks funny to me, but it’s cold outside and every bit of insulation seems to help for now. Yes, I am an intellectual rockstar, but only in my own mind.

I hope you’ll subscribe to my channel and watch the great new stuff I’m going to put out in 2018! Have a wonderful new year!

A proposed bumper for The Basic Filmmaker

The Basic Filmmaker put out a call on YouTube for people to make a new bumper for his channel. This is what I came up with in a few hours. I think some aspects of it could be improved but I’m pretty happy with it as-is. The five-second time limit was a bit constraining and I would probably do it a little differently if I made it a second time around. Anyone who has watched my short films might recognize a couple of the clips in this video from the “Behind the Scenes” during the credits of The Old Man’s Pendant II.

Hubsan X4 H107C quadcopter/drone cell phone fisheye adapter modification

I attached a cell phone fisheye adapter lens to my Hubsan X4 H107C quadcopter/drone and flew it around for a bit. Most camera mods involve disassembly and possible damage, but this mod is harmless. This footage is color corrected but has not been stabilized.

This is definitely the cheapest and simplest camera fix mod you can do for this little quad. All you need is a $3-$5 cell phone adapter lens kit, some strong clear tape, electrical tape to mask off the light leaks, and careful hands to line the adapter rear up with the direction of the camera. The results speak for themselves. The lens flare is inevitable because the lens adapter has uncoated elements.

After this video, I added a thin rim of electrical tape sticking out of the front edge of the lens to cut down on lens flare from sunlight outside of the visible area. I don’t know if it helps but it certainly can’t hurt.